Monday, May 22, 2017

Scenario 4: Take the High Ground - Tactical Tutorial

Having played this scenario numerous times, and still looking for that "down to the wire / down to the die roll" balance, I decided to double-check this matchup to see if there was imbalance - maybe there is!

A few things should be noted here:
- the present rules and lists show my historical preference, which differentiates the Welsh from the Feudal English. The Welsh enjoy more shooting, but do not have Knights as a troop type. Instead, they have Cavalry, which are Dx melee Knights, who shoot as Brigans, ie on the move for Dx-2.
- the last time I played this, I gave the English 3 knights, 2 Bowmen and 1 Freemen, and they won fairly easily on Turn 9 or so. So for the Big Battle demo game, I switched them to 2 Knights, 2 Bowmen, and 2 Freemen.
- while I'm pretty sure these lists are balanced across the spectrum of 30 scenarios, the greater mobility and shooting of the Welsh with less hitting power may not be a winner in each individual scenario. I'm OK with this, since it is a hazard of national differentiation.
- Many of the tactical details will change if you tinker with the mechanics of movement, melee contact, etc. I've movement of 5", 7.5" and 10" as standard. If you go to 6"/9"/12", some of the below relationships will change. Still, the thought process will remain identical even if some of the tactical nuances are altered - this is how you win using tactics!

Anyway, to battle once again!

A reminder, that the Welsh start with a won game. The English must completely clear the hill of Welsh to win. Anything else is a draw. Demonstrated below, a Freeman with 14 Hits has its toe on the hill - the Feudal English have NOT won the battle!


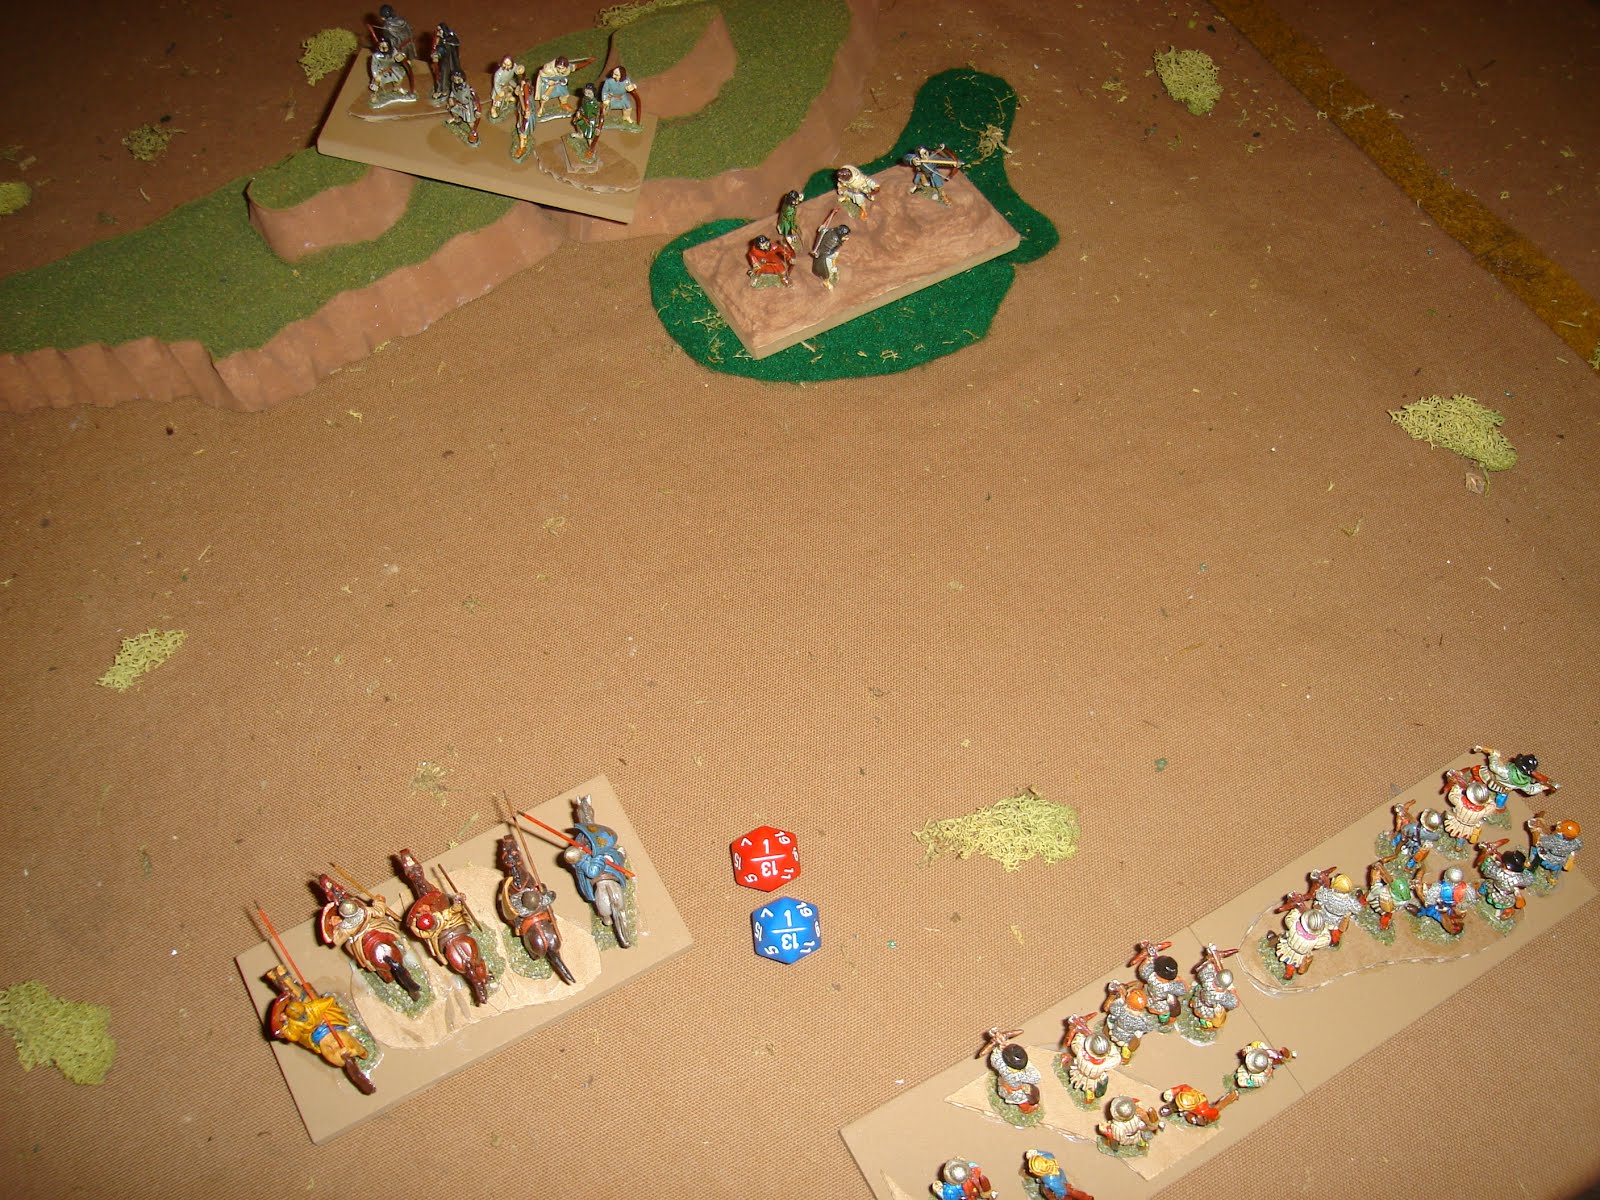
Turn 1. Welsh deploy their two Freemen behind the hill crest, out of LoS, and therefore may not be shot or charged until LoS is less than one Base Depth [BD] or 2.5" with my basing. English split their Knights, one up each flank of the hill. To left, the Knight advances a Fast Move of two Base Widths [BW] or 10". The Knight to right also advances 2BW but gets a BD bonus by moving along the road, a total of 12.5". The rest of the English army advances 5", with the Freemen in center to attack the hill, bowmen supporting from flanks.

At top of pic, is the Welsh reinforcements, arriving a Turn 2.

Closeup of interesting deployment and Turn 1 decisions. Both Knights advanced the max.


Left Knight out of Charge range. Right Knight easily in due to extra road movement.


To avoid the charge, the Welsh Freemen would have to be pretty far back, if still on the Hill.


But this concedes the uphill bonus of halved Hits to the Knights, which is unacceptable - they can advanced on their turn, get a BD on the hill, staying out of a BD of the Welsh.


Alternatively, the Welsh Freemen can squelch any attempt to flank them by being both on the hill and over the Hillcrest [there isn't a BD of any side over the Crest, so they are out of LoS].
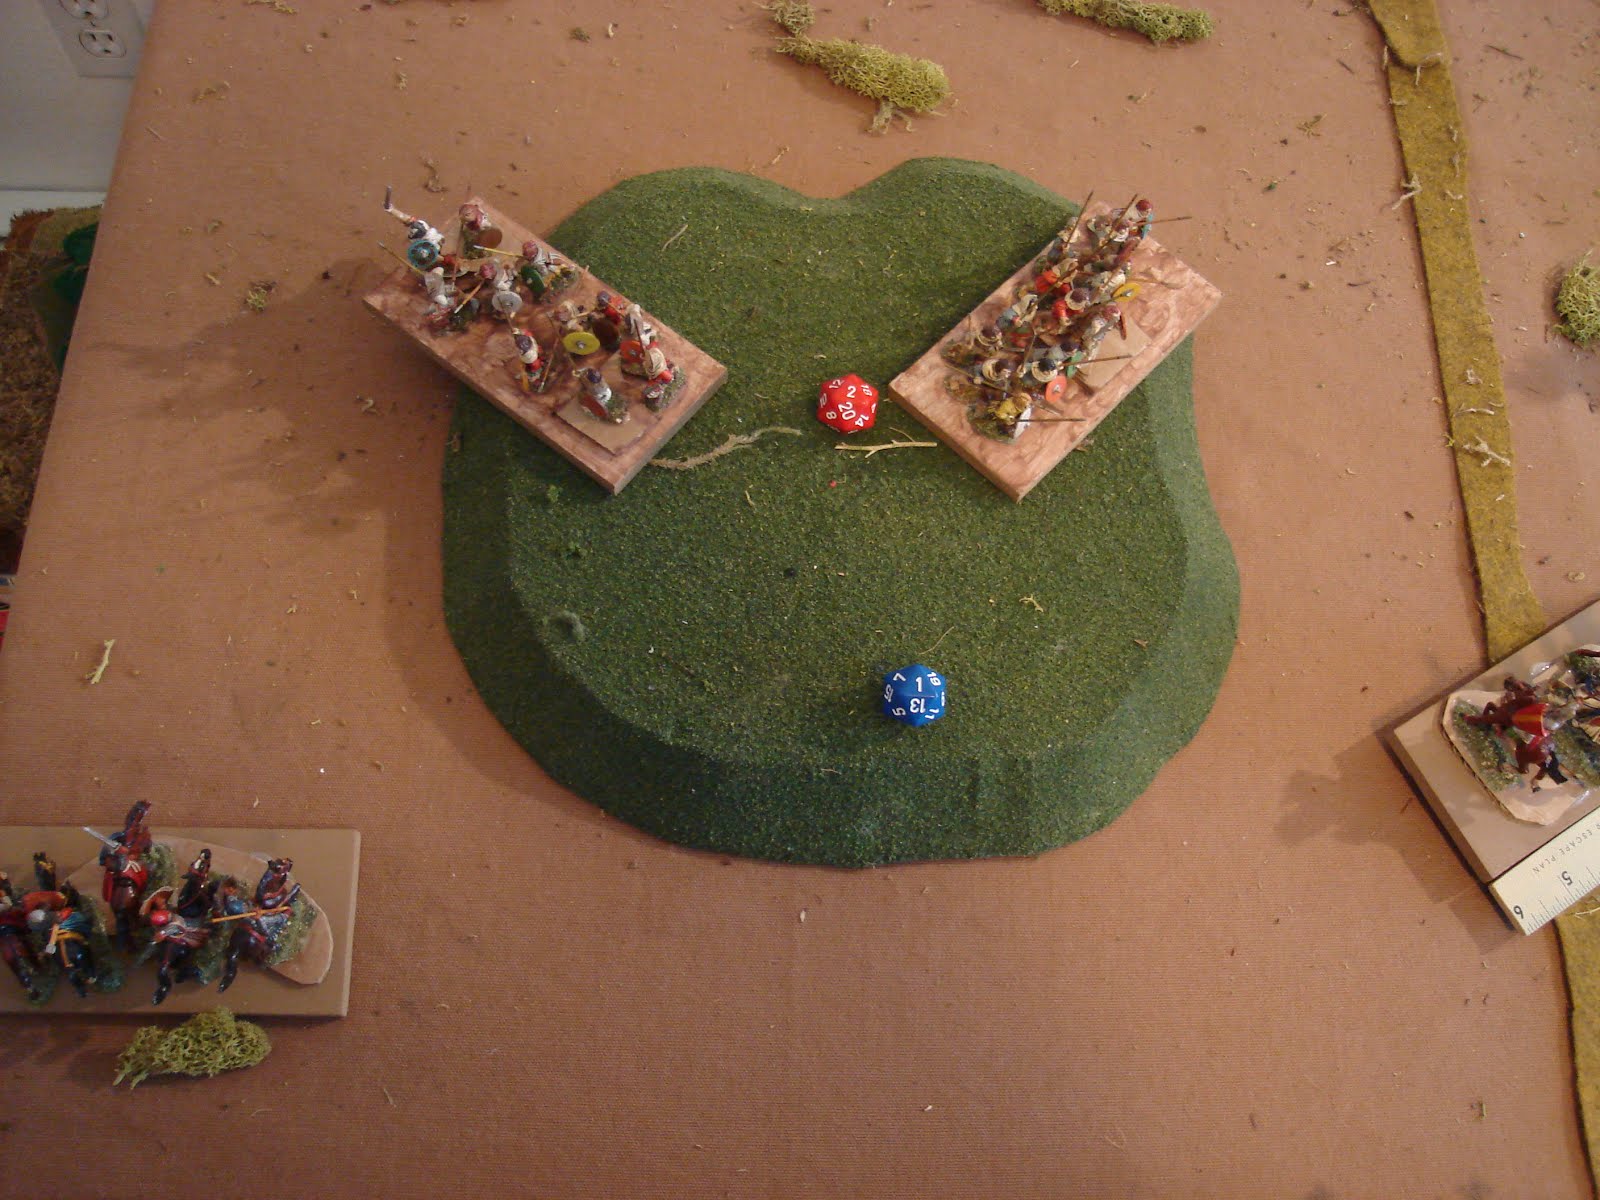
Unfortunately, this loses the Welsh the mutual support of Protected Flanks, leaving them vulnerable to flank attacks at the center of the hill - also unacceptable.

This leaves the below the only acceptable deployment in my book - the Welsh have a Protected Flank in the center and can't be flanked by the Knights turn 2. The Knights have a choice - Charge uphill against the Welsh [an even proposition but it blocks their army] or continue moving forward to work around the flanks, while the foot go up the middle..

These are the kinds of decisions I'm looking for in a game. Easy on the amount / complexity of the rules, but hard choices have to be made that actually matter.

Turn 2. The Welsh Reinforcements enter. Two Freemen up the road, the mounted on the right with the Cavalry leading the way. 
They give the English some tough choices. The Knights can charge the flank of the Freeman on the hill, then be shot Turn 3 and meleed by the Cavalry on the left side on Turn 4 - not an inviting proposition as Knights disappear rapidly when attacked on the flank.


OR, Turn 2 the English can face the Welsh Cavalry but still threaten the Freemn with a Flank charge if the Welsh mounted don't close in, forcing them to commit to their right. After some debate, I choose this course of action.


Meanwhile, Turn 2 on the right has left the Knight in a bind. Turn 3 will have the 2 Welsh Freemen right on top of them, well within threat range of 5". The nearby Bowmen can't charge until they are out of missiles. This has the Knight isolated and unsupported.


Turn 2. English right Knight moves to right, opening space for Bowmen to support. Note that neither of the English Freemen can charge the Welsh: they are both over the crest and out of LoS [which requires a BD of the base to be seen] and they are out of Charge range since 5" won't give either Freemen a BD of a side, the minimum required to be in melee.
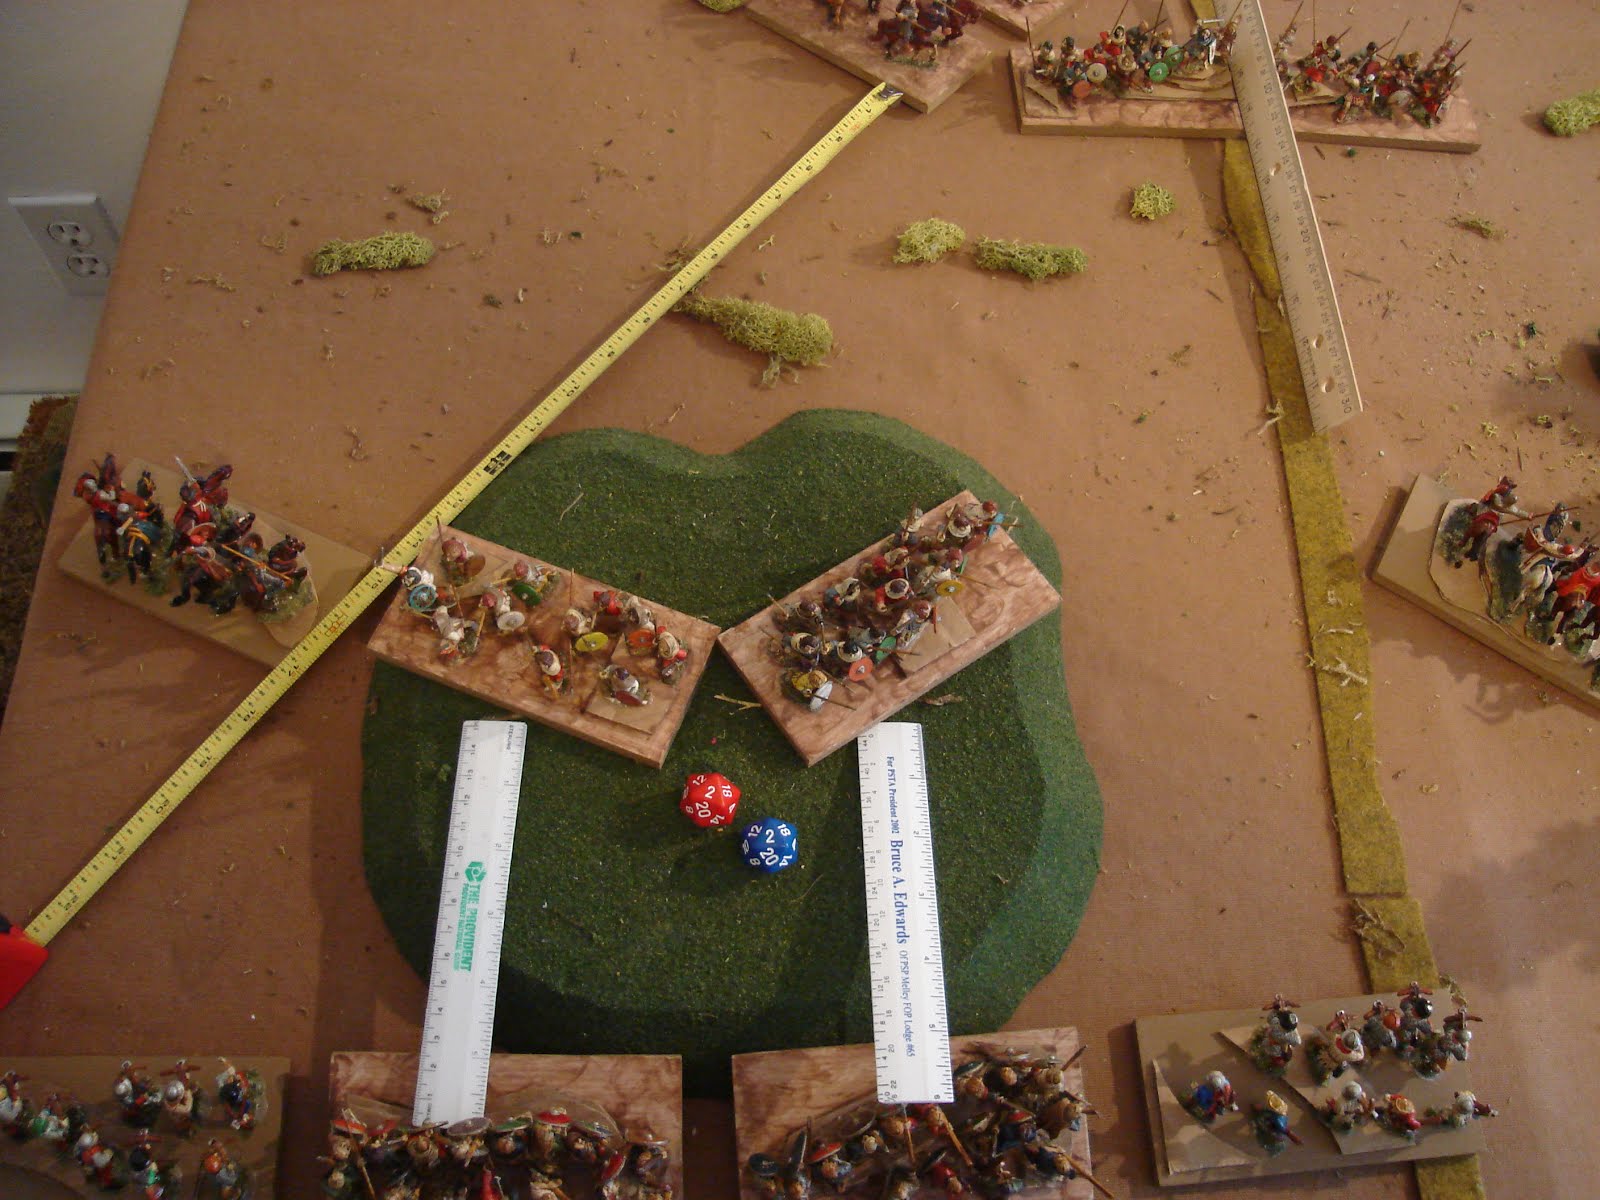

Turn 3 on right. Welsh Freemen move full down the road. English close in. Knights charge Freemen for 5 Hits but leaving flank open. Bowmen could advance pretty far up, but need to stay a bit farther away so a BD of a side of either Welsh Freemen is within shooting Arc.


Turn 3 on left. Welsh mounted offer lousy situation to the English Knights: They advance with the Cavalry within Charge Range, but the mounted Brigans to left are within both shooting and charge range of the flank. If English Knights charge Welsh Freemen on the Hill, they will in turn be charged on their flank by the Welsh Cavalry. Ugh!


Yet, the Knights can't reach the Brigans, which would be worse anyway since the Cavalry melee Dx v. Dx-2 for the Brigans, so better to have the Brigans hitting the flank...


In the end, I decide to take the fight to the clever Welsh - Tally Ho! [oops, wrong game...]. The English Knights charge the Cavalry, inflicting 4+2 for 6 Hits total.


Welsh Turn 4 on left. Cavalry inflict 3 Hits. Brigans 4-2x2 or 4 Hits for 7 total Hits.


Turn 4 English Knights hit back for 3+2 Hits, 5 total, bringing the Cavalry to 11 Hits.


Welsh Turn 4 on Right. Freemen take obvious choice, charge Knights in flank, inflicting 3x2 Hits [3 doubled for Flank...could've been 8 or 10 Hits]. Freemen on Front side Hit for 3.


Turn 4, English Knights strike back for 5+2 or 7. Bowmen could shoot at flanking Freemen, but taking the Hill is the victory, so...


They shoot at the Welsh Freemen on the hill for 4 Hits.


Turn 4 Center. Welsh Freemen move over crest to get uphill advantage. Note they cannot charge since they were out of LoS at the start of their moves. on hill. English Freemen charge to get in the first blow, inflicting 3 and 2 hits [halving is rounded up for any fraction].


Turn 5 Center. Welsh hit for 5 and 4. English hit for 6 and 4, but I forgot to halve the Freemen attacking uphill, which would have been one less each. *Sigh...* that's the problem with taking pics and writing narrative - I make little mistakes. We'll see if it is decisive or not.


Turn 5 left. Welsh finish the fight, adding 10 Hits: 4 from the Cavalry, 5-2x2=6 from the Brigans. This brings the Knights to 17 Hits and they are destroyed [15 Hits = destroyed].


Turn 5 Right. I mess up again. I played the English first. They roll 4+2 Hits and destroyed the Welsh Freeman in front of them. They then take for more hits from the Freeman on the Flank putting them to 13 Hits. I should've fought the Welsh Freemen first, which would've destroyed the Knight [as the Freeman to Front has to inflict at least 2 Hits!]. AAARGH!


Turn 6 Right. Welsh destroy the Knights. Had this been done correctly, they would've had the Knights destroyed last turn, and both Freemen would still be on the table: one with zero hits [to left, as is] and one to Front with 12 Hits -2 for Rallying, or ten Hits [which is gone].


Welsh Turn 6, center. Welsh shift over their victorious mounted forces to contest the hill. The Cavalry throw missiles for 4-2=2 Hits on the Bowmen [who are out of missiles, and may charge]. The Freemen inflict 3 Hits each - rolling low is a bad idea at this time!


English Turn 6, Center. Unsurprisingly, the Freemen destroy both Welsh Freemen to their front. The support of the Bowmen was essential - as it should be, since they are unarmored spearmen and I don't see any reason to penalize archers shooting uphill. The Bowmen charge the Welsh Cavalry inflicting 2-2=0 Hits...take that!


Turn 7 Left. Cavalry fight back for 4 hits, the Bowmen, show their stuff by again missing.


Turn 7 center. Brigans advance and throw for 1 Hit. Welsh Freemen position themselves against the BowmenTwo English Freemen advance and Charge respectively, threatening the Cavalry's flank and inflicting 4 Hits on the Brigans.


Welsh Turn 8, left. Cavalry decide to Retreat from the melee, moving straight back a full Move, a BW / 5". They have to do this b/c of the English Freemen threating their flank - the flank charge would inflict a minimum of 4 hits, destroying them.


Turn 8. Welsh Brigans roll hot and inflicting 3 Hits! To the right, the Freemen hit the Bowmen for 4 Hits. The left Bowmen charge the retreating Cavalry, but roll a 3-2=1 Hit.


English Turn 8, Center / Right. Freemen blow it and roll 2 Hits on the Brigans But the other Freemen is now threatening the Brigans with a devestating Flank Charge. English Bowmen roll OK, inflicting 4-2=2 Hits on the Welsh Freemen on the right.


Turn 9, Center / Right. Welsh Brigans also retreat from a flank threat. They roll another '4' and get the Bowmen to 8 Hits. While the Bowmen only inflict 3-2=1 Hit back, their Freemen charge the flank for 3x2=6 Hits on the Welsh Freemen. It's looking pretty tough for the Welsh...they could really use that other Freemen I mistakenly removed! To left, off-camera almost. the Cavalry get 3 Hits, the Bowmen 3-2=1 Hit - slow going for the Welsh, there.


Turn 10. Welsh do 3 Hits on Bowmen from Cavalry, 4 Hits on Bowmen from Freemen, pull back the Brigans. In return, the English destroy the Welsh Freemen, leaving quite a hole. The Left Bowmen miss entirely - again.


Turn 11. Welsh Cavalry destroy the Bowmen. But Freemen move up to threaten them.


More Turn 11. Welsh Brigans rally off 2 Hits. I forget to rally off two Hits each on the English Freemen to right and the remaining Bowmen, it seems - I meant to since they didn't move.


Turn 12. Welsh Cavalry move back, Brigans move over and shoot for 4-2=2 Hits. English Freemen advance against the Cavalry, rally two Hits to 11 on the other. Bowmen position themselves to threaten the Brigans next turn if needed [or they could've rallied 1 Hit]


Turn 13. Welsh Cavalry rally off 2 Hits and Brigans miss, 2-2=0 Hits. English Freemen right advance against the Cavalry and on left rally off two Hits [down to 9 from 13]. Bowmen should've rallied off a hit, but I shot them instead [bad plan], and they put two Hits on the Brigans [waste of time when they only have 4 Hits and it brings them to 6, really]..


Turn 14. Welsh Brigans eliminate the Bowmen - yay! English Freemen rally down to 7 Hits.


Turn 14, Left. Cavalry turn and shoot, rolling a 5 for 5-2=3 Hits! This puts the Freemen at 11 Hits, not enough to destroy them but giving even up odds at destroying them next turn! Freemen in turn charge and inflict three hits, putting the Cavalry at 14 - 100% chance of destroying them if the Welsh blow the shot!


Turn 15 Left. Welsh roll a 3-2=1 Hit, putting the Freemen at 14 Hits - they blew it! Freemen put three more Hits on them in return, and they are destroyed.


Turn 15, Center. Unfortunately, the Welsh Brigans are able to move onto the hill, and the Freemen can only threaten them. No one cleared the hill, so the game is a draw.


A close battle. I think that in this scenario, splitting the Knights is a mistake. They should be kept together for mutual support and go down the road. A Bowmen on the Left is enough to work on that flank in the confined space between the hill and the board edge. Given that there's a better attack up the road, it is quite possible that this force is a bit weak. As it is a small raiding or local force, they should have one additional unit of Cavalry available that can dismount as Serjeants.

Concluding thoughts.
Well, I hope that this quite detailed account serves a few purposes. 
First, that simple rules with good scenarios provide lots of opportunities for interesting tactical play, significant decisions and close outcomes. 
Second, that two armies that are different in play style can meet and have an equal chance of winning, and of all is even, fight to a draw with these rules. 
Finally, that it is hard to keep track of things when you are playing both sides, thinking about explaining tactics and rolling dice around! Unfortunately, the game probably would've been a win for the Welsh if I hadn't removed one of their Freemen by mistake.

C'est la Guerre!

So, this is what I did the last week. It was a bit time-consuming, but it furthered my goals and work for this set of rules and this period in general, including getting more stuff based, smoothing out the rules a bit, and making a QRS, which I've long needed. Overall, I'm very satisfied with the progress, and feel like I'm in a good place with the development of this rules set and the figs / basing / period details to go with it.

Thursday, May 18, 2017

Big-Battle One-Hour Wargames Game: P3, Lessons

As usual, I forgot to take pics since I was in the midst of GMing - rats!

The host did a solid job setting up, and I dropped by earlier in the day to check on and adjust things so we weren't rushed that evening. The board is 12x6', and we played ona 9x3' of it, with three of the 3x3' scenarios. This is how it looks - be mindful that while one can fill up the blank spaces with lots of cool looking terrain items, for the purpose of a demo, simple is best!


Scenario 4: "Take the High Ground" [left]


Scenario 8: "Melee" [center]


Scenario 10: "Late Arrivals" [right] note this is a mirror image to the layout in the book. The impassible hill now divides this scenario from its neighbor more easily.


Results. Both the Welsh defenders in #4 and #8 lost to the Feudal English attackers. Knight armies are just easier to figure out than counter-attack and denial armies like the Welsh. On the right, #10, one player brought his Pre-Feudal Scots and played two sides of that, with:

- Attackers: 2 Knights, 2 Freemen, 2 Brigans
- Defenders: 1 Serjeants, 3 freemen, 2 Brigans
This was the most even fight. The Attacker chose to hold his knights in reserve, and let his infantry lead the advance. This made for a slower attack. The Defender started with a unit of Brigans in the woods to harass the advance, which he did successfully. In the open, he had a unit of Freemen, who eventually attacked a unit advancing up the road and again slowed the advance up, but of course he was overwhelmed on the flanks. 

On Turn 5, Defender brought in his Serjeants and a Freemen. He put the former next to the Camp and the Freemen in the camp. Both therefore took half hits, so he essentially chose to make the unit of Freemen as good as Serjeants by having them hold the camp. The alternative is to put the Serjeants in the camp, where they get 1/4 hits! But the Freemen would then be in the open, die faster, and the Serjeants would be flanked.


Attacker ended up attacking the camp and and its supporting units, with a Freemen and Brigan entering turn 10 and distracting his knights. However, Attacker just managed to take the camp on the last turn. A tense fight with lots of small decisions by both players that ultimately shaped the game's outcome more than the dice.


Player Feedback

- several said they had fun, which is always good!
- requests for more guidance in setup and scenario tactics.
- "knight are unstoppable!" [if only this were true for mine!]
- running out of missiles is "not fun".
- explanation of rules was good.

Detailed feedback from player / Host:

  1. The game worked well.   
  2. I liked splitting it into 3 one-on-one games.
  3. Mid-game clarifications were few...and expected.    
  4. The rules were very straightforward.   
  5. Your basing works nicely.   
  6. The terrain layout was properly scaled to the game.   
  7. Your use of only a portion of my table worked for the game/scenarios.

Detailed feedback from player / prolific game designer / tinkerer:
  1. the game played quickly and simply. 
  2. the units stats were so simple as to do away with distinction between national armies.    Partly this may be a reflection of the small number of real men each unit represented. I can believe that as numbers go down national differences decrease.  
  3. this does make the game more dependent on good scenario design and on making the best  opening move.  Playing on such a small board makes the opening turn...critical.  I see this especially in Early Warhammer Fantasy and Kings of War games where armies may start as close as 2 feet
  4. Winning or losing can be dependent on deployment. 
  5. As an occasional change of pace the game might be fun to play but I can't see it ever replacing, for me, a more sophisticated Medieval Warfare game. 
Obviously, perspective is part of the comments. I edited them a little to make them clearer as I comprehended the comment. I may be mistaken in a place or two.

Lessons for running newbies through a game


Changes:

  1. The QRS worked fine, but I didn't realize - the printer faded on some of the color headers, so "print a day before and check results better"!
  2. Make all initial decisions for the player - they don't know the game well enough to make them on their own. This includes deploying the initial units.
  3. Nearly identical forces on both sides is easier. Next time I'd have Welsh v. Welsh, Feudal English v. Feudal English, and Pre-Feudal Scots v. Pre-Feudal Scots. One of the benefits is both players can help the opponent remember his troop types.
  4. The "Red v. Blue" explanation from the book were confusing - next time I'll make my own.
  5. Also, I didn't realize it but in two of the scenarios the Attacker went second, and in #10 they go first! This was needlessly confusing.
  6. For a demo, just keep the scenarios totally separate, and let players play turns at their own pace. If someone finishes quickly, they can always play again.
Sustains:
  1. The three separate games alongside each other worked well.
  2. Keeping to the most basic rules - no optional or advanced.
  3. Keeping to related scenarios provides mission focus for each player, rather than just the entire side. Makes for some good variety without complicating things much.
  4. The rules are easy to grasp - resist requests and temptation to add differentiation.
I hope to run a 3 v. 3 or 4 v. 4 big historical game in the future. Maybe a "not hastings" battle, or perhaps the Battle of Lincoln. I think these will enable a group to get through the battle completely within a reasonable evening time limit.

Wednesday, May 17, 2017

Big-Battle One-Hour Wargames Game: P2, Playtests

Still planning for tomorrow's "big battle One-Hour Wargames game". Been tinkering with the forces, and decided I had to play out some of the compositions. My goal is to minimize randomness and give everyone an equal chance at glorious victory [or disastrous defeat!] so I'm _somewhat_ going against the OHW structure and not rolling up forces. Don't get me wrong, I personally love to have a tough challenge, either solo or with a willing opponent, but tomorrow's the intro of a brand new paradigm to my old gaming group.

They've been playing rules with "loads 'o modifiers" for decades [no exaggeration], and where the game scenario is almost secondary - an afterthought - to the rules and modifier charts. Tomorrow I hope to intro them to the reverse, where just a few decisions are crucial to victory and the rules are pretty clean-cut. Also, where bad luck or trying to get a "gotcha!" in some way aren't very important. To that end I tried out the following scenario forces:

Scenario 4 "Take the High Ground" [left side of battlefield] for this I ran with:
Red Defenders, N. Welsh: 1 Cav, 1 Brigans [mtd], 1 Brigans, 3 Freemen
Blue Attackers, Feudal English: 2 Knight, 2 Bowmen, 2 Freemen

My thought was that the Freemen would hold the hill until the mounted forces relieved them, and the Brigans would affect the battle by being in the woods. But, NOPE, that wasn't it...

Turn 3, attacking Blue Knights trashing Freemen on hill. Red Freemen and Brigans moving down road while Blue Bowmen dominate the center and Freemen reinforce the hill...

Turn 4, Red loses both Freemen, and the hill, while Blue loses a knight. Roadway is dominated by a Red Freemen and their Brigans are entering the woods [ I'm such a dip - I moved the Brigans at the wrong rate the whole time...5" instead of 7.5"]. 

Turn 5. Blue Knights on road are nearly spent, but their Freemen hold the hill, while Bowmen are ready to hold their flank. Red side is spread out and not contesting, oops.

Top of Turn 6. Red shatters two Blue Knights, but Blue is nicely set up, despite both Bowmen being out of missiles, along with the Red Cavalry.

Bottom of Turn 6. Blue Freemen hit flank of Red Cavalry. Red Freemn along road rout. Red Brigans can't quite hit Blue Bowmen [shown by ruler, needing 5"].

Turn 7. Hope is lost for the Red defenders. Their Cavalry are almost done, and a fresh Red Bowmen [out of missiles, and thus able to charge] is moving onto the hill. Red Brigans are held off in the woods by Blue Bowmen on the road. Put a fork in it...
So I thought the attackers had it too easy - I could strengthen the defense with a unit of Serjeants [a Warlord's Teulu] on the hill, but I'm going to swap out a Knight for a Freeman:
Red Defenders, N. Welsh: 1 Cav, 1 Brigans [mtd], 4 Freemen
Blue Attackers, Feudal English: 2 Knight, 2 Bowmen, 2 Freemen

The center scenario I thought would be pretty clear cut, and used the following:
Scenario 8 "Melee" center
 Red Defenders, S. Welsh: 1 Cav, 1 Brigans [mtd], 1 Brigans, 3 Bowmen,
 Blue Attackers, Feudal English: 2 Knight, 2 Bowmen, 2 Freemen

Turn 1, Starting Positions. Red Units hold hill. Brigans are ready to hold woods.

Bottom of Turn 1. Blue Knight and two Bowmen advance on the Hill.

Turn 2. Red Units have little to do, but Brigans move into the woods. Blue forces close in. 

Turn 3, no Surprises: Blue charges in. Brigans are at woods edge to have Line of Sight to Knights [or else they can't charge]. But they can be shot at, taking 4 Hits [halved in woods].

Turn 4. Red Brigans hit Knights Flank. Blue Bowmen shoot away, tearing up the Brigans. Red Mounted Brigans distract on the road, but are countered by Blue Freemen entering the board, and Bowmen turning to face.

Top of Turn 5. Red beats down Blue Knights - the risk didn't pan out... double enveloped, Blue Knights flee with 16 hits. It should be noted that the Red units are pretty weak - Cav are 3x2=6 Hits, but Bowmen are 4-2=2 Hits, and Brigans are 3-1x2=2 Hits. But they do it.

Bottom of Turn 5. Red Brigans [mtd] distract two Blue Units. Blue moves on hill.

Turn 6. Doesn't look good for blue. At Right, Freemen work forward with support from Bowmen against Red Brigans [mtd], at left, hope remains in Freemen and Bowmen.

Turn 7. Blue Freemen and Bowmen go for the hill while Knights rally off hits. In the woods, Red Brigans rally Hits also. At the road, the Brigans [mtd] distract two Blue units. 

Turn 9. The tipping point. Red Bowmen and Cavalry tear up Blue Knights. Red Bowmen hold hill against Blue. Blue doesn't win skirmishing contest on right, as the Bowmen / Brigans combination is more than enough to handle the Freeman - Bowmen combo to right.

Turn10: Blue Bowmen and other Units falter. Nothing is going to be won, here.
Well, that was pretty lop-sided. Clearly, the attackers needed a bit more edge! Here, I'm going with upgrading the attackers a bit, to:
 Red Defenders, S. Welsh: 1 Cav, 1 Brigans [mtd], 1 Brigans, 3 Bowmen,
 Blue Attackers, Feudal English: 3 Knight, 1 Bowmen, 2 Freemen

The last scenario I don't know if I'll be able to play test. We'll see. At the moment, I'm uncertain what will be the forces, as they're supposed to be brought by one of the players. I think this is important since his armies are all WRG/DBx mounted, and I'd like to have two of them play off against each other.

Hopefully, this pans out. It is important as a gaming community that we address the issues of our community and play INTO them rather than AROUND them, and that includes addressing the issues of very complicated [and dated] rule sets, and low-fun gaming, IMHO.

Monday, May 15, 2017

Big-Battle One-Hour Wargames Game: P1, Concepts

Periodically we want to expand our gaming horizon beyond what we typically play. 

While "One-Hour Wargames" is written for simple, quick-playing, 2-person games [that also do well solo] sometimes we've extra people show up or just want to throw a big battle - perhaps an historical one - or just a large throw-down with all the figures we and everyone we know has! Or perhaps its a culminating campaign game where all the forces and players are going to be present [a wargamers dream!]. 

Yet, often these games become disasters. They get bogged down in poor planning, logistical problems, or lopsided encounters where a couple of clever people trash the other side and the game either ends before everyone gets playing or drags on forever while some people have already had their command terminated. What to do?

"Gentlemen, that covers the rules overview, here are your dice and QRS"
"I think the knights should enter the table here - no wait! over here, I think"
"Are your troops even in the battle yet?" "No, I think I'll eat lunch while I wait"
"Hey, what's the modifier for skirmishers hitting a flank?" "CAN skirmishers charge??"
"Sire, what are these figures over here - reinforcements or dead?" "Pass the pretzels."
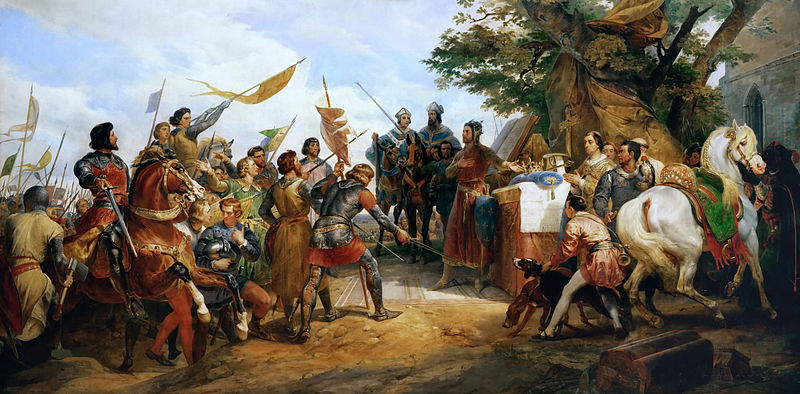
File:Bataille de Bouvines gagnee par Philippe Auguste.jpg
Early big battle wargame being played with less than total success...
From: https://en.wikipedia.org/wiki/Battle_of_Bouvines

After lots of years at the gaming table, I can assure you I have participated in or worse - planned - a number of less than excellent large games. But, it is worth trying to throw a bigger event periodically as it galvanizes the group, gives everyone a goal to participate in and of course helps us to hurry up and finish those figures that need just a little more work!

The "One-Hour Wargames" approach can work for large battles as well as small ones, I believe. In fact, it is probably better suited to a large multi-pplayer game than the vast majority of more complicated yet difficult to understand rule sets that are out there. I think part of the key is that it is a scenario-driven game system rather than a rules-driven game system. 

My experience of about 40 plays of the various scenarios with various of the rules sets, modified and unmodified - RAW - is that player understanding of the victory conditions and their decisions towards them reward the better player with victory 3-4 out of 5 games. It is still possible to roll your way to victory - or defeat - but over a few games the better players win solidly in the majority of plays. And knowing the rules helps, but is not the determining factor once you've tried them out just a couple of times.

So to my mind, since two people can play out this battle in an hour or less...

There's no reason why we can't put together several of these...

...and make a game for six people to play in about an hour!
Above, scenarios 4, 8 & 10 mega-battle. Note that the #10 map is reversed.

So, I'm planning for 5-8 people to attend the game, but don't know who specifically. With 18 Units a side, 6 / scenario, and me playing or not playing, I can GM for 5-6 easy, and split a couple of commands [while I don't play] with a novice player and an experienced player.

The overall scenario is that the Blue side [bottom] is trying to seize a number of terrain objectives, specifically two hills that dominate roads [left and center] and a tight gap between an impassible hill and a large wood [at right]. If they succeed in two of the three scenarios, they will win overall, as the final enemy force will be forced to retreat with their allies. If the two hills and the pass are controlled, then the defenders will be successfully besieged.

No force is allowed to help another force win their scenario unless they totally wipe out their opponent. So it is most likely that there will be three totally separate games being played alongside one another, except that they will stay on the same turn sequence [which is not necessarily mandatory, for player who all know how to play the game themselves]. I'm hoping that there'll be time enough to play twice in one evening.

For an early medieval game, this battle has good historical feel. Each of the commands is full of warlords who don't necessarily trust each other much more than the opposing warlords. I want the players to play three full games, alongside one another, but without intruding into each other's games. 

For time, I'm budgeting about 30 minutes for everyone to settle in and get an overview of the rules, 90 minutes to play the first time, and under 60 minutes to play a second time, altho depending on who shows up they may very well play in 60 and 45 minutes each time, since the rules are so straight forward.

I won't be using a number of optional rules I have, few of which add much time to the game, but they all add a little more complexity. I want the players to concentrate on making decisions that will win the scenario, each side of which has about three important decisions to make, creating a matrix of about nine possible ways for the game to develop. That's plenty of playing, so I'm glad that the scenarios are only about an hour each!

Tune in for the results later...

Sunday, May 14, 2017

Basing [6]: Unbasing & Rebasing...ugh!

Keeping with the push I've been making to base onto single-unit bases instead of 4 WRG / DBx size bases, as related in the previous post, I re-based a bunch of Saxon Fyrd. These were easily removed as they were on thin bases with just a thin layer of Elmer's Wood Fill. All I had to do was bend the bases and the figures started to come off - praise the Lord! 

This was a relief and I quickly set them up and glued them into two unit bases, which had plenty of space to keep all their spears and such within the borders of the base itself and also they can be placed next to each other for a "double-diorama effect". Left side...

Center...

...and right side.


With this under my belt, I turned to a mass of 60 Welsh spearmen. They are from the Old Glory line, sometimes seen as part of the "Revenge" series, and are later period Welsh "knifemen" from the 100 Years War or Wars of the Roses. They come with shields but don't necessarily use them, and have both a spear-holding hand and often a small sword / long knife in the other. They could be made as javelinmen, but I chose the long spear approach, which suited the later period I intended for them.

In the back, are the first half, that I glued straight onto the wood bases I made with Elmer's. This is a good glue to use, IMHO as it dries hard and brittle, so it snaps and breaks. This means that it is pretty easy to remove figures when you want. Softer glues are tough to work with and stretch and cling to fig bases.

In the front are the bases I made using wood fill. This gave the bases more shape and texture. But it is chalky and fairly strong, so has to be removed with a steady hand and the right tools.

Also noteworthy in the above pic, is the double-bases for AUX in the DBx system. Instead of two bases of three figs, you can see I did one of six. Ergo, every two bases is actually a full unit of 12 figs. By doubling the bases, I could also use them as AUX(X) or longspear that are Auxilia more resistant to cavalry. Overall, they're a pretty interesting army, with the right rule set. Unfortunately, it is the tendency of rules to ignore the less well documented and flashy armies in favor of the usual Rome, Byzantines, 100YW English & French, etc., and then lump together barbarian armies as 1-2 junky troop types.

Overall, I think these look OK, but the figs look a bit cramped - I'm looking forward to seeing the final result with whole unit bases. Also, they'll be better protected and easier to handle.

Closeup of the two bases - you can see the texturing from the wood fill up front, and the plain green flocking of the back bases. The figures' bases are also visible in shape and shadow, compared to the ones with wood fill that you can build up a bit.


Implements of destruction: large Buck wood chisel [sharp-edged], heavy wire clippers [to squeeze and pop figure bases off the wood base and tap the chisel] and X-acto blade to clean the bottom of the figure's base so they will stand up reasonably straight.


Work begins: note how easily the Elmer's glue figs pop off at back. The wood fill figs have to be gently chiseled off. I place the chisel at the edge, tap with the wire clippers, and it bites deep enough that the figs fall off as I work my way down the base - takes a couple minutes.


Sometimes you have to search for the right angle to start chiseling away...


With figs removed, I base them in groups of 11-13, looking for a bit of variety. Every unit has one leader-fig, which was included in the OG pack, I think [check website to be sure].


Some final results. These are clustered in a bit of a defensive posture, 2-3 deep; note that all their spears are within the base edges - this means units can be put into contact without worrying if the metal spears will scratch or damage other figures. Note also that the extra space gives some better flow to the group of figs, they just look more "natural".


Total time for rebasing the 60 figs - 5 new units - was about 60-90 minutes over a few days. It actually wasn't as bad as I thought it would be. I'm really glad I thought of the big chisel, and it will definitely be on hand for my gaming tools in the years to come!

I'm going to be needing these units in a few days as I throw a big multi-scenario OHW Medievals game for my old gaming club. Stick around for more posts that show how OHW is not just a book for a small, 2-player game, but multiple scenarios can be placed side-by-side for much larger historical games.