
A few things should be noted here:
- the present rules and lists show my historical preference, which differentiates the Welsh from the Feudal English. The Welsh enjoy more shooting, but do not have Knights as a troop type. Instead, they have Cavalry, which are Dx melee Knights, who shoot as Brigans, ie on the move for Dx-2.
- the last time I played this, I gave the English 3 knights, 2 Bowmen and 1 Freemen, and they won fairly easily on Turn 9 or so. So for the Big Battle demo game, I switched them to 2 Knights, 2 Bowmen, and 2 Freemen.
- while I'm pretty sure these lists are balanced across the spectrum of 30 scenarios, the greater mobility and shooting of the Welsh with less hitting power may not be a winner in each individual scenario. I'm OK with this, since it is a hazard of national differentiation.
- Many of the tactical details will change if you tinker with the mechanics of movement, melee contact, etc. I've movement of 5", 7.5" and 10" as standard. If you go to 6"/9"/12", some of the below relationships will change. Still, the thought process will remain identical even if some of the tactical nuances are altered - this is how you win using tactics!
Anyway, to battle once again!
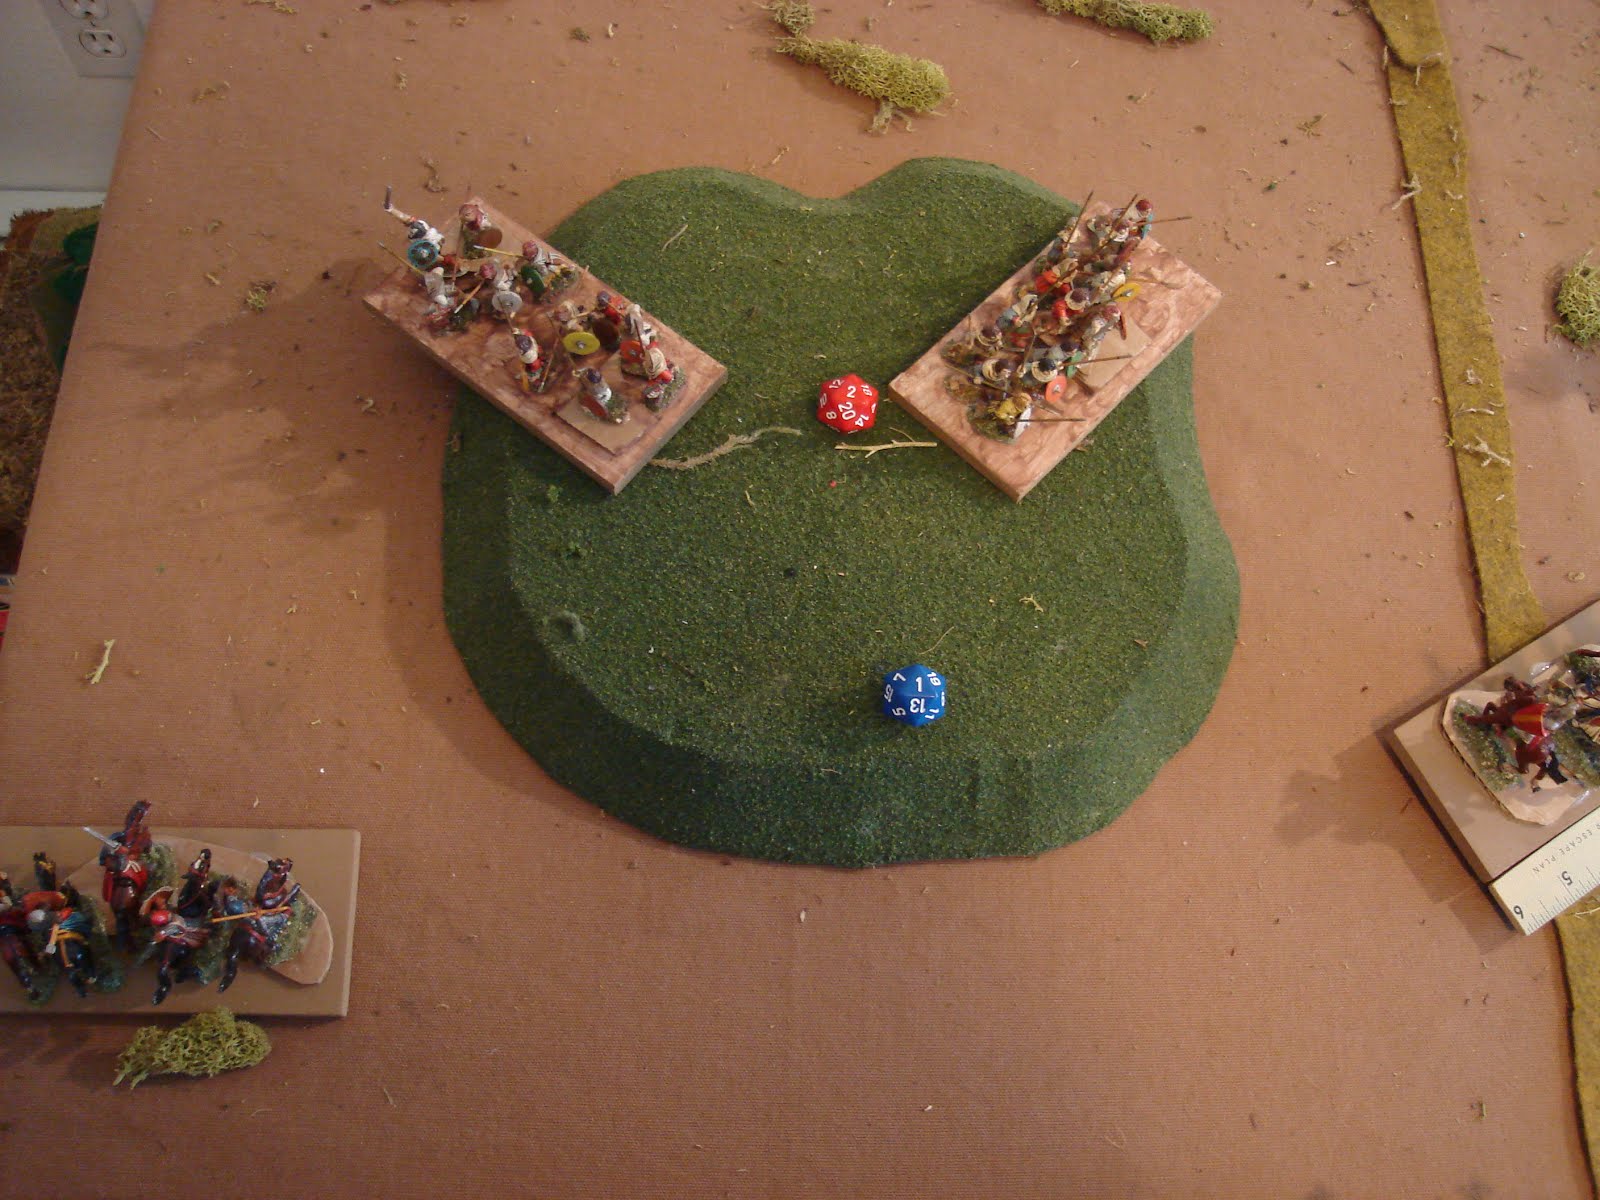
A reminder, that the Welsh start with a won game. The English must completely clear the hill of Welsh to win. Anything else is a draw. Demonstrated below, a Freeman with 14 Hits has its toe on the hill - the Feudal English have NOT won the battle!

Turn 1. Welsh deploy their two Freemen behind the hill crest, out of LoS, and therefore may not be shot or charged until LoS is less than one Base Depth [BD] or 2.5" with my basing. English split their Knights, one up each flank of the hill. To left, the Knight advances a Fast Move of two Base Widths [BW] or 10". The Knight to right also advances 2BW but gets a BD bonus by moving along the road, a total of 12.5". The rest of the English army advances 5", with the Freemen in center to attack the hill, bowmen supporting from flanks.

At top of pic, is the Welsh reinforcements, arriving a Turn 2.
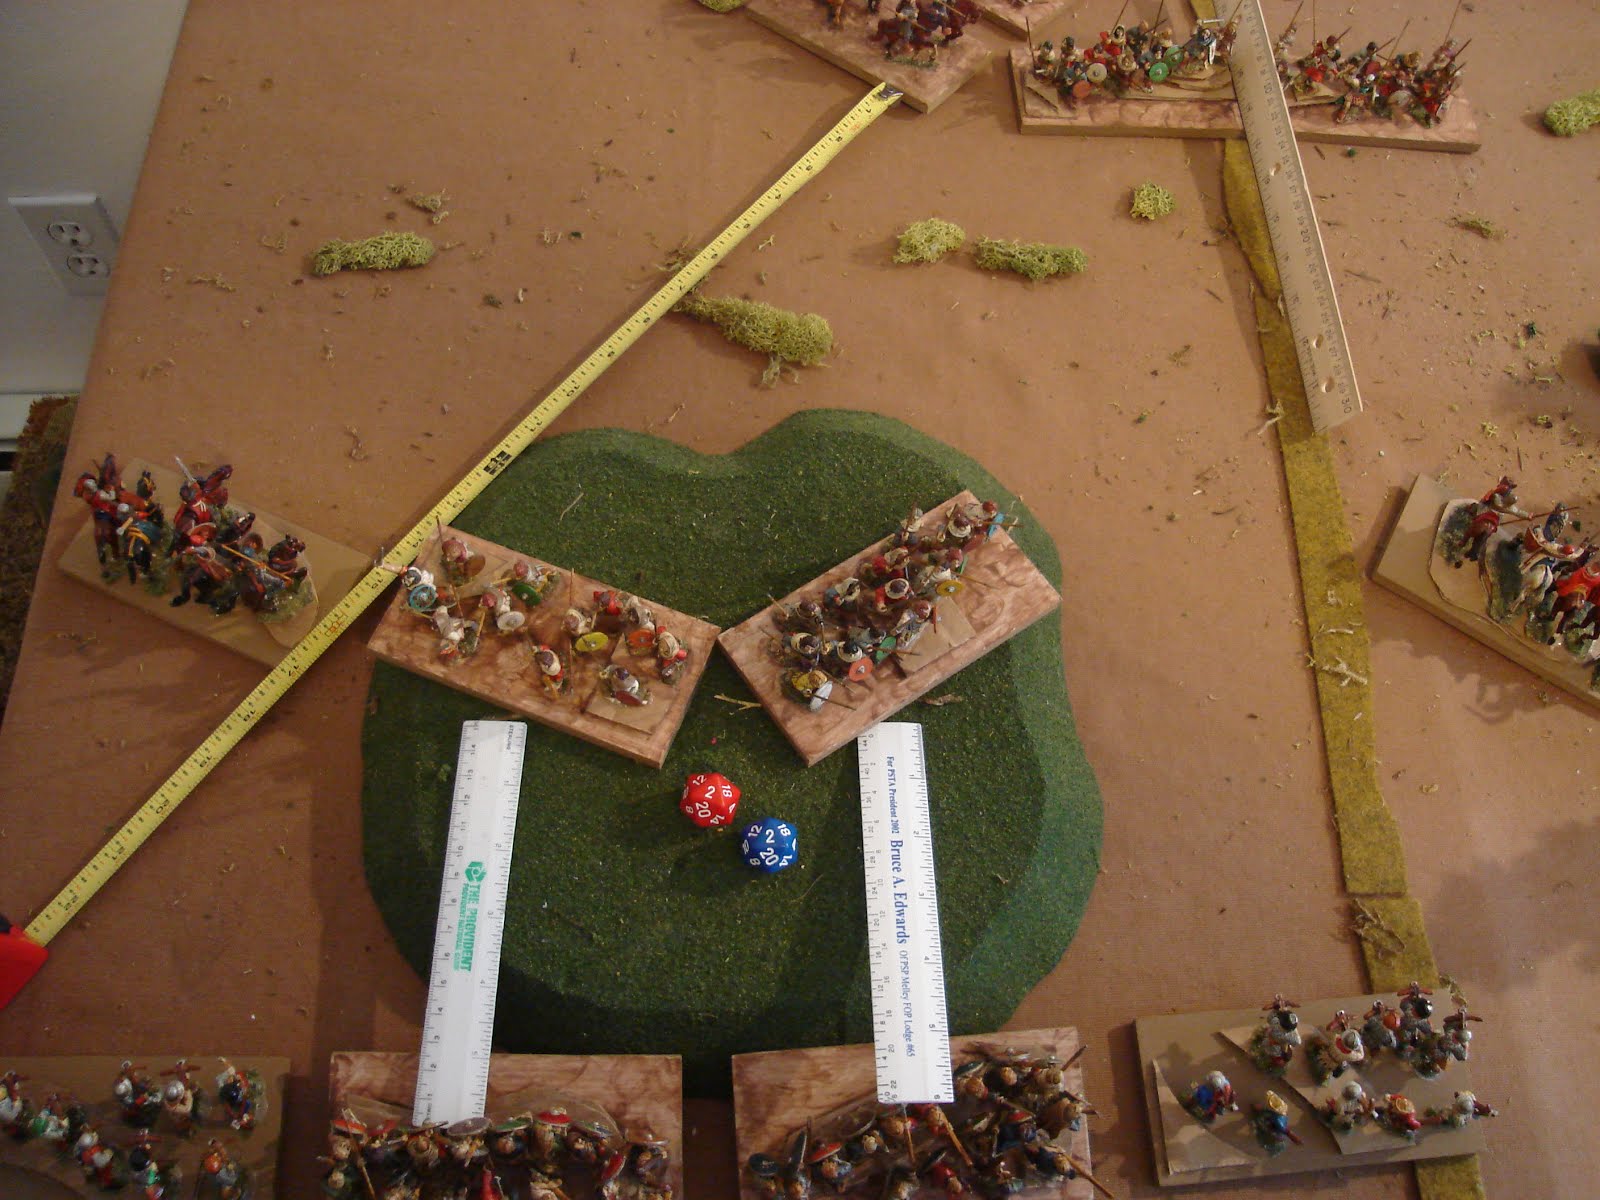
Closeup of interesting deployment and Turn 1 decisions. Both Knights advanced the max.

Left Knight out of Charge range. Right Knight easily in due to extra road movement.

To avoid the charge, the Welsh Freemen would have to be pretty far back, if still on the Hill.

But this concedes the uphill bonus of halved Hits to the Knights, which is unacceptable - they can advanced on their turn, get a BD on the hill, staying out of a BD of the Welsh.

Alternatively, the Welsh Freemen can squelch any attempt to flank them by being both on the hill and over the Hillcrest [there isn't a BD of any side over the Crest, so they are out of LoS].
Unfortunately, this loses the Welsh the mutual support of Protected Flanks, leaving them vulnerable to flank attacks at the center of the hill - also unacceptable.
This leaves the below the only acceptable deployment in my book - the Welsh have a Protected Flank in the center and can't be flanked by the Knights turn 2. The Knights have a choice - Charge uphill against the Welsh [an even proposition but it blocks their army] or continue moving forward to work around the flanks, while the foot go up the middle..

These are the kinds of decisions I'm looking for in a game. Easy on the amount / complexity of the rules, but hard choices have to be made that actually matter.
Turn 2. The Welsh Reinforcements enter. Two Freemen up the road, the mounted on the right with the Cavalry leading the way.
They give the English some tough choices. The Knights can charge the flank of the Freeman on the hill, then be shot Turn 3 and meleed by the Cavalry on the left side on Turn 4 - not an inviting proposition as Knights disappear rapidly when attacked on the flank.

OR, Turn 2 the English can face the Welsh Cavalry but still threaten the Freemn with a Flank charge if the Welsh mounted don't close in, forcing them to commit to their right. After some debate, I choose this course of action.

Meanwhile, Turn 2 on the right has left the Knight in a bind. Turn 3 will have the 2 Welsh Freemen right on top of them, well within threat range of 5". The nearby Bowmen can't charge until they are out of missiles. This has the Knight isolated and unsupported.

Turn 2. English right Knight moves to right, opening space for Bowmen to support. Note that neither of the English Freemen can charge the Welsh: they are both over the crest and out of LoS [which requires a BD of the base to be seen] and they are out of Charge range since 5" won't give either Freemen a BD of a side, the minimum required to be in melee.
Turn 3 on right. Welsh Freemen move full down the road. English close in. Knights charge Freemen for 5 Hits but leaving flank open. Bowmen could advance pretty far up, but need to stay a bit farther away so a BD of a side of either Welsh Freemen is within shooting Arc.

Turn 3 on left. Welsh mounted offer lousy situation to the English Knights: They advance with the Cavalry within Charge Range, but the mounted Brigans to left are within both shooting and charge range of the flank. If English Knights charge Welsh Freemen on the Hill, they will in turn be charged on their flank by the Welsh Cavalry. Ugh!

Yet, the Knights can't reach the Brigans, which would be worse anyway since the Cavalry melee Dx v. Dx-2 for the Brigans, so better to have the Brigans hitting the flank...

In the end, I decide to take the fight to the clever Welsh - Tally Ho! [oops, wrong game...]. The English Knights charge the Cavalry, inflicting 4+2 for 6 Hits total.

Welsh Turn 4 on left. Cavalry inflict 3 Hits. Brigans 4-2x2 or 4 Hits for 7 total Hits.

Turn 4 English Knights hit back for 3+2 Hits, 5 total, bringing the Cavalry to 11 Hits.

Welsh Turn 4 on Right. Freemen take obvious choice, charge Knights in flank, inflicting 3x2 Hits [3 doubled for Flank...could've been 8 or 10 Hits]. Freemen on Front side Hit for 3.

Turn 4, English Knights strike back for 5+2 or 7. Bowmen could shoot at flanking Freemen, but taking the Hill is the victory, so...

They shoot at the Welsh Freemen on the hill for 4 Hits.

Turn 4 Center. Welsh Freemen move over crest to get uphill advantage. Note they cannot charge since they were out of LoS at the start of their moves. on hill. English Freemen charge to get in the first blow, inflicting 3 and 2 hits [halving is rounded up for any fraction].

Turn 5 Center. Welsh hit for 5 and 4. English hit for 6 and 4, but I forgot to halve the Freemen attacking uphill, which would have been one less each. *Sigh...* that's the problem with taking pics and writing narrative - I make little mistakes. We'll see if it is decisive or not.

Turn 5 left. Welsh finish the fight, adding 10 Hits: 4 from the Cavalry, 5-2x2=6 from the Brigans. This brings the Knights to 17 Hits and they are destroyed [15 Hits = destroyed].

Turn 5 Right. I mess up again. I played the English first. They roll 4+2 Hits and destroyed the Welsh Freeman in front of them. They then take for more hits from the Freeman on the Flank putting them to 13 Hits. I should've fought the Welsh Freemen first, which would've destroyed the Knight [as the Freeman to Front has to inflict at least 2 Hits!]. AAARGH!

Turn 6 Right. Welsh destroy the Knights. Had this been done correctly, they would've had the Knights destroyed last turn, and both Freemen would still be on the table: one with zero hits [to left, as is] and one to Front with 12 Hits -2 for Rallying, or ten Hits [which is gone].

Welsh Turn 6, center. Welsh shift over their victorious mounted forces to contest the hill. The Cavalry throw missiles for 4-2=2 Hits on the Bowmen [who are out of missiles, and may charge]. The Freemen inflict 3 Hits each - rolling low is a bad idea at this time!

English Turn 6, Center. Unsurprisingly, the Freemen destroy both Welsh Freemen to their front. The support of the Bowmen was essential - as it should be, since they are unarmored spearmen and I don't see any reason to penalize archers shooting uphill. The Bowmen charge the Welsh Cavalry inflicting 2-2=0 Hits...take that!

Turn 7 Left. Cavalry fight back for 4 hits, the Bowmen, show their stuff by again missing.

Turn 7 center. Brigans advance and throw for 1 Hit. Welsh Freemen position themselves against the Bowmen. Two English Freemen advance and Charge respectively, threatening the Cavalry's flank and inflicting 4 Hits on the Brigans.

Welsh Turn 8, left. Cavalry decide to Retreat from the melee, moving straight back a full Move, a BW / 5". They have to do this b/c of the English Freemen threating their flank - the flank charge would inflict a minimum of 4 hits, destroying them.

Turn 8. Welsh Brigans roll hot and inflicting 3 Hits! To the right, the Freemen hit the Bowmen for 4 Hits. The left Bowmen charge the retreating Cavalry, but roll a 3-2=1 Hit.

English Turn 8, Center / Right. Freemen blow it and roll 2 Hits on the Brigans But the other Freemen is now threatening the Brigans with a devestating Flank Charge. English Bowmen roll OK, inflicting 4-2=2 Hits on the Welsh Freemen on the right.

Turn 9, Center / Right. Welsh Brigans also retreat from a flank threat. They roll another '4' and get the Bowmen to 8 Hits. While the Bowmen only inflict 3-2=1 Hit back, their Freemen charge the flank for 3x2=6 Hits on the Welsh Freemen. It's looking pretty tough for the Welsh...they could really use that other Freemen I mistakenly removed! To left, off-camera almost. the Cavalry get 3 Hits, the Bowmen 3-2=1 Hit - slow going for the Welsh, there.

Turn 10. Welsh do 3 Hits on Bowmen from Cavalry, 4 Hits on Bowmen from Freemen, pull back the Brigans. In return, the English destroy the Welsh Freemen, leaving quite a hole. The Left Bowmen miss entirely - again.

Turn 11. Welsh Cavalry destroy the Bowmen. But Freemen move up to threaten them.

More Turn 11. Welsh Brigans rally off 2 Hits. I forget to rally off two Hits each on the English Freemen to right and the remaining Bowmen, it seems - I meant to since they didn't move.

Turn 12. Welsh Cavalry move back, Brigans move over and shoot for 4-2=2 Hits. English Freemen advance against the Cavalry, rally two Hits to 11 on the other. Bowmen position themselves to threaten the Brigans next turn if needed [or they could've rallied 1 Hit]

Turn 13. Welsh Cavalry rally off 2 Hits and Brigans miss, 2-2=0 Hits. English Freemen right advance against the Cavalry and on left rally off two Hits [down to 9 from 13]. Bowmen should've rallied off a hit, but I shot them instead [bad plan], and they put two Hits on the Brigans [waste of time when they only have 4 Hits and it brings them to 6, really]..

Turn 14. Welsh Brigans eliminate the Bowmen - yay! English Freemen rally down to 7 Hits.

Turn 14, Left. Cavalry turn and shoot, rolling a 5 for 5-2=3 Hits! This puts the Freemen at 11 Hits, not enough to destroy them but giving even up odds at destroying them next turn! Freemen in turn charge and inflict three hits, putting the Cavalry at 14 - 100% chance of destroying them if the Welsh blow the shot!

Turn 15 Left. Welsh roll a 3-2=1 Hit, putting the Freemen at 14 Hits - they blew it! Freemen put three more Hits on them in return, and they are destroyed.

Turn 15, Center. Unfortunately, the Welsh Brigans are able to move onto the hill, and the Freemen can only threaten them. No one cleared the hill, so the game is a draw.

A close battle. I think that in this scenario, splitting the Knights is a mistake. They should be kept together for mutual support and go down the road. A Bowmen on the Left is enough to work on that flank in the confined space between the hill and the board edge. Given that there's a better attack up the road, it is quite possible that this force is a bit weak. As it is a small raiding or local force, they should have one additional unit of Cavalry available that can dismount as Serjeants.
Concluding thoughts.
Well, I hope that this quite detailed account serves a few purposes.
First, that simple rules with good scenarios provide lots of opportunities for interesting tactical play, significant decisions and close outcomes.
Second, that two armies that are different in play style can meet and have an equal chance of winning, and of all is even, fight to a draw with these rules.
Finally, that it is hard to keep track of things when you are playing both sides, thinking about explaining tactics and rolling dice around! Unfortunately, the game probably would've been a win for the Welsh if I hadn't removed one of their Freemen by mistake.
C'est la Guerre!
So, this is what I did the last week. It was a bit time-consuming, but it furthered my goals and work for this set of rules and this period in general, including getting more stuff based, smoothing out the rules a bit, and making a QRS, which I've long needed. Overall, I'm very satisfied with the progress, and feel like I'm in a good place with the development of this rules set and the figs / basing / period details to go with it.
Nice looking game, beautiful figures and interesting explanations!
ReplyDeleteThanks!
ReplyDeleteThe tactical tutorial took a lot more work than I thought it would. Possibilities are complicated to explain, it seems, altho we flash through all the selections in no time at all.