It's time to settle things the old-fashioned way...
It's been a long, long, time - about a year - and a lot of eventfulness, that has prevented me from getting feudal, much less blogging about it. During a spring clean process to organize and sort my office and gaming stuff, I dug up both the grid and open table versions of my OHW medieval rules, re-read them, and decided to go with the open table first. For those of you who are grid fans, that update will be coming soon - I like the grid not because it is simpler or easier [any experienced wargamer finds open table mechanics easy to grasp] but because it reduced the opportunities for the gamer to be, well, "gamey" instead of realistic. Anyway...
My own spin-off of the One-Hour Wargames medieval and dark ages rules is pretty different from Neil Thomas' rules. As such, I can no longer blame him for any faults! But, I also get to take some development credit, I guess.
6d6 "Spear to the Strife" rules feature
- partially diced movement,
- a 3d6 combat system where you need to roll a target number to hit [and can hit or miss with all three dice, making it a bit more variable than OHW].
- I also am a big fan of a rally rule, allowing you to take off the occasional hit at the price of doing anything else.
- More importantly, Unit turns are more limited so you need to plan maneuver more carefully. Only skirmishers can turn twice and they can shoot before or after their move - they have a shortened range to make up for it.
- I also have the Retreat rule from Ancient and Medieval Warfare. This doesn't make as much difference as you think it would - table space is usually pretty tight, and the victory conditions usually demand you take and hold ground anyway. Still, it is realistic and historical and a good possibility to have ready for a faster moving unit.
With that - on to the battle!
As I posted on Scenario #11 with the same miniatures during my painful re-basing process, I thought it'd be great to hit this one again. I am still of the opinion that it is a difficult scenario for the defender. Unless he scampers off fast as his feet or hooved can carry him, the Defender will almost certainly lose the two units that must face the entire Attacker's force of 6 Units. In a shooting period, it's almost impossible not to be shot at by an aggressive attacker skillfully wielding two Infantry - minimum - and any Artillery that he has. The alternative is to stand and try to knock out at least one attacking unit before being destroyed. However, the Defender has the possibility of a skirmish unit in most of those rules that can secure the woods and threaten the flank of Blue as they advance down the road.
In a close combat period, like the Ancient or Medieval rules, there is a better chance to retreat effectively, set up a 4-unit defense just south of the crossroads objective, and try to hold off the 6-unit attacking force. It will likely get canalized as both the swamp and the woods are impassible to the medieval unit options. This would bring us to the discussion of how critical changing just a unit or two, or a couple of mechanics can be, to how some of these scenarios play out.
Basically, if you play the game as written, you roll for a force that includes 6 units of 4 possible types, of which 3-4 are always a basic type [Infantry, except for the Medieval list which makes mounted knights the basic unit] and the remaining 2-3 are random selections of 3 other types - typically artillery, skirmishers and cavalry in a few variations over the periods, but artillery as replaced by Archers in the medieval rules. There are so many variations using the RAW that I think I figured out there are 10,000 combinations of rules, forces, and periods altogether, more than most can play in a lifetime [altho at about an hour a pop, it could be done...]. This gives OHW the most replay value of any game I know.
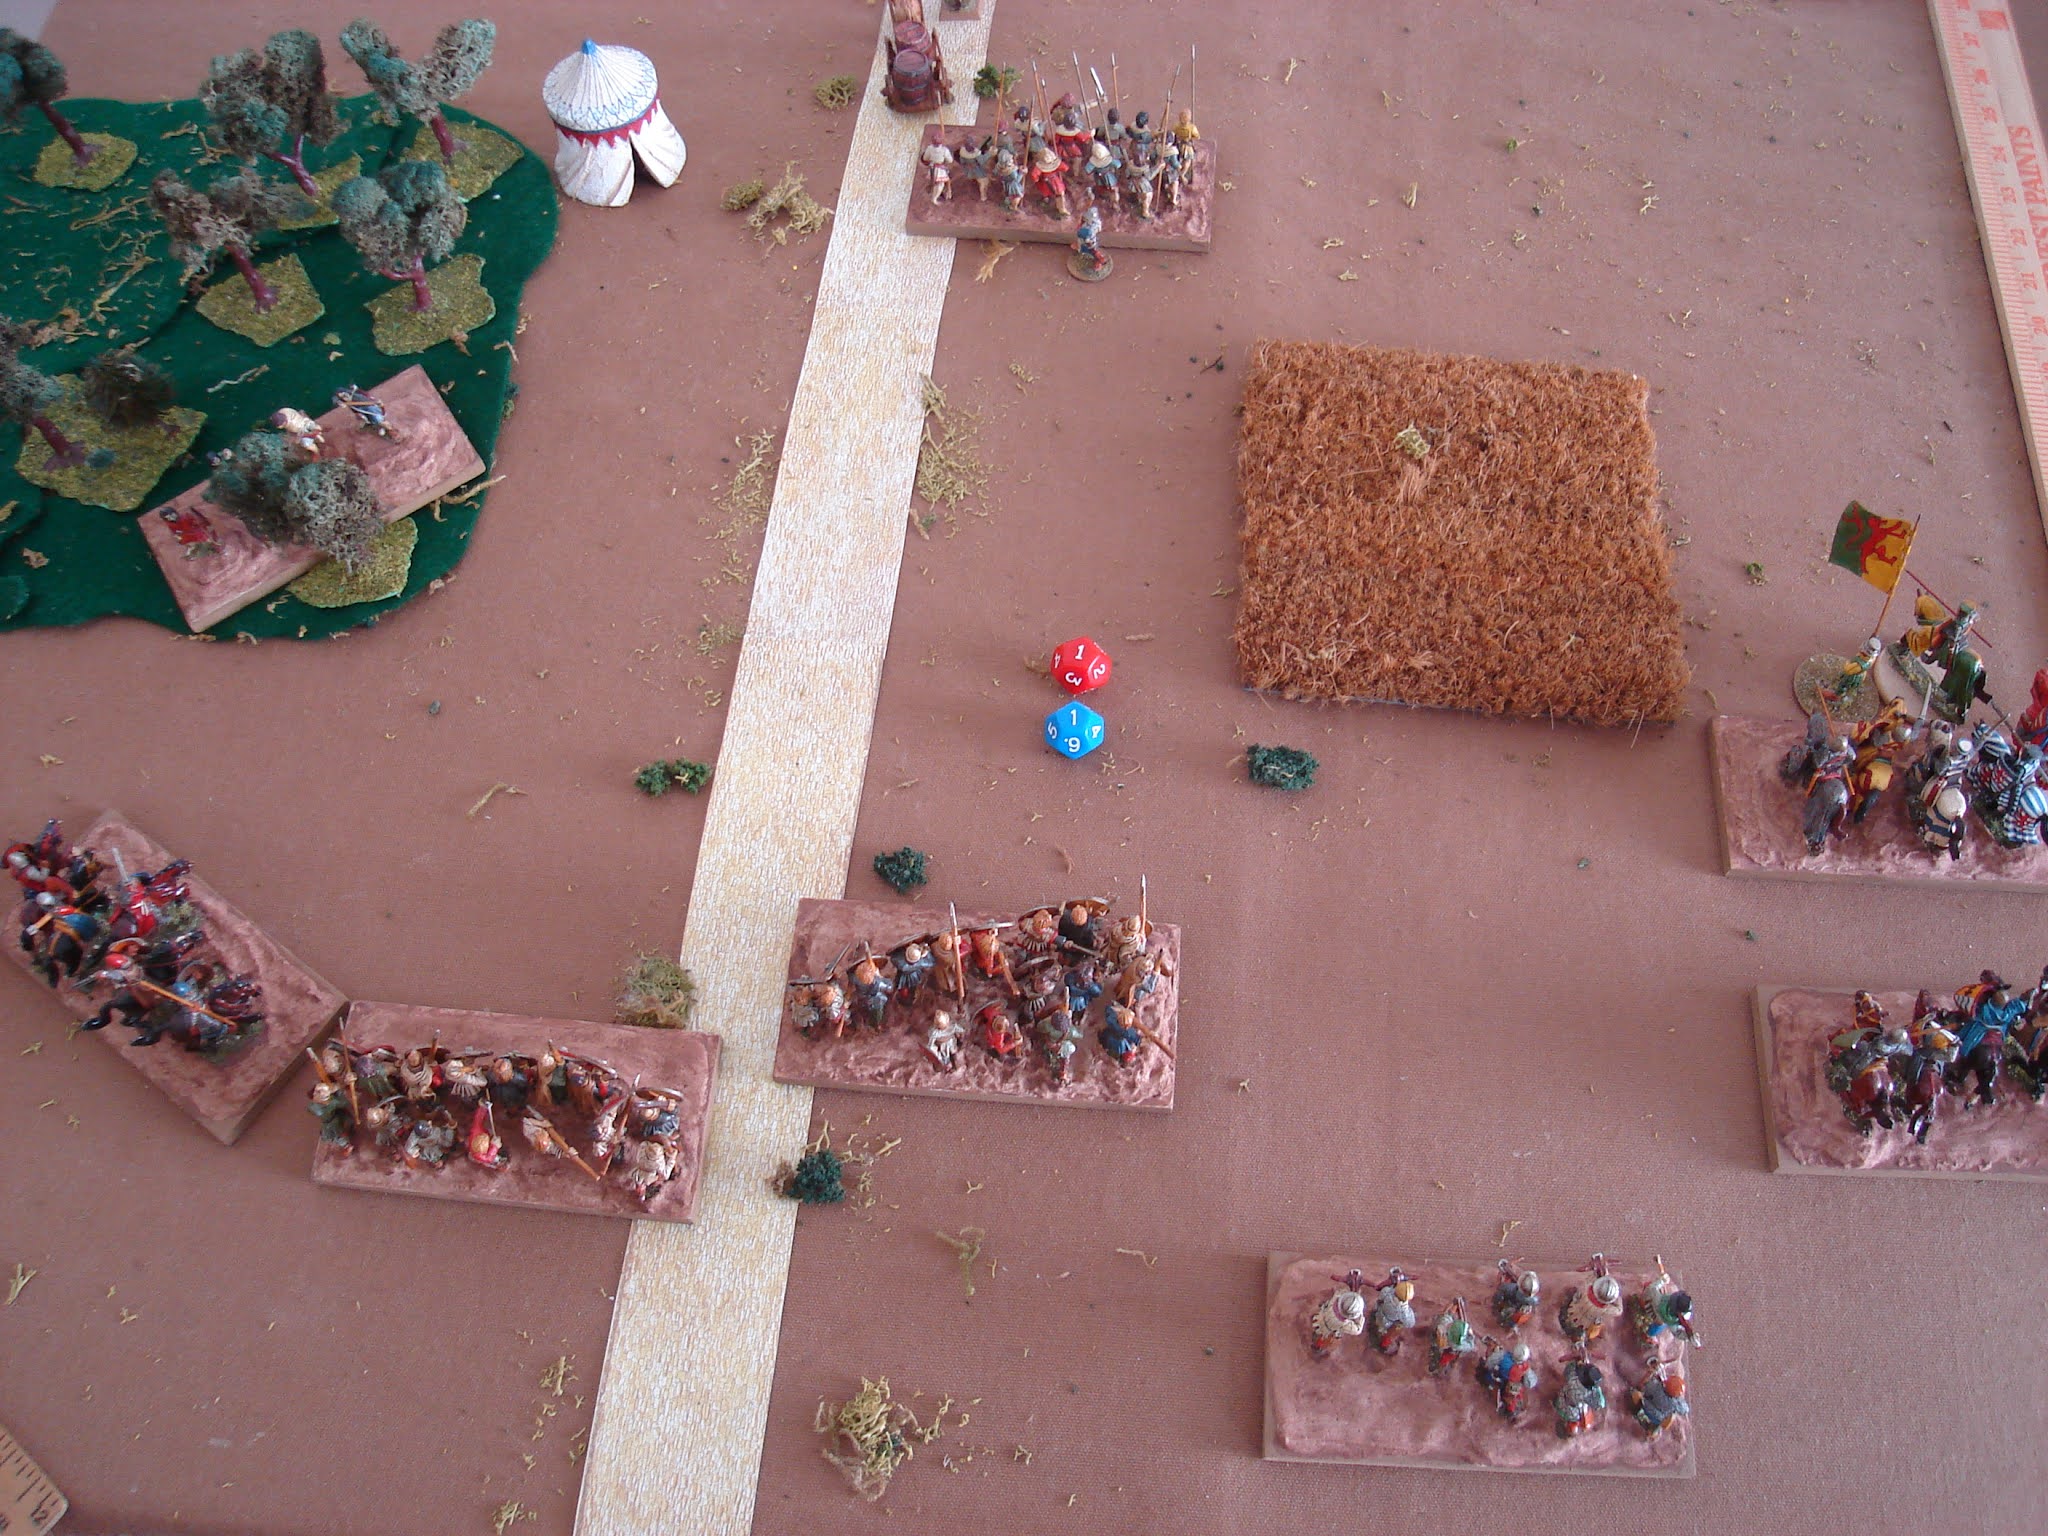
Below, the relatively simple board and setup. The crossroads at the top are the objective for the attacker, and the defender starts with two - unfortunate - units in zone 1. The possible combinations in this one decision alone - picking two units for initial setup - can involve quite a lot of thinking and pre-game analysis!
And below, the scenario as set up by me. I don't actually have any good bog terrain, so I used something resembling a fen [also sometimes a wheatfield...best floormat purchase EVAH!].
Background to Our Story
Sir Ranulf, an English Marcher Lord has been eyeing some choice land nearby that has the temerity to belong to some Welshmen...
Sir Ranulf [mounted and on foot], and his squire, standard-bearer, personal retainer, and camp servant. For those interested, the coat of arms is William Marshal, actually.
For a long while, the Welsh have been too strong to drive off, but upon their father's death, the two surviving sons started bickering amongst themselves who would own this particular tref [village, township] and seeing his opportunity, Ranulf makes his move. He quietly gathers his loyal followers using the ruse of a spring fair soasnotto raise suspicion:
Three units of knights...
...two units of Freemen [Saxon Fyrd] and Archers [a mercenary crossbow unit]. All figs are Old Glory 25s, except for some of the characters and the Crossbowmen.
The victims of the deceitful land-grab, in their camp near the border. Holding the gap on service for road work and hunting expedition, are Cyfwyn, loyal man-at-arms to Sir Madog, and his foot warriors and archers. After a good day boar-hunting while the road repairs are progressing, all have gathered in anticipation of a feast! But just as the mead starts to flow, a horn is heard, then the thunder of hooves and the tramp of many feet...
Coming to rescue their lord, the mounted teulu of mail and spear / javelin armed warriors will arrive on the road turn 3. These count as Cavalry and mounted Skirmishers [Brigans] in my rules, but both can throw javelins at 6" to modest effect.
Marching to the sound of battle, will be one last unit of Freemen and Brigans [skirmishers - they can enter the woods]. However, they don't enter until Turn 9.
Left wing setup: push the Freemen up the middle to pin the defenders, mop up with the Knights, then push on to the crossroads!
Right wing setup: push the knights around the bog, using the Crossbowmen's range to support them or damage the surprised defenders as needed. This plan is PERFECT!
Btw the knights is Sir Ranulf and his Standard Bearer. Generally, he adds a bonus combat dice [up to one extra hit] and the banner makes it easier to rally.
Turn 1. Plan unfolds - Knights on right rapidly advance, the crossbowmen move up quickly while the left Knights threaten any retreat by the defenders. In the RAW, units can move completely freely in any direction and fact any direction, getting two free turns - one before and one after the move. I found this to be a bit too unrealistic for all but skirmishers [Brigans] so everyone gets one turn before or after their move. This cuts down on some of the gaminess of maneuvering close to the enemy without having to put a ZOC rule into the mechanics... Welsh fire on advancing Freemen getting 2 Hits. I use a 7-hit system spun off of the math that other greater mathematicians worked out elsewhere. This allows me to use one 6-sided die for hits, removing it and the unit at 7+ hits.
Turn 2. Knights become impatient and crash into the damaged Welsh. Hoping to speed up the process. Cyfwyn can be seen swinging his axe in the front rank of his spearmen - brave fellow!
Note the lovely new RED casualty markers I got from Commission Figurines! I also got yellow and green, so I can mark morale states as well! I like the designs, and the tones, and that both sides are a bit rough - easy to grip and they stay on bases. Highly recommended! My first set were from Sound Officer's Call Steve, and I just had to get more [and some buildings...].
This provokes a shift to the right in general - the left Freeman advances against the Archers, while the right Freeman turns to go around the bog. The crossbows remain in support of the central attack, which is still a key part of the battle - destroying those two units will seriously compromise the defense, while the Knights win by seizing the objective, the crossroads, which they are now in a position to do.
Welsh plink away but really need to roll hotter than average at this point...
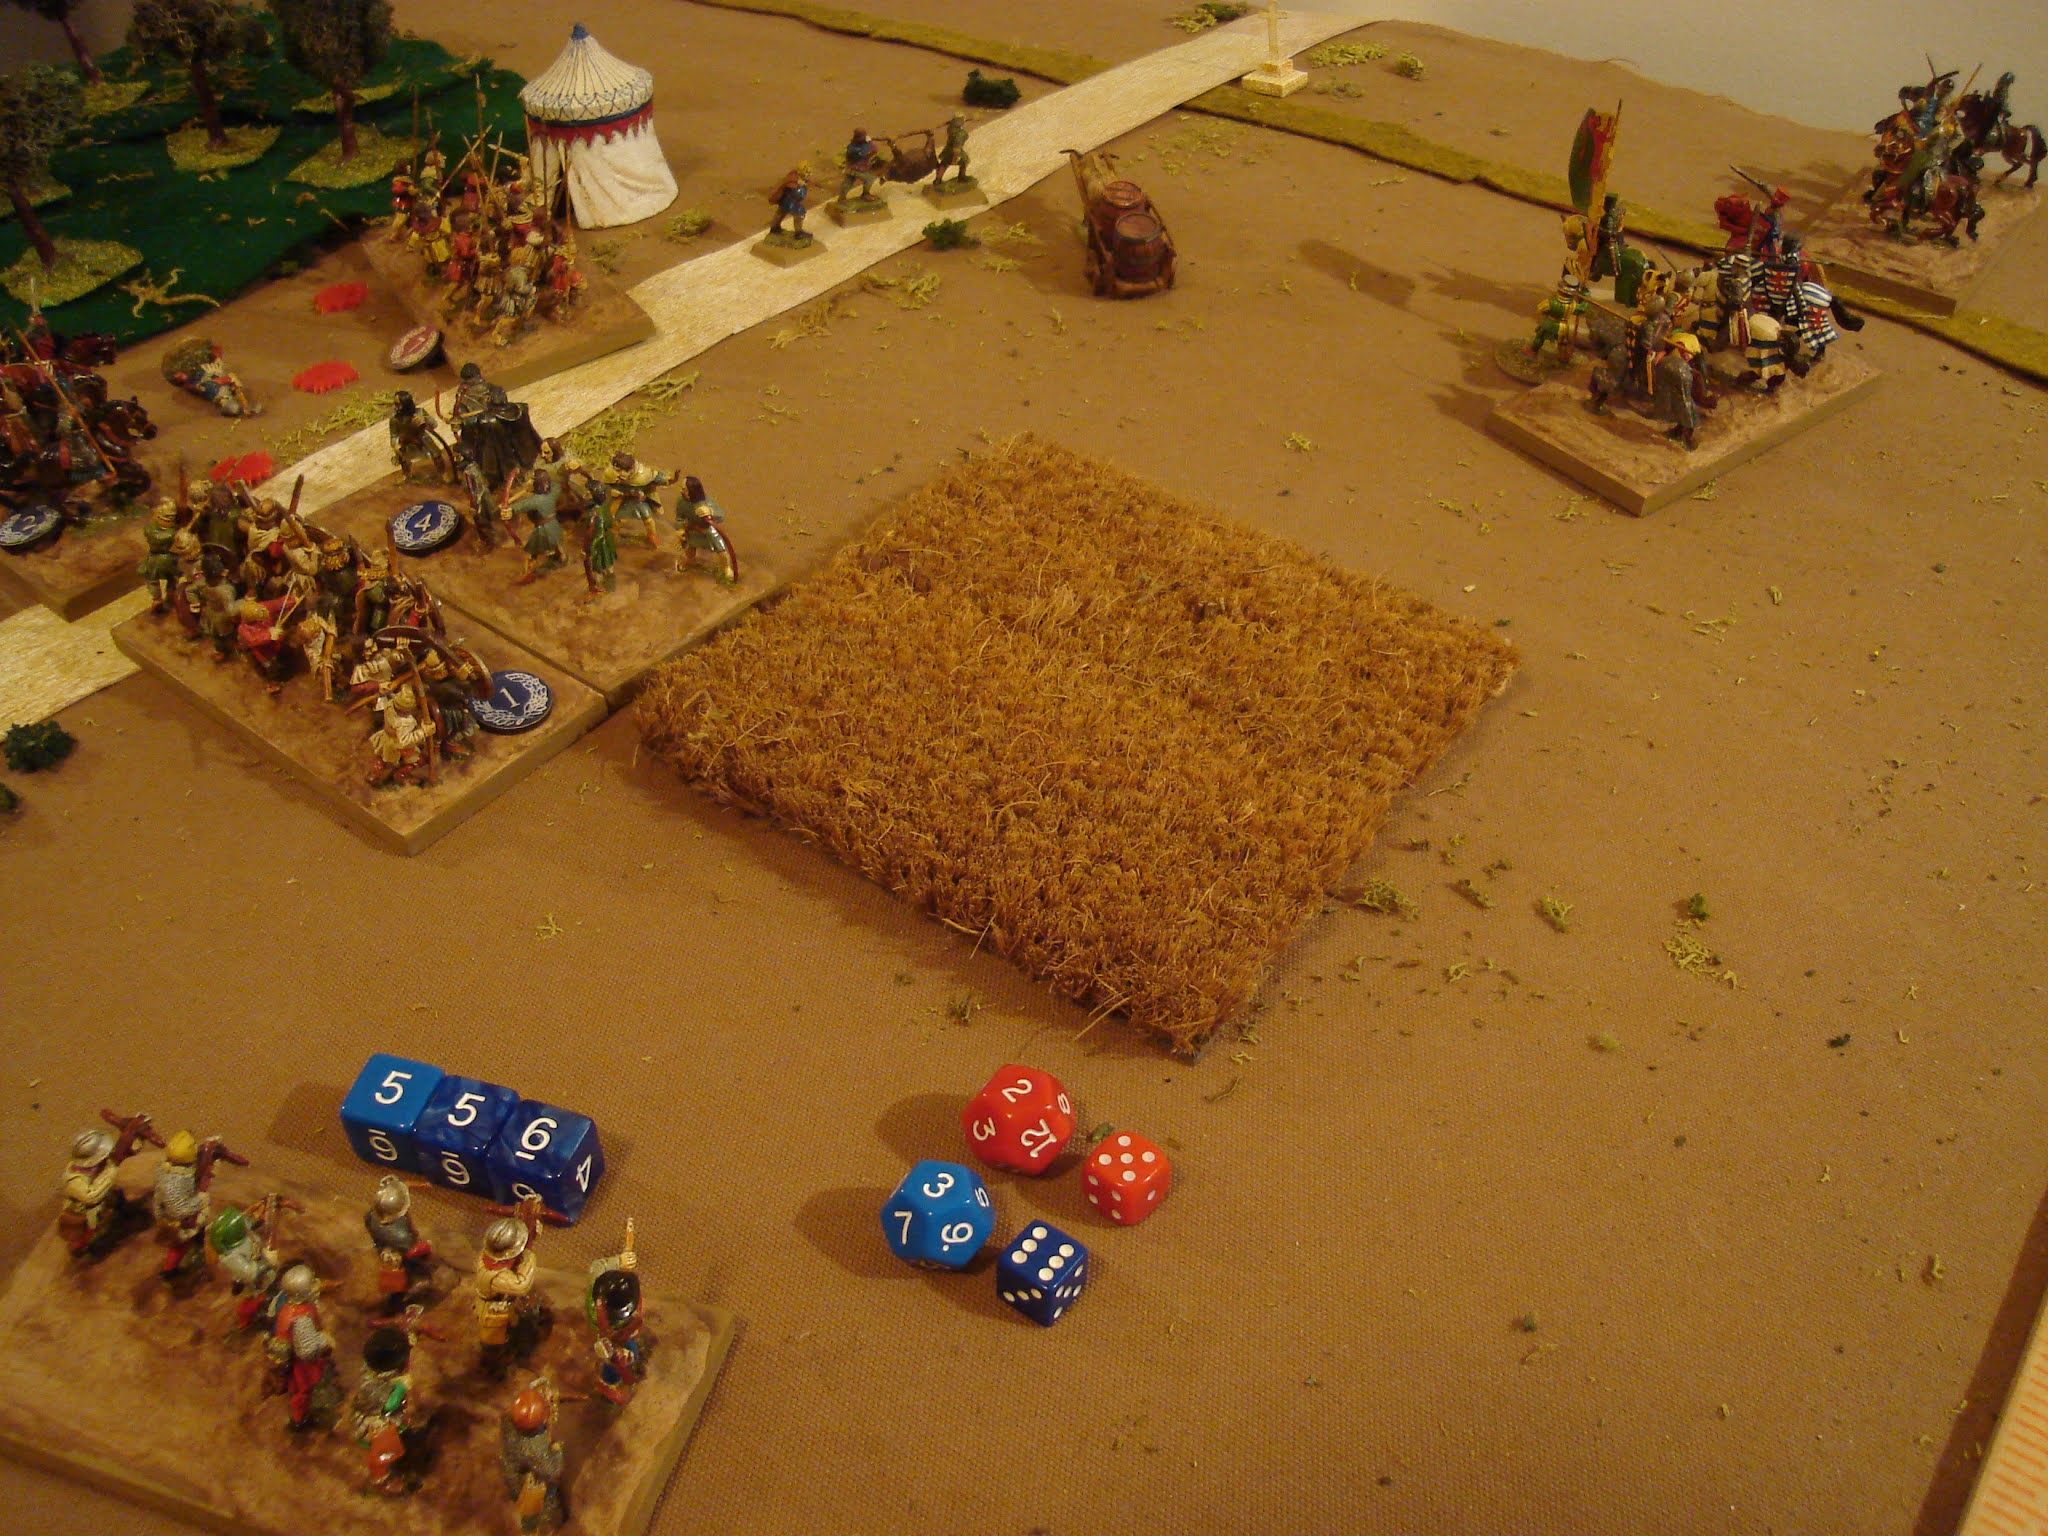
Turn 3. Sir Ranulf keeps the initiative 6-5 [Welsh need to win by 2 on a d6 to seize it and switch to acting first each turn]. Crossbows then deliver hail of bolts upon the Welsh archers heads in support of the following attack by the Freemen. The Welsh spearmen are broken, dragging Cyfwin with them, while the knights position themselves to limit the choices of the Welsh reinforcements that are about to arrive on the road.
Welsh Turn 3. Their cavalry charge one unit of knights, while their servants skirmish against Sir Ranulf. Both roll poorly and inflict no hits. Their Archers are doing better, actually!
....but on Turn 4 are broken by the freemen and Knights as Sir Ranulf keeps the IN again, 6-3.
By the objective, the Welsh teulu are getting the worst of it, altho they are not going down without a fight. They have taken on both Knights and rolled a bit low.
English Turn 5. Again holding onto the IN, Sir Ranulf's men flood up the center. Both Welsh mounted take a few more Hits and are nearly destroyed.
Welsh are losing 6-2 and 5-4 in the melees, and won't last another turn, I think.
English Turn 6 [forgot to turn over turn dice]. Both Welsh units are broken. As there are no more Welsh arriving until turn 9 [from the top left road] and no English units are damaged heavily, I can't see any way for the Welsh to win at this point.
Well, I've played this scenario a bunch, and I always find it hard for the defenders to win unless they have either a significant force advantage or the attacker makes serious mistakes. To me, the big problem is the last group of defender's reinforcements don't arrive until Turn 9. I realize they arrive near the objective, but with a 6-2 advantage that changes to a 6-4 on turn 3 [when one defender at least is dead, so a 6-3 advantage] there's little hope of the defender massing enough combat power to destroy enough attacking Units to blunt them.
If I had one piece of advice, I'd say it is to make the last reinforcements arrive Turn 6.
That being said, it is not entirely Neil Thomas' fault. While it is true that fast-moving attackers will typically engage the defenders by Turn 2, his turning rules allow a quicker retreat than mine do, so at least the fight will be farther back, closer to the objective and reinforcements. This leads to a 6-4 attack that is canalised down the road and around the bog. However, IF the rules allow for units to move in woods, e.g. skirmishers or any Infantry in the ACW, then the attacker will be able to flank the defenders fairly quickly, and they will need their reinforcements by Turn 6.
I played a couple of variations on the defender's tactics, and will post on these soon. It's good to get feuding again!
Today's story ends...
The dust of fleeing Welshmen and pursuing knights is settling, while the mercenary Crossbowmen care for the surviving Welsh wounded [as in, they stab them to death and care if they have anything of value] and pick through their belongings. The camp is thoroughly looted by the Freemen. Sir Ranulf sends out word to all that they must reassemble before the Welsh can counter-strike, as they must push on to the bridge over a river ahead that is too deep to otherwise cross, or the invasion will fail.


 Turn 3. The Big Picture is that while the Welsh have a bit of a battleline, it is being broken up. Still, the English are scattered around and not supporting each other well. The Welsh Archers are over-performing and may defeat a Unit of Knights!
 ...they break the Welsh Freemen in the center...
 ...and the Welsh Bowmen on the road...


![[from here]](https://images.saymedia-content.com/.image/t_share/MTc2NDYwNjE2NTc4NDQyNDUz/making-chain-mail-out-of-coat-hangers.gif)