
Miniatures? We don't need no stinkin' miniatures!

This will be a relief to some, heresy to others...
About 20 years ago, while at a convention, my little publishing company swapped our games [The Hell of Stalingrad, Fires of Midway CLICK] with the Your Move Games guys who were nearby. We got two decks of cards for Battleground Fantasy CLICK, Elves of Ravenwood and Orcs. And...they sat around in a box, until recently, when I pulled them out and decided I had to either give them a play, or get rid of them. After a few months of "I'll get to that" I decided to check them out at BGG and see the reviews. That was encouraging, so I finally gave them a playtest.
********************************************************************
BLUF: These are a great idea, and give a great game of historicals or fantasy. For a measly $20-40 you can have entire armies running around your tabletop with terrain, and it all packs into a small box / binder. Perfect to transition your boardgame friends to open table games such as miniatures. They can easily pick up their own card decks, thrown down the paper terrain and you can have at it.
While there is nothing novel in the mechanics or in the "take on things, either fantasy or historical" the game is well put-together and the mechanics so traditional that they are easily tweaked. For example, there's no ZoC rule, but it would be easy to insert it if you want it.
The rules reflect reduced effectiveness in combat in detail, with several factors coming into play, so one will be doing a fair amount of checking for modifiers, e.g. attacking a flank, fighting to the flank, etc, plus the use of the cards affects the values of attack and defense quite often. This is the main complicating and slowing factor of the game.
The nice thing is that one can take a pass on using the Command Cards, and even the Command system in general, for a much faster game. Again, it's easy to shape the game experience to how you want to play it given time and space constraints.
My only complaint is that there are no cards for generals and heroes [especially heroes for the fantasy set]. Altho the "effect" of generals is seen in the command system, it would have been appreciate to have some heroic elements, even if the card represented a hero and his bodyguard. Also, the font size on the cards is a bit small, and it slows the game down a bit to read the cards - maybe not an issue for those who have 20/15...
While there are lots of aspects to game play, there is an element where the player who remembers the most will likely win: cards, command point use, modifiers, etc. This _may_ result in tactics taking a back stage to the game itself. IOW, flanking a unit may have less effect than using the right card at the right time. Some will like this more than others.
There's a sale going on at the new publisher, Rat Trap Games, so go buy at least a basic set and terrain!
********************************************************************
Lots has happened with Battleground since 2005 or so, including the release of numerous factions, terrain, campaign cards, and two historical sets: Alexander v. Persia and the Second Punic War. Also, YMG has been acquired by Rat Trap Games, who are responsive and have great customer service.
Official website of IP owner, Rat Trap Games: CLICK
Best all-around support page for the rules at BoardGame Geek: CLICK
I found the 2.2 Fantasy BG Rules as a 30-page pdf here: CLICK
I found the full 3.1 rules here, this is the most updated ruleset: CLICK
The rules come with a 1-page Quick Start rules that can make it easier to demo in a very structured scenario, but may fall apart if players want to be cagey [i.e. you'd then have to refer to the main rules, anyway].
First, I ran a playtest with the quick-start rules, which use only the most basic bare-bones of movement and combat [fine with me...]. This was Second Punic War, so Rome v. Carthage. Working with the stat lines wasn't bad - every attack, you need to subtract the defender's values from the attackers, then roll lower than the difference. Typically, you need a 3-4 to hit, then a 3-4 to wound. Depending on the stats, you can get into some other numbers, e.g. hitting on a 5 or less, but only wounding on a 1-2.
Below, the Carthaginians eventually destroyed the Roman cavalry and ended up fighting the Triarii, who are pretty tough. There's no Zone of Control, so maneuvering is pretty free, potentially, but more limited in the full game with the Order rules. This took under an hour, even with looking up a few things and getting familiar with the cards.

In short, the Quick-Start rules make for good demos and introduction to the game. The next step is to start using the modifiers on the Quick-Reference Cards [QRC], and any special rules on the unit cards themselves. This enhances the tactical aspect of the game but only adds a little complexity.
For the larger playtest, I picked two pre-made 1500 point armies for Orcs and Ravenwood Elves, right off their unique faction cards. I figured, the designers should know what will be a good matchup, right?
Scenario # Surprise Attack. Whoever owns the crossroads Turn 15 wins. The road and woods are typical, the bear fur thing is a bog and impassible.

Altho the units move a bit slower than in OHW, I figured I'd just see how things went and if necessary would make it Turn 20 if there wasn't a clear winner. Often, in the RAW OHW, victory is clear much earlier than Turn 15, anyway.


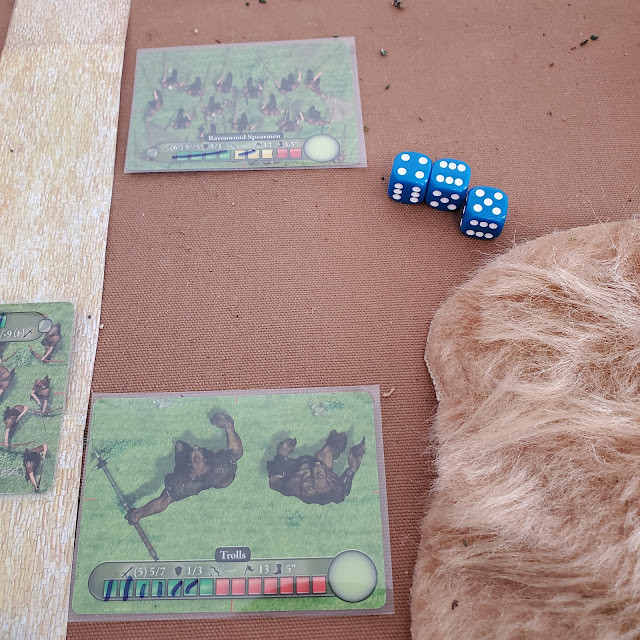
Elves play "Force" card and manage two wounds on the Trolls.

Orc Turn 2, they keep pouring onto the board, using "Lash" to keep the units moving as quick as possible, trying to beat the Elf reinforcement schedule. This produces interesting tension, as the defender - not needing to move quickly - can spend Command Points to collect cards and improve fighting ability. The attacker has to carefully weigh the benefits of enhancing fighting ability v. moving quickly to enhance chance of achieving the victory conditions. So, plenty of player decisions to make at the highest level, and they will matter.


Goblins bows inflict another Wound on the Elf archers who then have to check morale as they used all Green boxes - they pass pretty easily.

Elves return the favor, and the Goblins fail morale and are Disordered.

In combat, the trolls rout the spearmen, who rolled pretty badly for morale, a '15'.


Meanwhile, the trolls are rallied [rallying is too easy in my opinion - no roll, just spend command points. I'd prefer a morale check to pass] and press on.

Despite being flanked, Bears are still smacking Goblins around...Wolfriders are destroyed, and only the Crazed Goblins are still in the fight!

Orcs get stuck in, and are good "heavy" units. They beat up the Archers who pass morale with a great roll. The trolls are weakened and having trouble hitting.

Generally, the elves are outclassed by the orcish center, and they continue to Rout them, looking to make more headway towards the objective. It is the Elves priority to prevent this from happening, of course.

Bears blow a pretty easy morale roll when they go green to yellow, stop at table edge [will leave next turn if not rallied]. Still, destroyed the Crazed Goblins...

Overview of situation at Turn 9 end. Trolls and Goblin Raiders threaten the crossroads - but Stag cavalry is on the way, and the Bears WILL rally...
 Orcs are pushing ahead with all they have, but Bearkin are wearing them down.


Using Spirit Guidance and some good rolls, the archers inflict two more Hits on the menacing Trolls as they lumber forwards - they heal one hit a turn, so you need to keep at them!


But the Elvish swords aren't done yet! They need to keep the Trolls fixed in the narrow roadway pass to delay them, even if it means they die - they lose their yellow boxes, and are now looking at just two red hits left - they roll a '9' and pass morale.

Thanks to the use of cards, they also manage to get the trolls into the red - they have no yellow boxes - and they have to check and fail, routing from melee.
Meanwhile, the flanking force has arrived, and the wolves are dancing with the bears, and getting the worst of it. Use of cards is helping both sides a little bit.


Using maximum effort, Trolls nearly get onto the crossroads, supported by a pretty tough Orc unit. They other orc unit fails to rout the Bearkin, who roll great.

Goblins are barely hanging on, being outclassed by the Bares, erhm, Bears.

With the demise of the Goblin Raiders, the Bears end up fighting the orcs, right at the crossroads. Despite using a card, the orcs miss completely as do the bears. This is a possibility of the mechanics if you roll badly - no effect.

Everyone getting stuck in at the objective. Bears rout again, but elf infantry is pinning some orcs down, while the remnants of the Ravenwood force surround the trolls to - finally - finish them off.

Using cards, and great rolls, lots of damage done at the objective.
 ...and BOTH orc and elf rout from melee [this is another aspect of the mechanics - as combat and results are simultaneous, it is possible for both to Rout].

Bears and Stag cavalry take on the orcs. All are on their last few hits. Stag Cavalry roll hot and wipe out the last orc unit on Turn 15. Decisive Elf win!

Final hands - Elves burned lots of cards, orcs had a few left, mostly because they either didn't fit the situation or I forgot to burn them turns 14-15.

Casualties on both sides were heavy. Orcs were wiped out, Elves barely had two units left at the end. Definitely a hard-fought fight!


Overall, I liked the system altho it is a bit detailed for my taste. There are plenty of rule options, and lots of "splicing the mechanic" for partial benefits / penalties. This requires lots of head work to keep on top of the various modifiers and maneuver options, plus cards, command points, etc. Overall, a very tradition 1980s-1990s type of rule set, with a "More mechanics is MORE" philosophy.
As stated above, one can easily drop lots of the detailed options, and play at a simpler level, e.g. eliminating command points / cards / orders. This will speed up the game. Playing with the "Quick-Start Rules" is even easier.
My choice would be to streamline things a bit, eliminating some of the special rules and multiple-choice mechanics to concentrate on bigger options that have more impact.
CARDS: they affect game length, and can also cancel out.
Game length can get long if you are using the cards. If one side is working hard to stay in the fight [defensive Blue cards] while the other is working hard to destroy the enemy [offensive Red cards] the net effect over a few turns is mainly to slow things down as the cards cancel out.
Sure, the cards are random, so there are definitely times when you lack cards you prefer. However, a skillful player should be able to save cards that they will need in the future without much trouble. Then they will get burned as you engage in heavy combat. They add an element of skill in game play and planning, so YMMV.
The two factions were great, each having plenty of flavor in very traditional Tolkein / D&D way. If you grew up in the heyday of those genres, you will definitely feel completely at home with the flavor of the Ravenwood Elves and the Orcs.
Again, there is very little truly original material in this game system. It is full of tried and true mechanics that most gamers will have seen repeatedly in historical games. The main draw is that the game is super-portable and can be played at multiple complexity levels for different types of players. It is also a perfect crossover game for your board-game bound friends, introducing them to miniatures gaming at very little cost. Like many card games, this is a complete game you can carry along with you to any boardgame event and throw it on the table quickly. I recommend getting the terrain pack as well, which adds to the visuals and tactical options.
Can't see how one can go wrong with this game - it deserves a lot more audience and a lot more play, go get yours today as there's a sale at Rat Trap productions!
Next Post: Battleground Historicals with One-Hour Wargames!


