Monday, December 5, 2016

OHW: Scenario #12, "An Unfortunate Oversight"

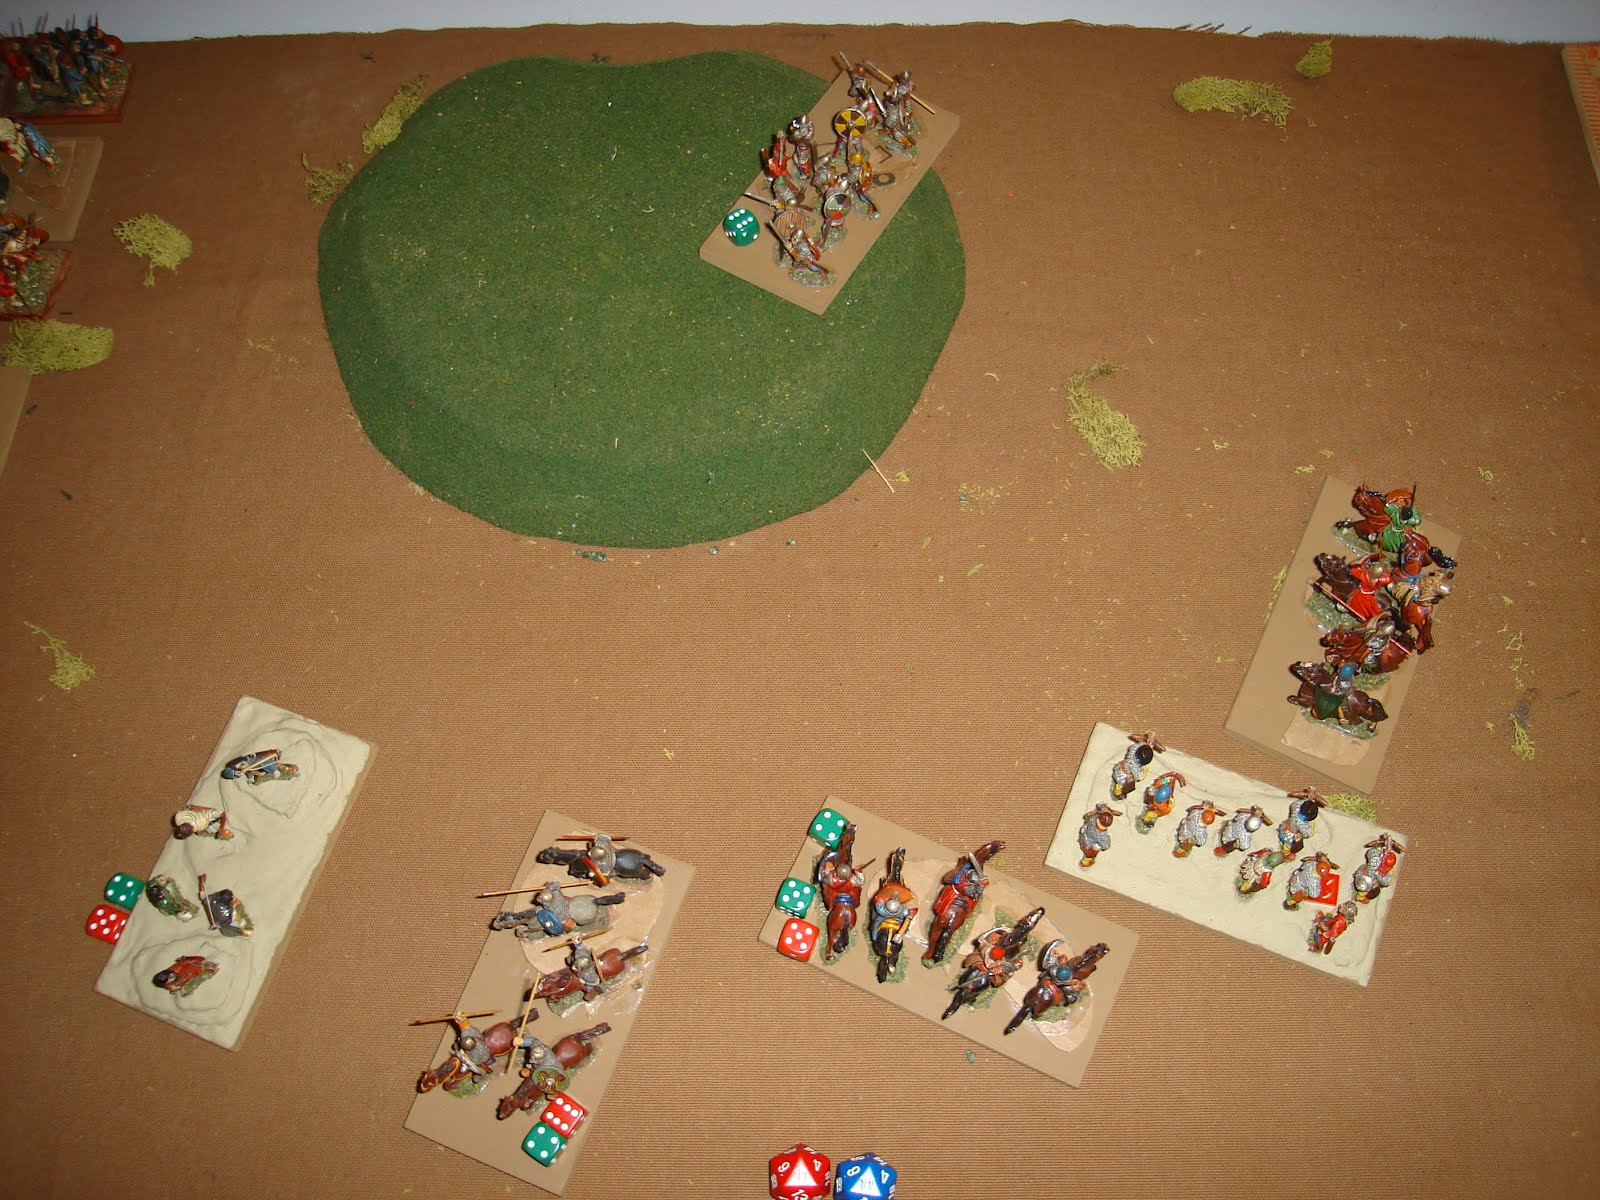
The battle's T.12 climax - who will hold the hill, and therefore the river crossings??


Having done the most deliberate simplification of the rules in a while, it was time to playtest them. I changed all measurements to Base Widths [BW] and Base Depths [BD] which as I play them are 5" and 2.5" [a BD needs to be 1/2 of a BW].  Note that these are also the size of my single bases.  I shifted diced movement [which I quite like] to optional rules.

I'm quite pleased with them, the combination of a single base that is easy to handle, pleasant to look at [a little diorama] and simplifying a few things got some games down to 30-40 minutes.  This is about what I can squeeze in on a typical weeknight after the Little Man goes to bed and before it is my bedtime.

I've now played this scenario about 8 times. I played it once just like this so this is technically the second playtest of these rules and scenario; wanted to make certain that there was nothing seriously wrong before I spent all the time taking pics and such. This scenario presents a number of challenges to both sides. For Red:

  • holding the town and how best to use it as a flank support is important - the game is easily long enough to allow the Blue player to attack on the level ground,
  • to dismount the knights and where to put them - on the flat or the hill,
  • related decision - keeping one mounted knight in reserve or just a Freeman.
Blue has a few important game decisions as well:
  • how best to challenge the town and its river crossing. I've attacked with dismounted knights supported by a hero and banner, or just threatened with Brigans,
  • To attack the hill directly or screen the hill while attacking the level ground between the town and the hill instead,
  • placing the one Bowmen - shooting into the flat or crossing at the ford in support.
The combination of decisions and their interaction shaped all the previous 7 games I played. I tried numerous combinations, and have to say that how Red sets up shapes everything after - how Blue counters it and then attacks. Red then has a short opportunity to prepare for a response, and the rest comes down to some dice results and mid-game decisions. These boil down to Blue retreating Knights to rally v. Red advancing to threaten them while they do so. The scenario has never been dull and only one-sided a couple of times.

As always, my rules offer a choice between the D6 [more variable] and the D5 average die [2, 3, 3, 4, 4, 5 sides] so I refer to the die rolls as "Dx". I choose the D5 as more average and rewarding skill and decisions more than luck, but that's my style.

The book's scenario 12 below. Red sets up first, Blue moves first but can't shoot on Turn 1. Length is 15 turns as always, with 6 Units per side.


Red Force. Rolled a '1' on my variation of NT's force dice. This resulted in only 2 Knights, but 2 Bowmen, and 2 Freemen. As they are outnumbered 2-1 in Knights, Red wisely chooses to dismount them as Serjeants. In these rules, that means they inflict melee Hits equal to Dx same as Freemen, but take 1/2 Hits due to armor and cohesion. The Bowmen shoot Dx but melee at Dx-2. Freemen are just plain average performers.

This force represents a quick mobilization with few mercenaries by a lord defending against a raider or invader. Hence it has some knights, bowmen from castle garrisons and the better of the freemen or continuously employed mercenaries, and then two units of local Freemen one might consider the best of the militia, or "select Fyrd". Figures are Old Glory Welsh archers and spearmen, with OG Swabians and Gripping Beast late Romans to front [some of you might recognize the banner of the Welsh Lord and his teulu!]. In my mind, this is a Welsh force trying to hold a river crossing against a raiding force of Anglo-Normans.


Blue Force. With a '5' they get 4 Knights, a Bowmen and a Brigan. I left the Knights mounted as they need the mobility and Dx+2 melee dice. This is a fast-moving force, perfect for this scenario as the Brigans move almost as fast as Knights. The Bowmen could be fielded as mercenary crossbow as depicted, shooting at a +1 and the lesser knights to left could melee at only Dx+1 to even it out, but I ended up just fighting them all straight up. 
The crossbowmen are Foundry, the rest Old Glory.


SETUP. Red must set up within 12" of the town - they've made "an unfortunate oversight" and missed the ford that flanks them. Red decides to defend the crossing with a Bowmen, defend the valley with a Freemen and a Bowmen supported by the second Freemen. The two Serjeants will take and hold the hill. Their armor and being uphill means they take 1/4 Hits, a pretty powerful help that will make them last a long time unless they're flanked. 

Blue threatens the town crossing with Brigans supported by Bowmen, who can also shoot across the river into the Red Freemen. Stacked at the flanking ford are all four Knights. There's no move penalty to cross the ford, but defenders on the riverbank take 1/2 Hits - this means the bowmen in the village take 1/4 melee Hits, 1/2 defending the ford, 1/2 defending the town. For shooting, the ford doesn't help, so they'll take 1/2 Hits. 


Turn 1. Blue shoots and does some damage, but the Bowmen run out of missiles. The Knights begin crossing. Red moves onto the hill, and advances both valley Units since the Blue Bowmen have no missiles. This allows them to threaten the crossing knights with missiles but at no danger to the Freemen being torn up by missiles. Small things can make a big difference when it comes to decisions!


Turn 1 Shooting. Ok, I forgot that Blue wasn't supposed to shoot at all. But if they'd done this in Turn 2, there wouldn't be much difference. Blue rolled a natural '5' and the Bowmen get 5 hits but run out of missiles - these are halved and rounded up due to the village cover and results in 3 Hits net. The Brigans throw some javelins and at Dx-2 get 2 Hits, halved to1 Hit. Red Bowmen inflict 3 Hits on the Brigans who are a bigger threat than Blue Bowmen with no missiles. Overall, this exchange was something of a waste for Blue.


Turn 2. Blue Knights continue to advance. They face the lead Knight to threaten the lead Red Serjeant with a charge. The other three are still maneuvering. Blue Bowmen start heading to the ford - without missiles, they aren't much use south of the river. Red occupies the hill and prepares in the valley, but Blue is still out of missile range.


Turn 3. Blue finished deploying into threat range. All four Knights can charge to contact. Welsh Bowmen inflict 4 Hits on opposing Knights - probably just angers them! The Welsh Bowmen in the town hit the Brigans for 4 then 5 Hits, going out of missiles also. This has encouraged the Brigans to depart bow range lest they be destroyed. As there's an option to recover 1-2 Hits a turn, they'll be using that on the South side of the river.


Turns 4-5. Calculated risks... Blue Knights 3 charges the Welsh Bowmen in the valley. Knights 1 & 2 support by threatening a flank charge on Red Serjeants 2 if they charge the flank of Knights 3. Tempting, but the victory condition is the hill, so Red Serjeants opt to advance a little into charge range, threatening to charge off the hill and get the first blow. The Bowmen do little damage in the melee, while the Freemen roll 4 Hits twice. Still, not enough to defeat the Knights, they will most likely die next turn. I'm now realizing that I should've already turned the Welsh Bowmen in the town to flank and positioned them on the edge of the town ready to move out. The Brigans sit still and rally some Hits off.


Turn 6 Blue. The Red Units in the valley are destroyed. Altho they've a second line of Freemen, the fact that there are two Knights available puts them in an awkward position; the choice is to charge in and get the first blow, which may allow them to destroy the Knights in front of them who have 6 Hits, or to pull back and protect their own flank. I choose to go after the Knights. This is where having the Bowmen ready to move would've helped!


Decision Point. Taking the Knights in the flank is NOT a good idea...when a unit of knights can charge your rear while the other your flank [Dx+2 x 2 x 1/2, still pretty bad]. The ruler shows the 10" [2xBW] move range of the Knights...just enough.


But a small, threatening advance IS. Again, threatening to charge off hill, get first blow.


Turn 7, Blue. The Red Welsh Bowmen don't make it into contact range. The Blue Knights hit the flank, roll a '4' +2 = 6 x 2 = 12 Hits. The Freemen are destroyed and the valley is looking pretty empty. A single Bowmen with no missiles isn't much use, really. Altho they can now charge since they're out of missiles, they're melee isn't very good and they're alone. For this game, the failure to switch the Red Bowmen to face the valley a turn sooner will be the critical failure of leadership for Red. The 5" Base Width charge is just out, shown by the position of the blank base.


Turn 7. Red moves Bowmen into flank charge range, but out of the Blue Knight's "charge to flank" range, which are 5" and 2.5" respectively [Base Width v. Base Depth illustrated by the blank base]. Running out of options, Red decides to hang onto the hill for dear life and Retreats a BD with both Serjeants who, after all, are sitting on a win at the moment. Anticipating all this, the somewhat recovered Brigans are moving to cross the river even as the crossbows cross the ford.


Turn 8. The weakened Knight 3 retreats to recover some Hits while Knight 4 faces the threatening Welsh Bowmen. Having lost three Units and with Blue closing in with additional Units, Red decides that it is time to get a bit offensive. Neither Serjeant can be hit in the flank, and they threaten to charge next turn. The weakened Knight 4 just may lose to the Bowmen in a straight up melee, depending on the dice - they've 8 Hits.


Turn 9 & Blue 10. Blue can't abide being goaded, and charges Knight 1 into the lead Serjeant, covering with the awkwardly positioned Knight 2. Knight 3 was supposed to spend time rallying. Red challenged this by going for the flank of knight 1, which necessitated that Knight 2 & 3 charge in support. Charges on the Serjeant are doubled for flank/rear, halved for armor, so they take 10 Hits but drive Knight 1 to 13, almost dead [15 Hits].


Red Turn 10. Red faces Serjeant 2 against Knight 3 and now only has one Knight to flank - he may survive - and rolls a '4' driving Knight 4 to 14 Hits. Serjeant 1 destroys Knight 1 with 3 more Hits. It's getting quite hairy in that center area, anything might happen.


Turn 11. Red cleared out the center and has gained some honors, but has to retreat to the hilltop and its defensive bonuses - note that the hill + armor - rear leaves them at a net halving of Hits, so it is worth getting up on the hill. Blue has Knight 3 almost dead, but knight 2 is pristine. The Welsh Bowmen and Knight 4 are in a standoff thus far. The Blue Bowmen aren't very dangerous, but their mere existence is a long-term threat to Red, so getting away from them is a good move.


Turn 12. Blue must charge, and does so, inflicting a net '5' Hits, while the Serjeants blow their roll and inflict '2' back. Knights 4 positions for the flank charge.


Turn 13 Blue, and Scenario End. Well, it was hard-fought. But even with hill bonuses, the flank charge results in the destruction of Serjeants 1.


Interestingly, the fundamental decision points that resulted in Red's loss came about early in the game. I should've moved the Bowmen to help in the valley sooner, and perhaps not tried to wipe out the Brigans with shooting [but it was too tempting, I got them to 12 Hits, only one more shot would've done it...] since they ran out of missiles and then weren't nearly as much help in the valley battle that determined the outcome.

Another great scenario, it proved interesting over many plays and the rules delivered just what I want - plenty of interesting decision points and lots of play in a short time, under one hour per the original intent of the "One-Hour Wargame" rules. Yet, my variation has both better defined mechanics and some additional historical nuance. Worth the effort!


Now that the rules are where they need to be, I'll have to finish drafting the optional rules and the army lists, which are leaning towards using the same matrix as NT does, with just a few more variations on the core Units.

Wednesday, November 23, 2016

Latest Feudal Rules: 30 DEC 16

Well, NT strikes again. I played several games and decided that some of the attempts to restrict moves and such weren't worth it. Who is that guy anyway???  The latest rules are below, and are both a little simpler and a little subtler, most likely the way NT would like them. I'm also pleased to have finally decided upon the Unit terms after much internal debate. The main difficulty is that most chroniclers didn't use a separate term for mounted v. dismounted knights/men at arms. In the end, I chose the fat part of the bell curve and used Serjeants for the better foot, and switched to Freemen for the greater levy of foot which was also called Select Fyrd, Arriere-ban, communal militia. We would largely regard it as militia in this day.

EDIT: These are the simplified rules as played in the next post. Movement is now fixed instead of diced, and more optional rules have been added along with the force matrix I've been using and some suggestions for alternative armies that don't fit the basic feudal format.

12.30.16 EDIT: re-worded the LoS rules a bit to make it simpler and clearer, added a few ideas on troop types, refined the personality rules a bit, explained dismounting knights [don't know HOW I overlooked that!], small things mostly.


FEUDAL WARGAME RULES: game the 90%!
A battle game for 1000 warriors a force on a 3x3-4’ table, A.D. 1000-1300 or so.

GAME CONVENTIONS
0.00 Grey Areas are resolved by defining the issue in “either/or” terms and rolling off, the “Triple-Zed Rule”.
0.1 Measuring may be done anytime.
0.2 Dice used are six-sided, with either 1-6 [D6] or 2-5 [D5] on the sides [the D5 “average dice”, has pips of 2, 3, 3, 4, 4, & 5, no 1 & 6]. Pick one to use for all game rolls. Due to this choice, dice are referred to as “Dx”.
0.3 Scale is 5-10 minutes of action / inaction; 6” = 24m [1”=4m]. A 25mm fig=20 / 15mm fig=10 men.
0.4 Units represent 160 foot, 80 mounted / lights in five common feudal warrior types:
a.    Knights or milites, are feudal nobles with mail, helm, lance, and shield on warhorses, supported by retinues.  They charge aggressively but lack cohesion and horse armor so are vulnerable to casualties.
b.    Serjeants or servientes, or mercenary stipendarii, are footmen with spear, shield and hand weapons. Those armored are in the front ranks, often stiffened with dismounted knights. Veteran captains, mutual support, experience and obligation to nobles or cities make them the best of the foot.
c.    Freemen or liberi are the lesser experienced and armed men of a province or town called to fill out the ranks, especially in sieges.  They’ve less élan but support the knights with numbers in solid groups.
d.    Bowmen are serjeants, liberi or mercenary stipendarii, with bow or crossbow, who may shoot volleys. They’ve enough missiles to endanger targets and affect the battle but avoid melee until they run out.
e.    Brigans or ruttae are bandits or camp-followers with knives and improvised weapons, throwing rocks, javelins, et al.  The best are fierce raiding warriors.  They harass from difficult terrain, charging vulnerable opponents. Also called ribauds, bidets, brigans, kerns, jacquerie, etc.
0.5 Figures & Basing. Units have a Front of 4-6” and a depth half that. I use single 5”x 2.5” bases with 3-5 mtd / Light figs, 12-16 foot. WRG/DBx bases work on 12x6cm sabots, or any 2-1 Front-Flank ratio.
0.6 Base Width [BW] & Base Depth [BD] are used for measurements and must be in the above 2-1 ratio.
0.7 Front, Flank & Rear are measured from Unit corners, 45° arcs off the sides Front, Rear [back] or Flanks –left and right. A Unit’s Front center point shows if it is in a Target Unit’s Front, Flank or Rear Arc.
0.8 Bows are missiles propelled by a device, such as bows, slings, and the new light crossbows.
0.9 Javelins are missiles thrown by a person, including throwing spears, javelins, hand axes and rocks.
0.10 Terrain has two types, Area and Linear.  Area are 6-12” per side or diameter.  Linear are 6-12” long x 1-3” wide. Units are Defending terrain if they are within Area terrain or lining the edge of intervening Linear terrain.
a.    Hills. Area.  Defensive bonus if uphill of melee opponent.  Define “uphill” according to hill’s appearance.
b.    Woods, Marsh.  Area. Only Brigans may enter. Defensive bonus.
c.    Camp & Village. Area. Defensive bonus.
d.    Lakes & Rivers, Cliffs.  Impassible Area and Linear respectively.
e.    Walls, Ditch, Riverbank (at Bridge or Ford). Linear. Defensive bonus.
f.     Roads. Linear. Road movement cancels terrain restrictions, e.g. crossing a river.
0.11 Line of Sight.  LoS is measured from a shooting or charging Unit's Front center point:
a.    To a BD of the Target Unit’s side within which the attacking Unit is located – it can only be in one!
b.    The LoS requires a gap >BD through which to trace it. 
c.    It is obstructed by anything a figure height or taller, e.g. hills, woods and Units, but may be traced by a Unit on a height clearly taller and if the obstruction is closer to the Sighting Unit than the Target Unit.
d.    Units lining the edge of Area or Linear terrain have unobstructed LoS into the open.
e.    LoS a BD long may be traced between Units across one side of Area terrain, e.g. woods, hill [crested or plateau], but not through two sides.
f.     Units must have LoS to a Target Unit at the time of a Shot or Charge.
g.    LoS is blocked to a Target’s Flank with a friendly Unit under a BD away, [measure front-to-front and rear-to-rear corners]; obstructing terrain within the BD of a flank does the same.
Note that Line of Sight is used for both Shooting and Charges, and that a Protected Flank restricts both.
PLAY SEQUENCE.  A full turn has each player taking four phases:
Attacker  [player A]: 1) Shoot, 2) Move, 3) Melee, 4) Rally
Defender [player D]: 1) Shoot, 2) Move, 3) Melee, 4) Rally

1) SHOOT
1.1 Shooting Basics.  Bowmen shoot in Phase 1 and Brigans in Phase 2 if they are not in melee and they’ve a LoS [0.11]:
a.    Range is 2BW for Bows, BW for Javelins, measured per LoS above.
b.    Bowmen that Shoot cannot move in Phase 2. Brigans that shoot in Phase 2 cannot Charge.
c.    Shooting into a Melee is permitted if there is LoS to a Targeted Unit’s side.
d.    Protected Flanks. These may not be shot as there is no LoS to them [0.11g].
1.2 Resolving Shooting. Roll a Dx for the number of Hits against the Target Unit, modified in order:
a.    Brigans shooting are -2,
b.    Terrain.  Units defending woods, camp, village or walls halve Hits,
c.    Armored.  Serjeants halve Hits from shooting,
d.    Unshielded or unprepared. Double Hits from Units shooting into a Rear Arc [cf. 0.7]. 
e.    Stacked Modifiers. The max benefit is ¼ Hits [1/2x1/2] and one halving and doubling cancel out.
f.     Round all fractions up. This increases the minimum number of Hits which accounts for fatigue.
1.3 Place a Hit Marker on any Unit that was Hit by a Shot. Something red is easy to spot!
1.4 Missile Limit.  Brigans and Bowmen are out of missiles if they roll a natural ‘5’ to Hit - mark the Unit.
1.5  Remove units with 15+ Hits from Bowmen at the end of Phase 1, from Brigans and the end of Phase 2.

2) MOVE
2.1 Move Basics.  Players sequentially; select a Unit, state if using the Fast bonus, then move the Unit in a straight line any part of the total amount, using Turns as allowed.
Class 1  Serjeants, Freeman, Bowmen   Move  BD       Fast +BD  
Class 2  Brigans                                      Move  BW      Fast +BD                   
Class 3  Knights                                      Move  BW      Fast +BW                  
2.2 The Move rate allows Turns [2.4] a Charge [2.8] and a Retreat straight back [2.4c].
2.3 Fast Moves require a Unit start and remain a BD away from all enemy Units unless it is Charging [2.8].
2.4 Turning. Turns are not measured but are movement.  Units rotate on their center up to 180°. The corners and edges of Turning Units may pass over Units and terrain, but they must end their move clear. A Unit may always rotate 180° [an “about face”] or move back enough to make a 90° Turn and then move:
a.    Knights, Serjeants, Freemen and Bowmen may Turn once, at the start OR end of their move.
b.    Brigans may Turn twice, once at the start AND once at the end of their move.
c.    Retreat from Melee is allowed for Unit’s in Front contact with one Unit from a slower move Class; the Unit makes a Move at least a BD straight back; it cannot Shoot.
d.    Facing an Attacker is allowed if a Unit is in Melee contact with enemy Unit(s), none on its Front. It turns a full 90° / 180° to face one contacting Unit with its Front side.  Adjust enemy Unit bases to maintain contact.  If space is a problem, leave as-is and mark that side as the “Front” [cf. 0.5].
2.5 Gaps & Interpenetration. A gap over a BW is needed to move between two Units. A Gap over a BD is needed to move between Terrain and/or Units. Brigans may move through other Brigans, but must move entirely clear of the stationary Brigans. No other Interpenetrations are allowed.
2.6 Moving and Shooting. Brigans with Javelins may Shoot before or after their Move [including all Turns].  Bowmen may not Move if they shot in Phase 1 [1.1b].
2.7 Charging requires either a Front Arc LoS to a Target Unit that is less than a Fast Move, OR that the Target Unit be within a BD of the Charger’s Flank Arc. It requires at least a BD of edge-to-edge contact:
a.    Brigans may only charge a Flank or Rear, and only if they did not Shoot. 
b.    Bowmen may only Charge when out of missiles.
c.    Contact is achieved by measuring the LoS; if it is equal or less than the Charger’s Fast Move distance, or equal or less than a BD from its flank, the Charge may be made. Move the Charger’s Front into as much edge contact as possible given any space restrictions caused by Terrain or Units.  A Flank charge always results in only a BD of contact. Front or Rear charges must be able to fit at least a BD [half] of the Charger’s Front against the Targeted side, maximizing the Contact as space allows.
d.    Contact is allowed by only one Charging Unit on each Target side, Front, Rear and each Flank. 
e.    Protected Flanks. These may not be Charged as there is no LoS to them [0.11g].
The goal is to get Charging Units in full edge contact of at least a BD, despite terrain modeling, basing or sabots; also to reward flank protection while penalizing unprotected flanks and rear.  If disputed, cf. 0.00!

3) MELEE
3.1 One-Sided Melee.  Units only inflict Hits during their own player turn and only on one Target Unit in Frontal Contact.  Melee includes lulls in action as both sides catch breath and exchange insults in close proximity.
3.2 Resolving Melee. Roll a Dx for each attacking Unit to get the Hits on the Target Unit, modified in order:
a.    Unit Types. +2 for Knights and -2 for Brigans and Bowmen. 
b.    Terrain. Units uphill, or defending woods / marsh / village / camp / river bank / ditch / wall halve Hits. 
c.    Armored. Serjeants halve Hits.
d.    Unshielded or Unprepared.  Double Hits from Units Contacting a Flank or Rear.
e.    Stacked Modifiers. The max benefit is ¼ Hits [1/2x1/2] and one halving and doubling cancel out.
f.     Round all fractions up, even quarters, as for Shooting [cf. 1.2f].
Melee concludes with the elimination of Units or their retreat from Melee [cf. 2.2]. 
3.3 Place a Hit Marker on any Unit that was Hit in Melee. Something red is easy to spot!
3.4 Remove Units as soon as they get 15+ Hits.

4) RALLIES
4.1 Rallying. Units eligible to rally off Hits due to this or an Optional Rule do so now. 
a.    Units that didn’t Shoot, Move or Melee may Rally off 1 Hit.
b.    If they ALSO do not have a Hit Marker, they may rally off 1 additional Hit.
c.    Units that pass 10 Hits may not rally to below 5 Hits – use one red die to mark its Hits.
4.2 Hit Markers for the Phasing Player’s Units are now removed.


OPTIONAL RULES

PERSONALITIES
These come in several types and their use is encouraged since so much of Feudal warfare was about people and personalities.  For every three Units in a force, a player may pick a suitable personality figure.  All function as a Unit upgrade that may transfer to another Unit within 6” at the start of the friendly Movement Phase unless the Unit is in Melee.  If the Unit is destroyed, the personality is removed with the Unit.
·         A Knight Errant is a warrior with renowned personal fighting skill honed in battles and tournaments like William Marshal.  He inspires others with his skill so gives his Unit +1 Hit in melee combat.
·         A Constable is a powerful Lord, such as Earl Robert of Gloucester.  He knows that fear and his willpower keep men fighting alongside him, so his Unit may Rally even if it Moved.
·         A Marshal of Horse knows how to handle knights in their conrois on a battlefield – he gives his Knight Unit an additional Turn at the end of movement.
·         A Marshal of Bows knows how best to control and loose volleys against the foe – he gives his Bowmen +1 Hit in shooting.
·         A Brabanter or is a mercenary captain of renown, such as William of Ypres. He is an expert in gathering reliable veterans for service, and allow his unit to re-roll its hit dice in combat [the result stands, however, even if it is the same or worse!].
·         A Banner is an upgrade to any personality above.  The Banner is a prestigious symbol of the personality that inspires his followers.  It allows a Unit to Rally despite a Hit Marker [4.1b]. 
o   It does however count as another personality.
o   The Personality, and his banner, must stay with one Unit of Knights or Serjeants for the battle.
·         A Christian Priest may be used to rally Dx bonus Hits once to one Unit, since he has a holy relic, standard, powerful prayers, etc., however the Unit must obey the Rally rules. Remove the priest from the Unit once he’s inspired them, he’s tired and wants to go back to the monastery to pray!

Rallying and Tired Units
Units that have passed ten Hits are Tired and -1 to all Dx rolls – Shooting, Moving and Melee. Use one Red die to mark the Hits.  This represents unrecoverable fatigue and casualties in a typical 10-15 turn battle. Rallying undisciplined feudal warriors was difficult; instead of automatically rallying hits, use this rule:
·         Units that didn’t Shoot, Move or Melee, and without a Hit Marker, rally 1 Hit on ≤3, 2 Hits on a 4+.

Savings Rolls
Some love’em, others hate’em.  The good thing is that they reduce math and give a Unit a chance to endure [or collapse…] unexpectedly.  They also keep both players involved in a Turn.  Simply roll a d6 for each halving of Hits, saving on a 4+.  If they get two halvings [e.g. one for armor and one for terrain] then re-roll the failures.  

Missile Supply
Taking a more empirical approach, simply give all Missile Units a three-shot limit. I prefer to count DOWN with a black die, showing how many shots are left. The result of the shot is irrelevant.

Initiative
Battles often began with one side as the aggressor, making a series of attacks until fatigue or enemy resistance caused them to lose momentum.  To simulate this, the scenario attacker has Initiative and goes first each Turn [if no clear Attacker, roll off].  But at the start of Turn 2 - and every Turn after - roll off adding +3 for the Initiative Side.  If the Initiative side loses the roll, Initiative changes to the other side which goes first each Turn until it changes again.  Note this allows the side seizing Initiative to go twice in a row as the turn order changes, which could be a critical moment in a game.  While it is possible for Initiative to switch several times, it is likely to only change once or twice.  Additional options:
·         For more likelihood to change use +2 for the side holding Initiative, for less go with +4.
·         Subtract '1' from the players dice rolls for each of their Units that have routed.

Rally Variation
Once a Unit has taken 5 or more Hits, it may not rally to below 5 Hits.  This represents the concept of permanently losing the edge one has when completely fresh.

Trained Units
Some Feudal warriors were full time professional with a lot of experience working together.  Often, these were paid mercenaries who manned garrisons, but sometimes they were hired in large groups.  If using this rule, all Dx rolls are made with a d6, producing less dependable results for movement, melee and shooting.  Trained [T] Units instead roll a Dx, making them less spectacular [good or bad] but more dependable.

Force Morale
The 1HW scenarios have 6 Units per side as the norm.  This conveniently comes to rolling a Dx each time a friendly Unit is destroyed, attempting to roll higher than the total number of friendly Units destroyed to keeping fighting. If you roll equal or less your force routs and the game ends.  
·         With a three or four Unit army, roll a Dx halved [round up].  As this shortens the game a lot, you can roll TWO Dx and keep fighting if EITHER roll beats the number of Units lost. 
·         You could also get a +1 to your roll if your opponent has lost more Units, emboldening your force to greater efforts, or a +1 if you still have a warrior Personality on the board.
·         In a campaign game, allow the opposing side to get one last free attack as the army fleets, or eliminate all Units that are in melee with a Unit of higher movement class.  
For more "period flavor", consider fun ways to gain a bonus point or two on the die roll, like winning a pre-game challenge, praying to God [or 'the gods'], fatigue from force marching to an objective, etc.

Diced Movement
Movement by Feudal units was not consistent as only a few would have had experience working together in any given force. The blowing of horns, following of banners / standards would guide the mass of warriors, but it wouldn’t be a dependable timeframe [which is why drill has been historically practiced by more sophisticated professional armies].  To use diced movement, the following changes are made:

Class 1  Serjeants, Freeman, Bowmen         Move  Dx”       Fast +2”
Class 2  Brigans                                            Move  Dx”       Fast +4”                     
Class 3  Knights                                            Move  Dx”       Fast +6”         

Javelins shoot 6” and Bowmen 12” [because the moves may be longer with high dice].

Declared Movement
This option is a possible addition to diced movement, above. The player indicates a Unit, states the intent of its move, rolls the dice and then fulfills the intent as much as possible.  Units move the full distance rolled unless moving next to a Unit with a banner, at a terrain feature that gives a movement or combat bonus [e.g. road, hill]. They stop if contacting a Unit they may not move through, engaging in Melee if enemy. Knights must contact an enemy Unit if they roll enough distance.  Note, this section is the one most open to disagreements, so use with caution!  A Personality with a Banner suddenly becomes essential if you use this rule.

Advantages and Disadvantages
It’s quite easy to alter the qualities of units a little bit and get some great variety. If used, both armies should have the same opportunity to improve 1-2 Units with advantages and downgrade 1-2 Units with disadvantages. No Unit should have better than +2 or worse than -2 in Shooting or Melee or have more than one advantage / disadvantage used upon it. Some suggestions:
·         Determined / Unenthusiastic: 18 Hits / 12 Hits,
·         Melee +1 / -1, or Shoot +1 / -1,
·         Freemen or Bowmen that can enter Woods,

Alternative Troop Types
It is not always clear from accounts how warriors were armed and how they used their weapons. Some flexibility is in order to take these into account.
·         Brigans with Bows / Crossbows – these can only shoot in Phase 1, same as Bowmen.
·         Mounted Brigans – these are Brigans who Fast Move a BW but cannot enter woods.
·         Skirmishing Cavalry – these move as Knights, melee Dx and shoot Dx-2.


·     ARMY & FORCE MATRIX
The NT rules have six different forces per army for which each player dices. They are always at least half composed of a core Unit type. The small amount of variety provides much more interesting tactical challenges than you would think, and combined with the 30 Scenarios results in an amazing amount of game play. The only thing I’ve done is provide one “wild-card” force that is a bit more varied if you roll a ‘1’.

Force Matrix
                        Knights+         Bowmen*       Brigans          Freemen
Die roll            Core                Type 1            Type 2             Type 3
1                      2                      1                      1                      2         
2                      3                      1                      1                      1         
3                      3                      2                      1                      0            
4                      4                      1                      0                      1         
5                      4                      1                      1                      0         
6                      4                      2                      0                      0         
+Knights may dismount before a game, becoming a unit of Serjeants instead – they may not re-mount. This present the interesting dilemma of sacrificing speed and offensive power for survivability!
*One Bowmen may shoot at Dx+1 as mercenary crossbows. Balance this by making one Knight melee Dx-1 as mounted Serjeants, or one Freeman melee Dx-1 as unwilling levy.

This matrix suits my take on the rules, which reflect the many small but important battles during the 11th-13th C. that often determined the fate of dynasties and duchies. The dominance of Knights and Bowmen are reflected, supplemented by hired Brigans [to procure supplies, i.e. steal] and a levy of Freemen [to dig at sieges]. From this perspective, the presence of a force of militia or levy as Freemen are the least common Unit type.

Some variation for other armies are below.

Anglo Irish: Core – Brigans, T1 Bowmen, T2 Knights, T3 Freemen.
Norse Irish: Core – Brigans, T1 Serjeants, T2 Freemen, T4 Cavalry*
*Cavalry move as Knights but have Dx melee.

Scots Common Army: Core – Serjeants*, T1 – Brigans, T2 – Bowmen, T3 - Knights
*Scots Serjeants are schiltrons; melee Hits are halved but not shooting Hits.

Scots Isles & Highlands: Core – Serjeants, T1 – Freemen, T2 – Brigans, T3 – Bowmen

Early Feudal French or German: Core – Knights, T1 – Freemen, T2 – Bowmen, T3 – Brigans

North Welsh: Core – Freemen*, T1 – Bowmen, T2 – Brigans, T3 – Knights
South Welsh: Core – Bowmen, T1 – Freemen*, T2 – Brigans, T3 - Knights
*If there are no Knights in the force, one unit of Freemen may be upgraded to Serjeants. Freemen may enter terrain as Brigans.

Bretons: Core – Cavalry*, T1 – Brigans, T2 – Bowmen, T3 – Knights
*Cavalry move as Knights but melee Dx and shoot Dx-2 [these are better with a Brabanter personality!].