

Lord Rhys ap Robert of Wales on left, a Border Lord of mixed heritage. Lord William Fitzwilliam on Right, an English Lord with an eye towards enlarging his domains. Originally, these were painted as Lords and retinues for "Day of Battle", a characterful but clunky set of rules very much in the old style - worth stealing ideas from!
Well, the best way to work with the rules is to play them, and a campaign seems like just the thing. Working with what I have that is more or less ready to be on the table [if not entirely ready to look at re: basing] I'm going to be playing Welsh Border Lords against English neighbors. For this play, I upped the Bowmen to D6+2 attack like in the book, and didn't use the rally rules. I also used regular D6 instead of my D5 "Average Dice".
Below, is the force I rolled using the book's Force Matrix to make it easy on you viewers out there. A '3' gave the invading English a force of 3 Knights, 2 Serjeants [Men at Arms], and a Freemen [Levy] At center is the English Lord, in William Marshal's colors.

A '2' gave the defending Welsh 3 Knights, 2 Freemen and a Bowmen [Archer]. All Figs are Old Glory, the Welsh spear from the War of the Roses line, and the Bowmen from the Dark Ages line, I believe. All are on 5x2/5" bases of flooring about 1/4" thick for easy handling.

I chose #5: Bridgehead, as I figure these two neighbors have a river between them that must be successfully breached or the planned raid can't succeed.

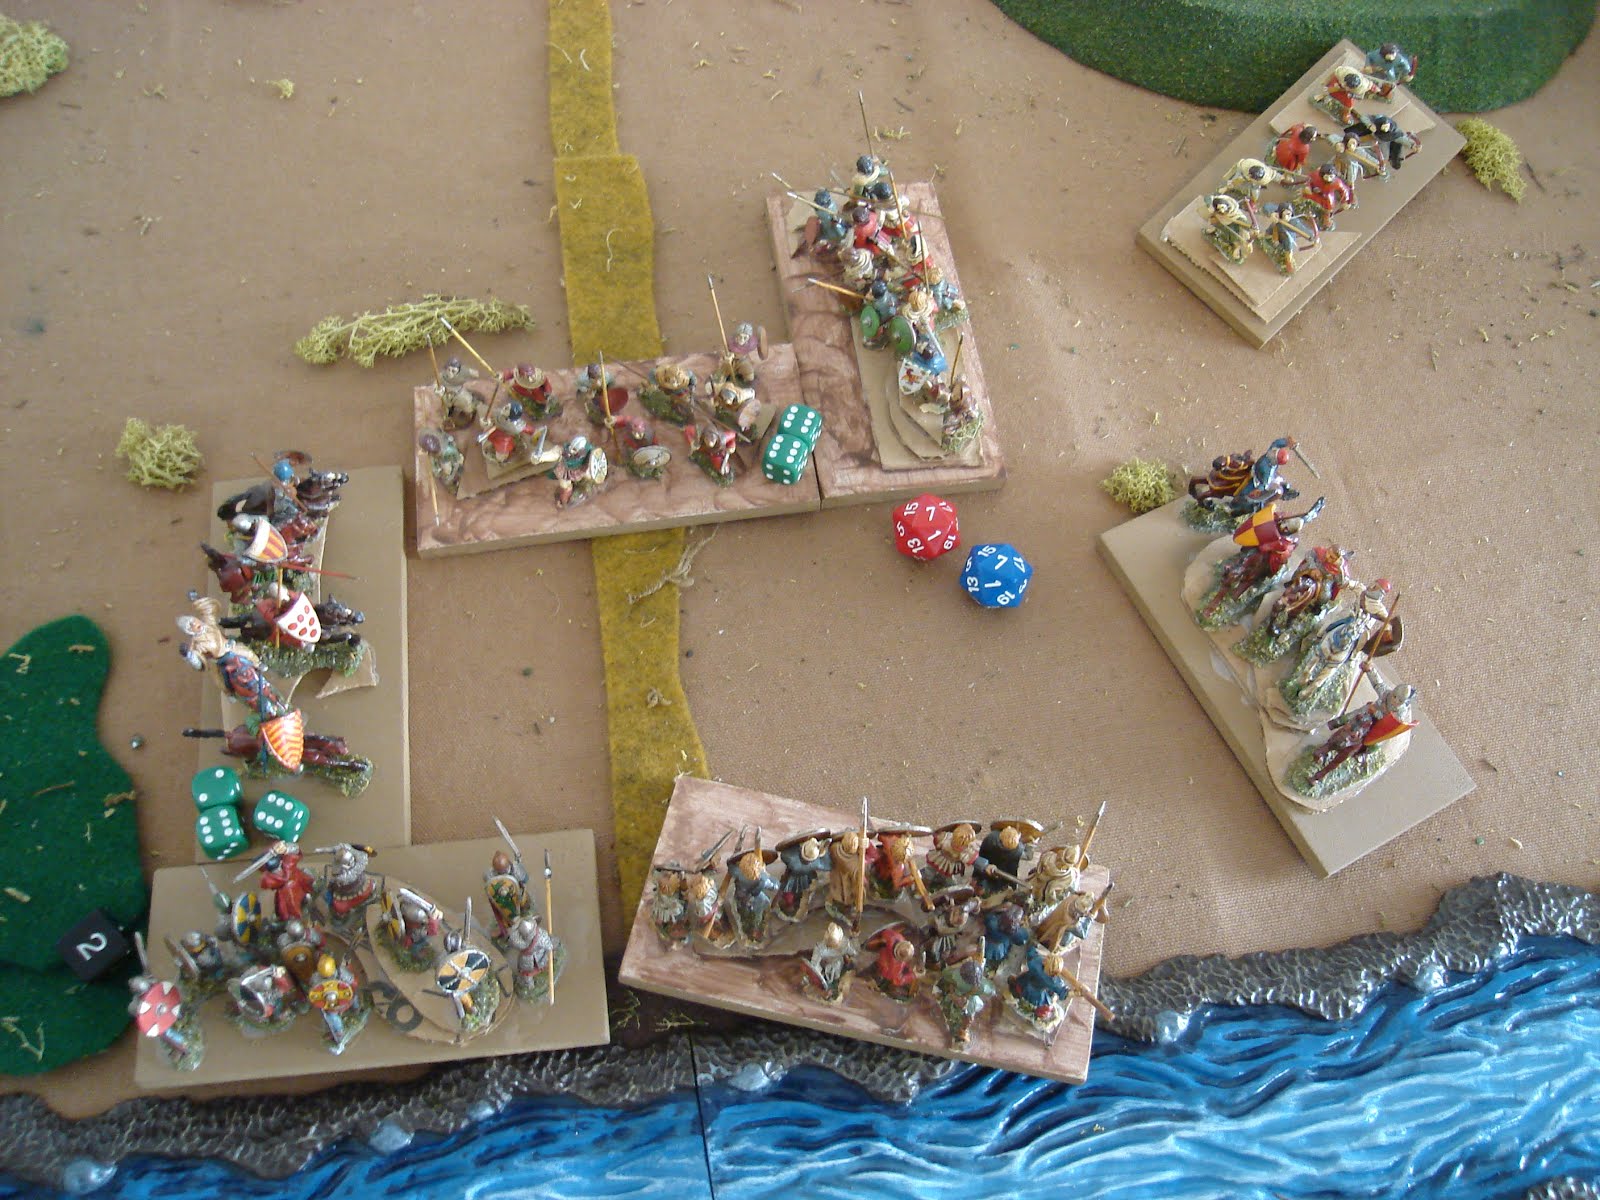
And below is my take on the table for the battle. At left, top and right are the reinforcement entry points for the responding Welsh - on a 1-2 at left, 3-4 top at the road, 5-6 to right.

Setup. At bottom, the English Serjeants are placed within 6" of the all-important ford, with a Knight Errant Personality leading them [he inflicts 1 Hit in Melee - it adds up! Battle opens with the Welsh going first and entering two units at top, rolling a '3'. I chose an Archer and a Knight since I wanted the combination of shooting and melee ability. I have also found that using the knights early can lead to the knights getting into trouble on their own.Victory goes to the Welsh if they destroy all English Units North of the River within 12" of the ford.

Turn 1. The Welsh move Bowmen down the road and Knights onto the Hill. English respond by shifting the Serjeants to the right to oppose the Knights and leave the road open.

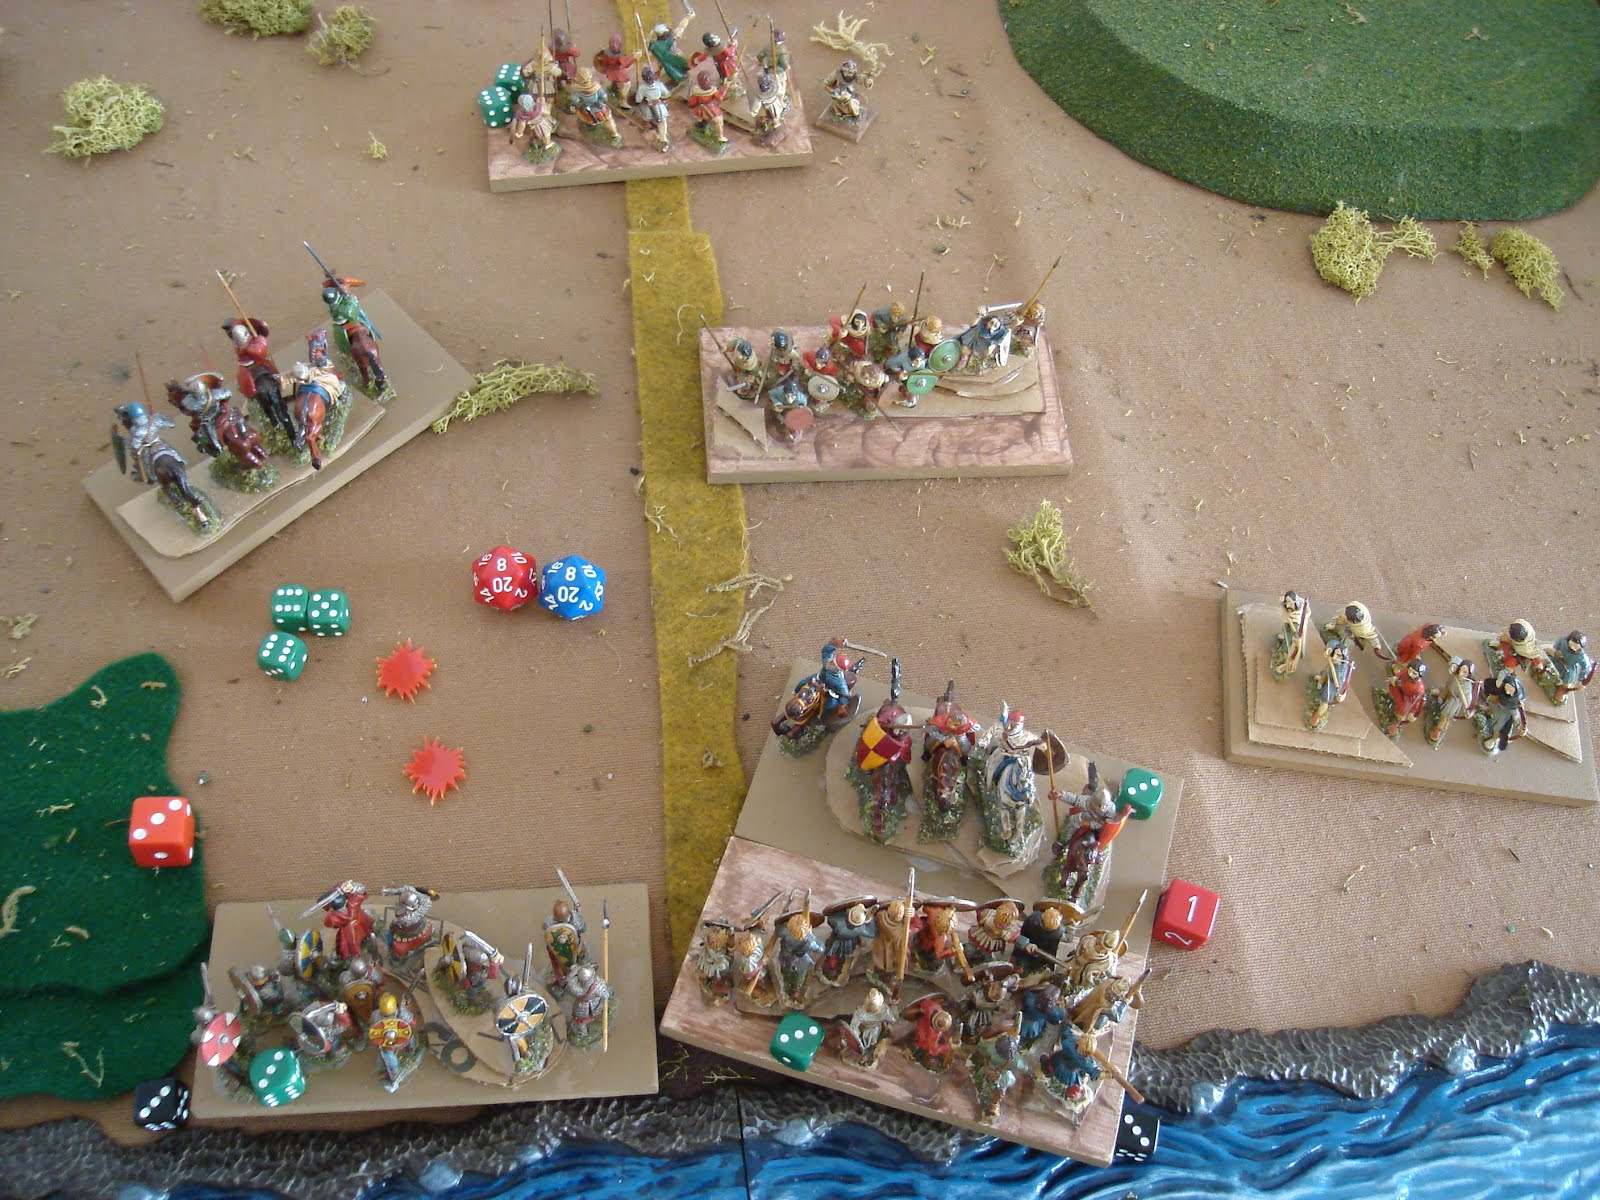
Turn 2. Welsh shoot, rolling a '6+2' for 8 Hits, halved for the Armor. Welsh Knights charge, also rolling a '6+2' and inflicting net 4 hits also. English Serjeants are half dead! English Knights enter, moving 15" up the road, across the ford. Serjeants roll a '4' which is +1 for their Knight Errant, but not added in yet [it is correct in next pic].

Turn 3. Welsh roll a '4' and bringin a Freemen down the road and Knights to the left within Charge range, moving Bowmen towards the Hill. English ponder and then bring in another knight and Charge the Welsh Knight. Serjeants roll '1' compounding the excellent Welsh luck with very poor luck on their part [sort of like the dreaded 6/1 split in DBA combat]. One need to see combat as a series of rolls, not just one or two, and look to win the melee, but taking 22 Hits [halved] and inflicting back seven won't dig them out of a defeat, here.

Turn 4. The Welsh decide the Bowmen can help their left Knight, so move down the road to shrink the bridgehead, passing up on the short-term advantage of a flank attack. Both melees move along, with either being set to end if the Welsh roll average next turn. English Knight 3 enters, but is bottled up without a lot space to deploy, so feeling that the advance down the road was the right thing to do for the Welsh Freemen.

Turn 5, Welsh. Reinforcements enter on a '5' to the right, the last Freemen and a Knight. Welsh knights blow out English Knights, while their comrades take out the Serjeants and the Knight Errant [who is starting to look more like a Knight Error]. Things aren't looking good for the English - their third Knight is available, however.

Turn 5, English. Knight 3 charges and breaks Welsh Knight. But, is pretty much surrounded with few options except a desperate charge. The center melee needs to end quickly, but the English roll a '1' needing more like a '6'. Serjeants 2 enters and is crossing the ford.

Turn 6. Welsh put a lot more hurt on the English, wiping out knight 3 in one go, and badly damaging Knight 2, leaving it with 1 Hit left! English put a few Hits on the Freemen then move their infantry across the ford, led by the Serjeants.

Turn 7. Welsh reposition and wipe out English Knight 2. English Charge the Serjeants out of the river and move up the Freemen, desperate to try and hold the Bridgehead.
Turn 8, the Welsh retreat the Freemen on the road, placing the forgotten abbot with them. Their Knights to left inflict a few Hits on English Serjeants before being destroyed. Welsh Knights charge Freemen holding the ford, with Bowmen moving up to support.
Welsh abbot rolls a '5' and removes that many Hits from the Freemen - clearly a man of inspiration! He now departs the battle and returns to his monastic retreat to pray.

Turn 9. The Welsh keep up the pressure, with the combination of Bowmen and Knights wearing down the English Freemen steadily. The Welsh Freemen are overmatched by the English Serjeants, but help is near at hand, so little hope for the English at this point.

Turn 10 sees the English Freemen wiped out, but the Serjeants fight on doggedly.

Turn 11. The Welsh Knights hit the Serjeants flank. The Serjeants almost break the Freemen, but needed a '5' to do so.

Welsh Turn 12. English Serjeants are wiped out.

Whew, what a battle!
I really thought things looked good for the English, but they got spread out too much by charging around. Upon reflection, they should've lead with their Serjeants, and carefully expanded the bridgehead behind them, allowing the knights to reinforce them. As it was, they got pretty beat up and defeated piece by piece.
In terms of rules, I was going thru a "have I changed things too much?" phase. Generally, I think the rules work very well, but getting the right balance with the scenarios is tough. I miss the rally rules - I really like how they reward careful players who conserve their Units with a strong end game, like in real life. However, I think they could be placed in the optional section, and rallying off hits reserved just for Units with a personality, instead of making all Units able to rally.
The bowmen hit a bit harder with the +2. This is not quite right for Feudals, but makes them less of a liability should you get 2 of them in your force. I also bagged the ammo limit of three shots. It didn't make much impact on this battle, but I like my original version best - they are D6 shooting, with no ammo limit, but they do run out on the roll of a natural '5' [which works on both D5 or D6 of course].
I played this scenario several times with the original rules from the book. I reminded myself that there are way too many gamey possibilities with all units turning twice.
Overall, while I think that some of my add-ons are not essential, they do add to the game and fix things that I actively dislike or are a bit gamey in the original rules.
Next time - The Revenge of the Welsh!
No comments:
Post a Comment
Thanks for your comment! t will be posted after it's moderated.