Sir Ranulf gathers as many men as possible and pushes hard for the bridge over an unfordable river that is the key to the defense of the cantref he desires. He sends his attendants out to bring along his scattered army that is chasing Welshmen and looting their belongings. They must arrive as quickly as possible as there's no doubt about it now - the Welsh know he's coming! The question is...who will get to the bridge first?
One-Hour Wargames #5 is a very interesting bridgehead scenario. The Blue attacker has managed to push across a spearhead, or perhaps forlorn hope, that must hold ground while reinforcements hurry to expand the bridgehead. Meanwhile, the Red defender must gather scattered forces to crush the bridgehead.
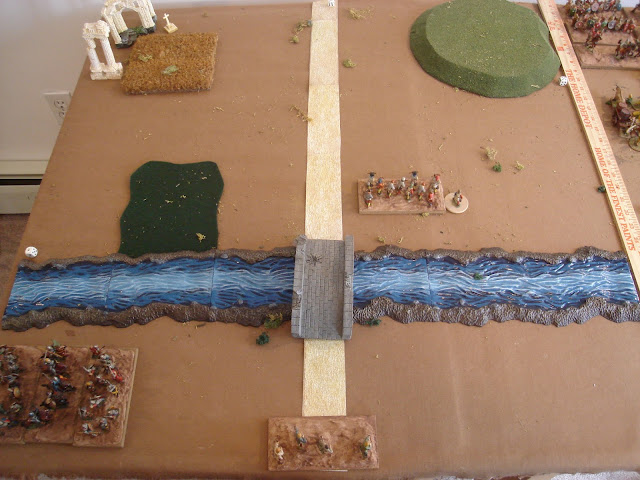
Red gets 3 waves of 2 units each, but the trick is that while he gets to pick the units he dices for where they arrive: on a 1-2 it's at 9 o'clock to left of the wood; on a 3-4 it's straight down the road from 12 o'clock; and on a 5-6 it is just at the base of the hill to the right at 2 o'clock. Where the forces enter and what kind they are is a big deal, as getting a skirmisher at 1-2 is a potential game winner, while at 5-6 it is nearly useless.
NOTE: the rules do not say - but one could dice the location and then pick the two units assuming a more organized defense. I decided to go with the more difficult pick the units then dice, as in this narrative the Welsh are caught off-guard...your narrative may be different! There is also a choice for the attacking Blue to choose the order of advance across the bridge ahead of time or decide on the spot - I chose that he had to decide before hand. Goes to show that it is easy to work a OHW scenario into the history or story you are trying to create...
Maestro Capellini shivered and pulled his cloak closer as he looked at his men. They were a fine contingent of professionals, mostly from the South of Europe. They had been a company for several years now, and knew the business end of a crossbow very well. Altho they kept intending to return back to the warm and wealthy south, the money was just too good! These Northmen valued them and trusted them more than their own vassals at times. His main complaint was the weather, which was too damp for his blood.
The Maestro's men were ready for whatever the Stranieri would throw at them today. He could hear the bellowing of Sir Ranulf as he organized the next group to cross over, which was reassuring. However he couldn't see any Welsh, which always concerned him...the devils could appear from a wood or gully by the hundreds!
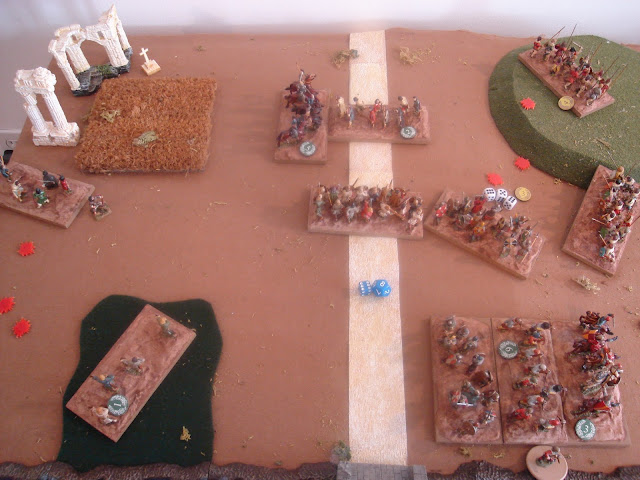
Below, the crossbowmen hold the bridgehead. They have a Master Bowman leading them, who allows them to shoot an additional 6" but to less effect. Sir Ranulf hopes that they will be able to dominate the opening stages of the battle for decisive effect later. To the bottom left are the oncoming reinforcements in order of appearance. First up are a unit of Skirmishers. Hopefully, they will be able to take control of the woods and hold them. If not, victory is doubtful.
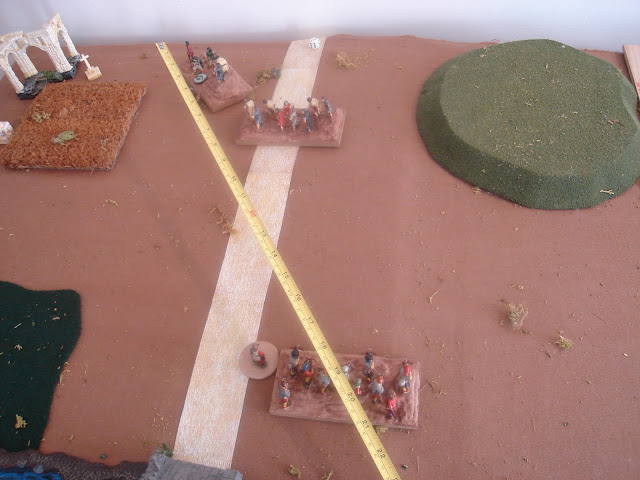
Below, the first two Welsh units arrive - Bowmen and Skirmishers, they rolled a '3' for arrival. The hope is that the skirmishers can seize the woods and hold them for a win since Blue must clear an area 12" from the bridge or lose the scenario. The Bowmen roll high for movement and thanks to that and the road bonus they are in their own range of the Crossbowmen. The Skirmishers are a bit slow.
Below, Old Glory Welsh archers. The single fig is a Green Hood Personality figure. He may be assigned to a unit of Brigans [Skirmishers] and allows them to reroll any natural '1' on movement or shooting. This does make the unit a bit more reliable in its performance. The Archers are a standard bowmen unit, except my default for archers is the "d6" level of combat performance, not "d6+2".
Facing them are the mercenary Crossbowmen, all Foundry figs. They shoot at the d6+2 level, and have the Master Bowmen figure with them, giving them 6" of extra range at less effectiveness.
Using their range, the Crossbows are able to reach the Welsh Skirmishers which are presently the biggest threat to victory on the table. They roll average and get 2 Hits. In my version of these rules, units die at the 7th Hit.
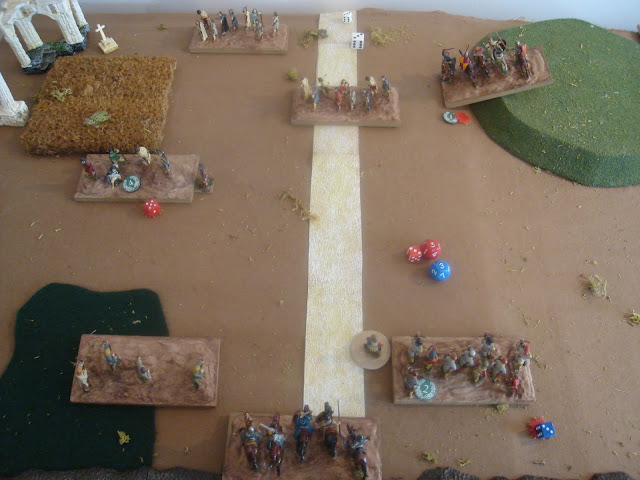
Below, a tough turn 4 for the Welsh. Their Knights roll a '3' and cannot move faster than their base move - ergo cannot charge the Crossbowmen, so move aside. Welsh archery again only inflicts one Hit, which is shrugged off my the professional Crossbowmen. The English knights roll high and are able to charge the other Welsh Bowman Unit, while the Welsh skirmishers takes another Hit and is going to die if it doesn't rally soon!
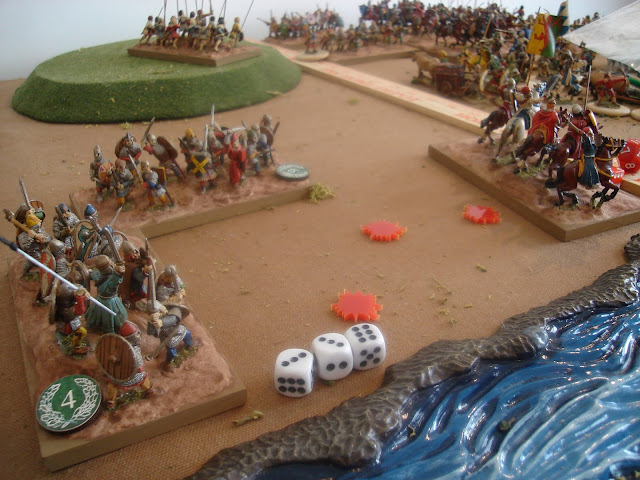
The mercenaries cheer as the Welsh knights turn aside in disorder from the deadly flight of bolts sent into them. Several Welsh nobles lay on the field while wounded horses scream and run wild. The return shooting is not effective, many arrows falling wide of the mark, and the few wounded are escorted off the field. The feudal archers, mostly huntsmen, are holding the woods to the left, while the knights gallop by charging the Welsh archers. Behind, dismounted knights begin crossing the bridge. The Maestro is relieved to see them - they are far better able to hold the bridgehead than his men, as there are just too many targets on the field!
English Turn 5. The Skirmishers miss, another hit is put upon the Welsh Archers from the Crossbowmen, and the dismounted Serjeants cross over. The situation is stable but not secure from any perspective.
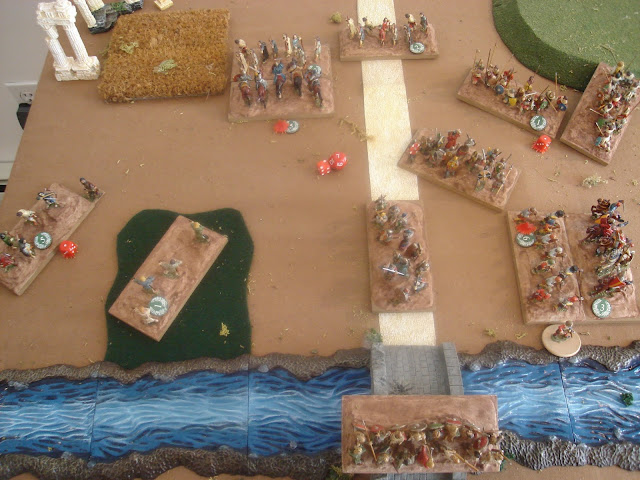
Suddenly, the field is full of Welshmen! Two large groups led by screaming chiefs pop out from behind the hill, while their Knights work around the Maestro's flank, much to his concern. He turns a bunch of his mercenaries to face the inevitable charge, and hopes that these Welsh are not so fierce when mounted. The rest of his men hit several archers, one of whom begins screaming from a nasty stomach wound, distracting many of his fellows - their return shots are not effective. Glancing back, the Maestro sees more dismounted Knights crossing the bridge... he just needs to hold out a little longer and they will be relieved!
Welsh Turn 7. Disastrous Morale Checks! The Skirmishers and Freemen both roll a '1' and Retreat from their opponents. This also blocks the other Freemen from taking up a more useful position on the battlefield. Still, the Knights pass and inflict two more Hits on the Crossbowmen, who are nearly done at '6' Hits.
Norman Turn 7. The Marcher Lord is marching ahead! Sir Ranulf's Knights destroy the opposing Bowmen, finally. His Serjeants follow up with a ferocious attack on the retreated Freemen that has them at 5 Hits. His final unit, one of Freemen, cross the bridge and start advancing down the road. He also successfully maneuvers a unit to back up the Crossbowmen against the Welsh Knights. The situation is looking very good!
And as if things couldn't get much better...Sir Ranulf wins Initiative for Turn 8!
Maestro Capellini hears cheering from everywhere, as Welsh begin to flee - his men take heart and work to hold off the Welsh knights as best they can with their swords and an occasional crossbow bolt. The Welsh knights seem dismayed, some are clearly hesitant, and they point to behind the Maestro. He turns and sees the Serjeants advancing carefully, and in an orderly fashion, close together. The Maestro begins pushing his men at the back to start moving off, thru or around the Serjeants backing them up. They need little encouragement, and start shouting to their fellows to hurry behind them, and to "scapa while the scapa is buona!"
All does not go the Norman's way, however. The Welsh Turn 8 sees the Crossbowmen and Knights put to flight, and the Welsh Freemen putting the hurt on the triumphant Serjeant unit. The Welsh Bowmen - clearly desperate and ferocious - inflict max Hits possible to destroy the Norman Knights!
Welsh Turn 9 sees aggressive and strong performance by all Welsh Units, who also pass their own Morale checks with a margin of error. The Bowmen put in another amazing attack, inflicting max Hits on the Norman Freemen, much to their surprise!
Norman Turn 10. Despite these efforts, the Welsh are struggling. The Archers flee after being shot in the rear by the English Skirmisher Unit. This frees up the English freemen to attack the Welsh Freemen, who are approaching the end. The Norman Serjeants roll a measily '1' for Morale and retreat against the Welsh Knights!
Maestro Cappellini's last men crossed the bridge, and headed back to camp. A few hurry as they hear the Welsh knights give a fierce warcry and charge into the Serjeants fiercely enough to push them back several yards - will the Bridge be lost?? The Maestro begins to shout at his men to turn and prepare to shoot at the knights, but none turn - they have had enough for today.
Unsurprisingly, the Welsh Freemen are destroyed. The Welsh Knights blow their chances to steal a draw by rolling a '1' for morale themselves, and retreating from contact!
The Norman Serjeants take heart when they see the Welsh Knights falter, and advance upon them again, pushing them nearly to the limit of endurance. Also, their fellows are just barely in range to charge to their flank [I allow close units to charge into their side arc, just a couple of inches].
Unsurprisingly, they see off the Welsh Knights.
End of the battle. The Welsh are swept from the field...barely!
Well, this was an exciting matchup, no mistake! This is a hard scenario for Blue to win, as getting a 12" bridgehead is nearly impossible without destroying the enemy army. Still, this time they had the perfect plan and it was aided by some good fortune with seizing Initiative at just the right time. A few dice rolls going the other way, and this may easily have been a draw.
I played this scenario about 6 times, trying out various units and combinations. I feel like the Serjeants are essential for their durability, and the Skirmishers are mandatory if the opposing side has any because of the woods. Overall, another great series of games, playtests, and an enjoyable continuation to the narrative, as Sir Ranulf continues to advance into the cantref!
Maestro Cappellini looked around at his weary men. They had a narrow scrape between that bridge and the Welsh knights! A few sang quiet songs, satisfied with themselves and their work today. Sir Ranulf had visited their camp and congratulated them, and more importantly, handed a fairly heavy purse to the Maestro saying "with respects from the Welsh!" The men had cheered lustily and shouted a variety of appreciated banter and battle cries back at Sir Ranulf, who nodded knowingly, gave a slight wave of appreciation to the Mastro, and walked off.
Sir Ranulf was certain that this cantref would be his - he just needed to push on, push on!











No comments:
Post a Comment
Thanks for your comment! t will be posted after it's moderated.