Monday, September 5, 2022

Hoplimania 2b: RULES - "Tearless Hoplite Battles"

"We're ready to share our culture with you today!"
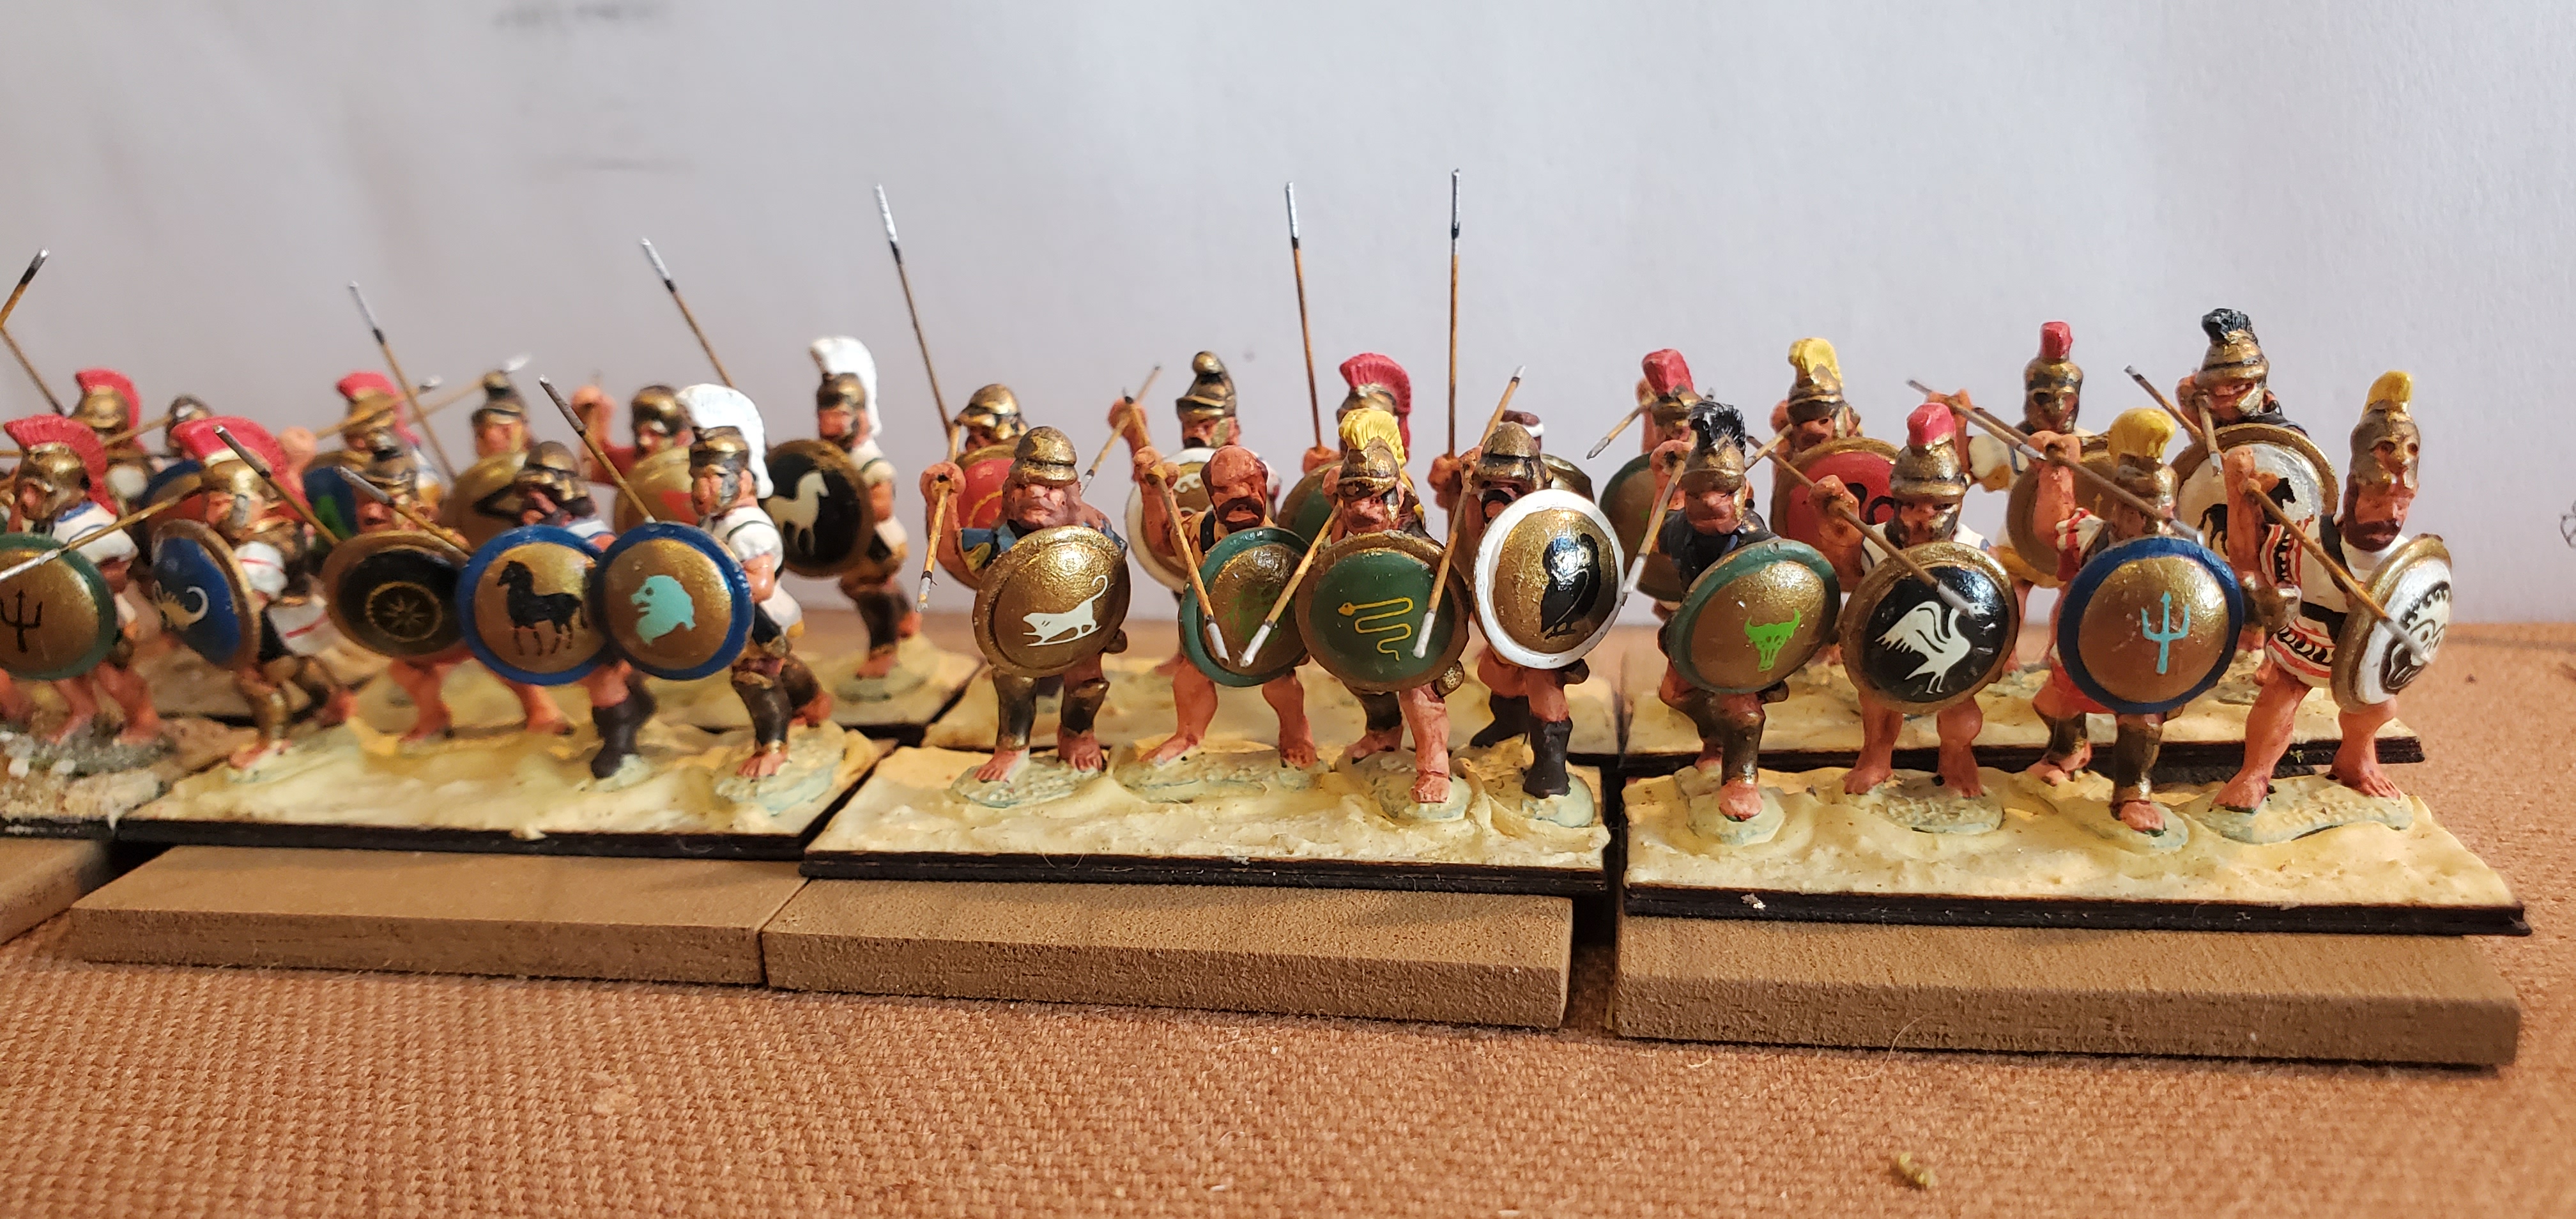
second painting by the obviously talented Karl Kapinsky, from here: https://age-of-discovery.blogspot.com/


Another battle, another opportunity for Tears! After the very strong narrative and enjoyable time I had with THB last post [CLICK] I played a few more games, made a few tweaks and edits, incorporated Mike T's answers, and felt like I could do another AAR with some interesting happenings.

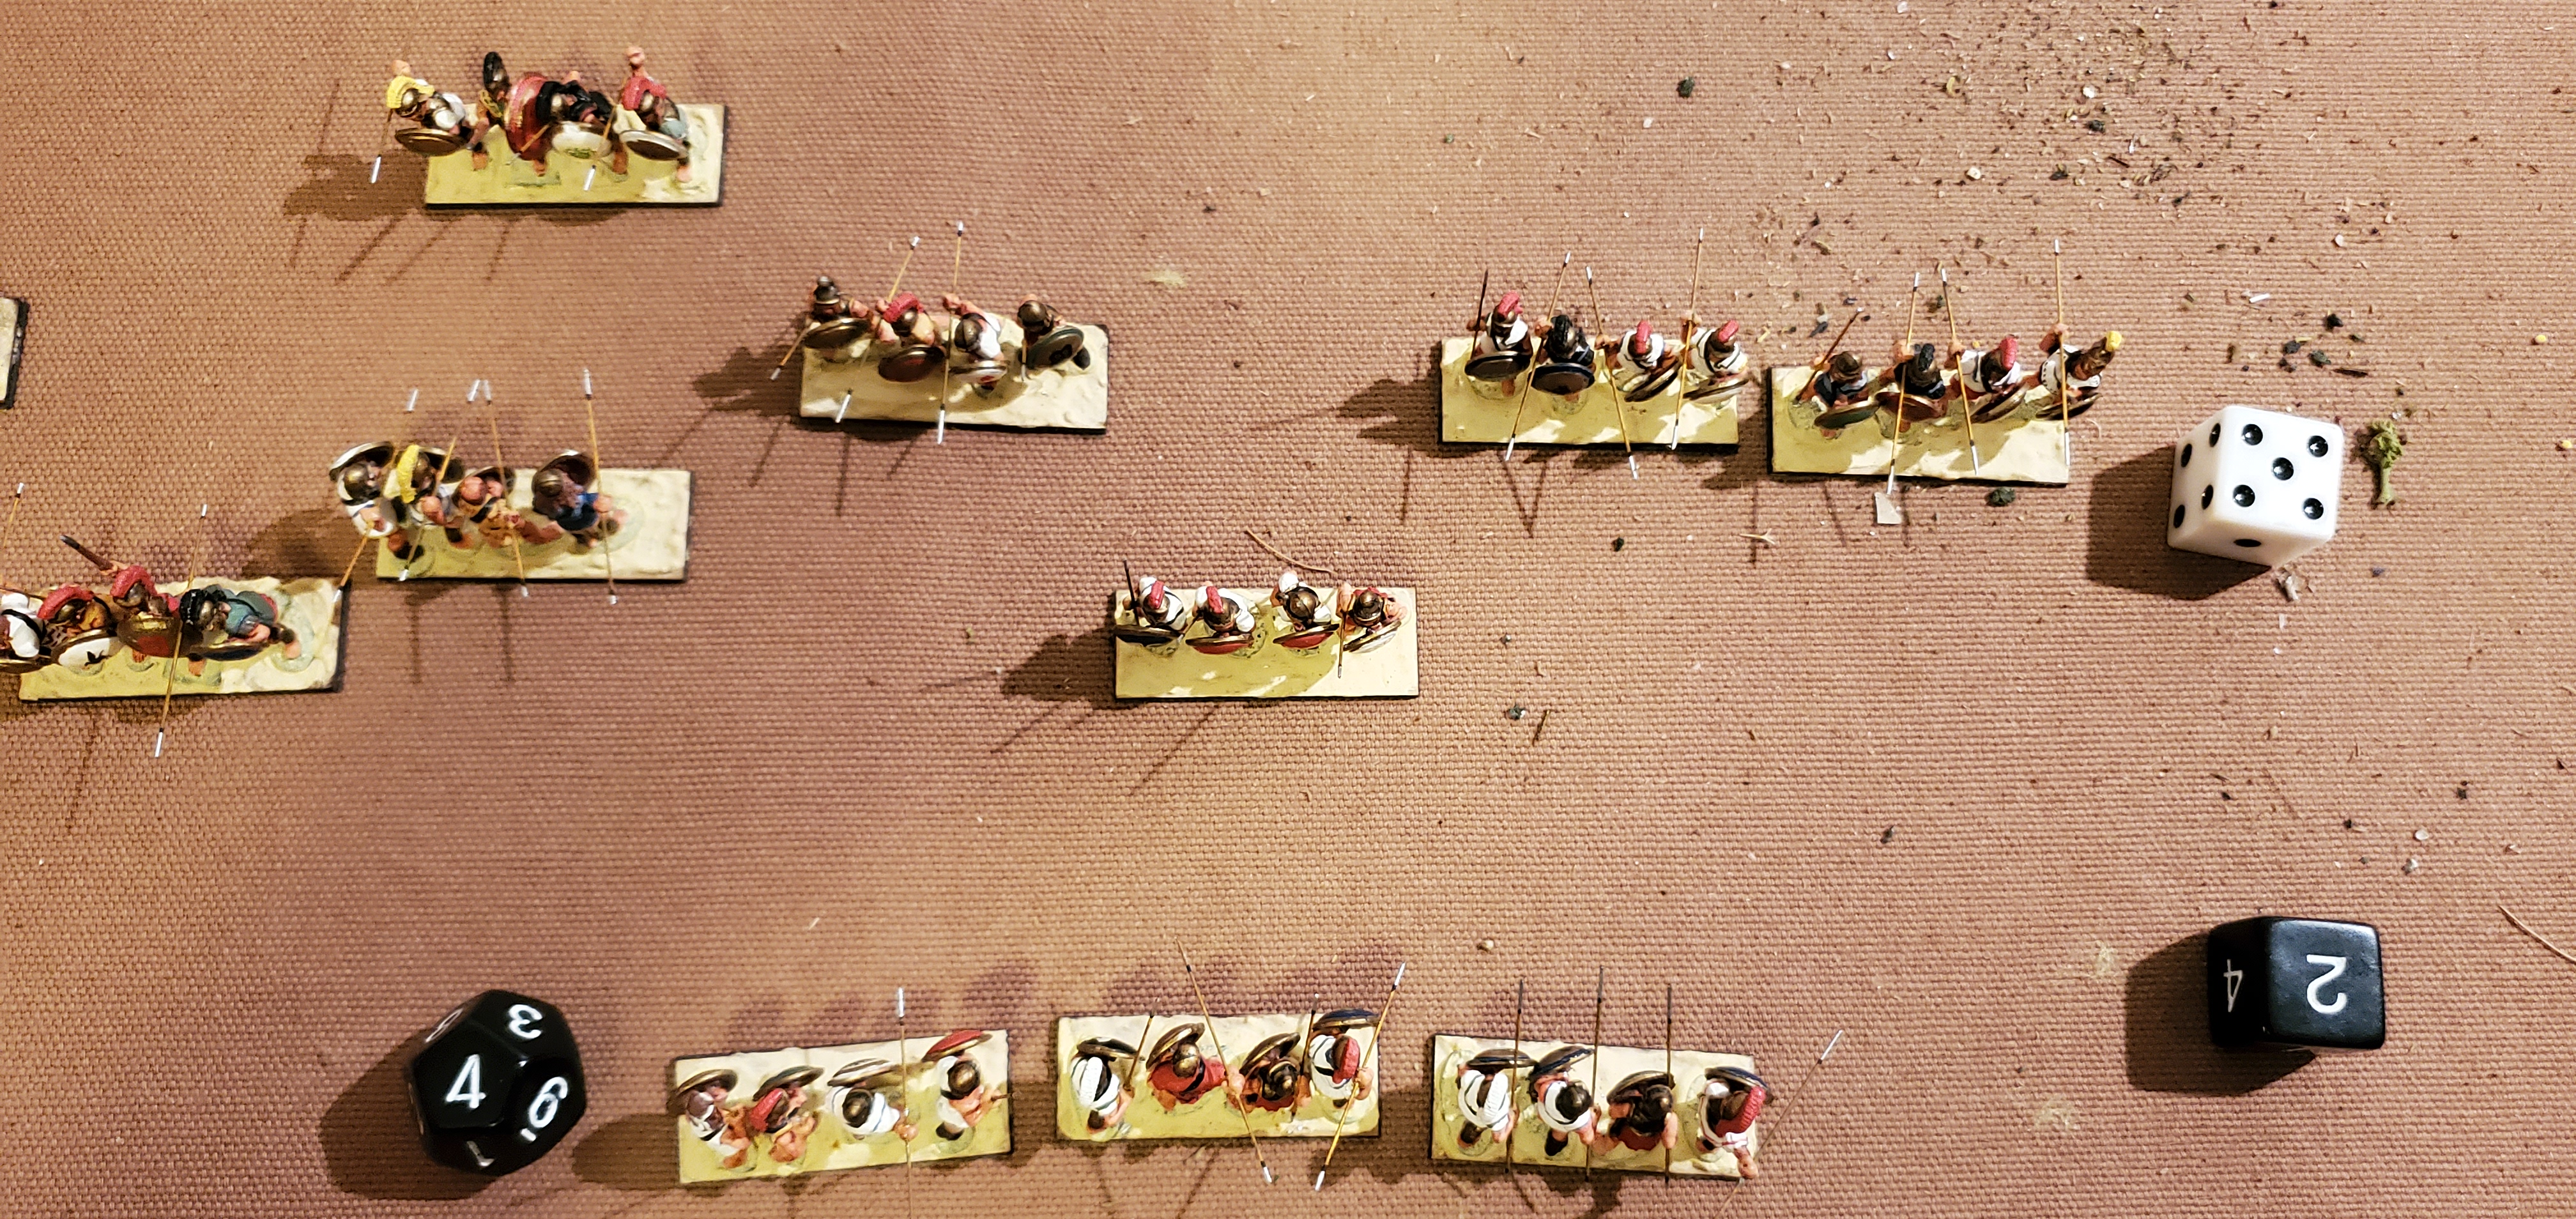
Again, Corinthians are on the top, Thebans are on the bottom.

Both sides used a Traditional Deployment, so had 2 Veteran, 3 Average and 2 Novice hoplite Units from [their] right to left. Both sides chose [I diced] to shift right to overlap the other, resulting in a large overlap of three Units a side!  I considered redoing this, but wanted to test the full range of possibilities in the rules so stuck with it. Both sides chose to Attack instead of Defend.
The player's card hands are visible to the sides because this is a solo game. I can't cheat since I barely remember what the cards may mean without the rules...
In the pre-battle shooting phase, the Corinthians [top] suffered a Disordered Unit, but inflicted 2 Disorders and a Shaken result on the hapless Thebans [bottom].

Turn 1, Advance Phase. The Corinthians come out with a very decent line - a couple units only one zone [square] out of placed - the Strategos himself is one ahead, and one of the Average Hoplites is back one. One of the Novices didn't hear a command, apparently...has been left two zones behind.
The Thebans have very random rolls, and are spread all over the place - ugh! The Theban Strategos [General] plays a couple of cards to get one Unit a couple zones advanced, and improve the Courage of another. The Corinthians play one card.

Both sides then check the Omens, or Sphagia, sacrificing a goat (poor thing). I may have used cards or rolled, forget which - rolling is my idea. Net result is both sides think the Omens favorable and each  gets one Unit improved one level of courage - The Corinthians take an Uneasy Unit and make it Firm, and the Thebans an Uneasy Unit goes up to Eager.

Both sides now must make a plan for the large overlap they have against each other. The Corinthians keep straight on while the Thebans start Maneuvering one Unit by making a left Turn. In THB, Units can't start maneuvering and leaving their original column on the grid until / unless they don't have an enemy Unit in the column - so they either need to defeat it or have overlapped.

Turn 2. As the two sides come within striking distance, the Thebans develop their outflanking plan while the Corinthians successfully slow their left-most Unit in response - they needed 3+ to succeed which they got. The Theban left-most Unit is already waaaaay behind so no effort spent there, which is good since the limited maneuvering ability is going into the Veteran Units on the right.

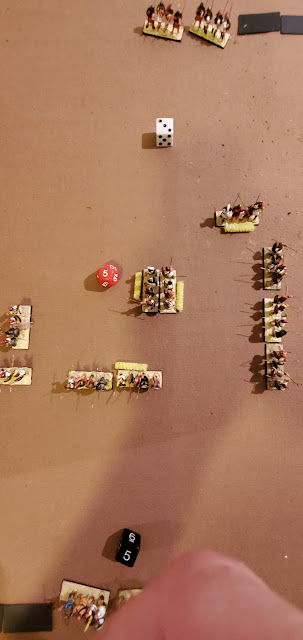
Turn 3. The phalanxes clash!  The Corinthians have almost all their Units in a solid line, playing a card to help with this. The Thebans look like they're a mess, but actually they are succeeding in getting into a better position to outflank the Corinthian left. The Corinthians are now Maneuvering their right-most hoplite Unit to cross the board and attack the Thebans at the right time. As the Units are a bit cumbersome maneuvering, one has to plan ahead - I enjoy this "realism".
In the Melee phase, the Thebans have one Unit Pushed Back, Shaken, but Break one Corinthian and Push back another in Disorder.
In Turn 3 Rally Phase, Corinthians re-organize one Unit on a '4', but fail to do so with another, using a Card for a bonus Rally, rolling a '1'. The Thebans fail to reorganize one Unit on the black '3' below.
The Corinthians have only lost one Unit, so easily pass their army break roll.

Turn 4. Chaos descends on the battlefield, as both sides organize their right-most Units for flanking maneuvers, while the neat battle line disappears in a flurry of combat results. Thebans have two Pushed Back Shaken, Corinthians one.

Thebans roll high and Rally off a Shaken, while the Corinthians fail to do so.

Theban long-term planning bears fruit, and we start to see a small battle line developing to the right. Corinthians are not quite so organized. The scrum in the center continues.

Turn 5. Corinthians break two Novice Hoplite Units, and lose one of theirs.
Both sides easily pass their army break point test.

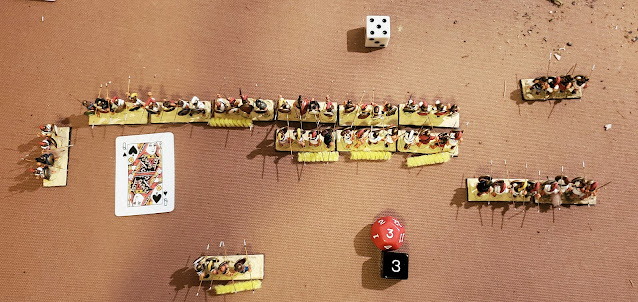
By Turn 7, the Thebans had a neat phalanx of four Units heading left across the table. The Corinthians are not quite as organized. Both - again - overlap the other's left flank. Thebans have one very game Unit that is fighting hard in the center and has Pushed Back the opposition, Shaken and Disorganized. The nearest Thebans can't help as they have enemy approaching down their row so can't stop or Maneuver. Both have lost two Units, and both have five on the battlefield.
The Theban then Rallies off a Disorganized - very disciplined, hard-fighting Unit! 

Turn 8, the overlapping phalanxes clash.
Despite the use of Cards to improve the rolls, the Theban Unit is broken in a dreaded 6 v. 1 roll-off.
But the Thebans manage to break the center Corinthian in a 5-1 roll off!

Both sides now had lost a third Unit, and the Thebans failed their Army Break Test.

I started to execute the rules for withdrawing from the battlefield, but it was late and I was too tired to make headway on them, so called it a Corinthian win.

Overall, the game had plenty of narrative and the small differences in each side's phalanx, combined with the overlap on the right, and each side's plan to exploit it, shaped the game:
- Corinthians faced a Theban left that was lagging way behind, slowing the confrontation and the likely result of losing a couple units.
- Thebans faced a neat Corinthian line and Maneuvered very effectively, also destroying the Corinthian left, but finished the process much better organized.

Ultimately, the results were close enough that the battle was decided by a dice roll, which I am fine with since both sides were at almost 50% losses and should be faced with significant force morale rolls. Had the battle continued, it would largely have depended on the dice results, with whoever lost a Unit first having a 50% chance to break.

Very enjoyable time, but must carefully read the rules for withdrawing from the battle after failing the army break test when more awake!

Friday, August 26, 2022

Hoplimania 2a: RULES - "Tearless Hoplite Battles"

"The arbitration team has arrived to discuss our territorial boundaries..."
by the obviously talented Karl Kapinsky, from here: https://age-of-discovery.blogspot.com/

Tearless Hoplite Battles was published in Slingshot 251 by Mike Tittensor, a game designer lurking in his mountain stronghold somewhere in central Europe, who is rumored to be a direct descendant of Vlad the Endgamer... but rumor abounds. I heard about them from that analyzer of wargames, Dale Hurtt [CLICK], who always seems to have something intelligent to say about game designs - so of course I set out to find the rules immediately.

I was able to track Mike down with the help of a few former Neil Thomas operatives recently returned from his stronghold in Nottingham woods - it's amazing what a few pints will do to loosen the tongue! Despite being busy with other gaming tasks and analyzing pork cuisine in the Czech Republic, Mike graciously found time to have a clandestine courier drop them off into my inbox.

A quick read and I knew I wanted to give them a go. They use a grid, are very period specific to the era of the Greek hoplite, 7th-5th centuries BC, and have mechanics to restrict players options to traditional hoplite warfare. They are also fraught with narrative and feel and flavor. And I like having historical limitations and flavor!  

EDIT: Mike himself sent a winged-footed courier [in what appeared to be a ballet outfit] bearing a message that said:

"The rules are designed to reflect how to get a long line of potters, bakers, masons and wine merchants to advance in a straight line through the dusty plains of Greece when your C3 infrastructure consists of a bloke with a loud voice and a kid with some pan pipes. 

Men love war…but they love talking about it over a crater of wine a lot more. This is a set of rules for those battles."

So...let's get out onto the plains of Greece!

The game is logically arranged by phases: 
Setup
Approach
Battle [repeated], and, 
Victory!
The Battle Phase is the repeating Game Turn in which the hoplites maneuver and fight.

I didn't have a 40mm grid ready to go for my partially completed DBA hoplite armies, so used an unmarked grid, which worked fine. With 7 hoplite units a side and some spaces on the flanks, there were 13 columns by 15 rows for the grid. 
I then: 
  • determined the hoplites quality and bravery, 
  • set up the battle line, 
  • chose a tactic [offense or defense], and finally, 
  • determined any attempt by a phalanx to overlap the other. 
As the two phalanxes were the same size, and it was the first play, I kept them straight on at each other - simple! Not having any specific forces, I will just call them Corinthians [top] and Thebans [bottom].

I then began the Approach with missile attacks. Lights are abstracted into missile attacks that occur once a turn so players can concentrate on the hoplites. Still, I had some bases, so I tossed them out there to mark what columns the lights would attack - I randomly rolled these since I had no idea what to do!  I ended up disordering two Corinthian Veteran hoplite Units and the same two on the Thebans [red pipe cleaners]. 
Note that the Veterans on both sides are on the right, the position of honor. Both sides had two Veterans on the right, three Average next, and on their left two Novice hoplite units.

Next, the actual approach was made. These are rolled with a d6 and modified, and then the Unit moves forward that many spaces. This gives a large spread of outcomes, so the hoplite phalanx is quite scattered as can be seen below.
Part of the design's challenge is for players to order their lines as best as possible before contact. This is complicated by mandatory forward movement combined with limited ability to add or slow movement.

The cards provide buffs and bonus opportunities. In this case, the Corinthians played the Queen of Diamonds which allowed them to advance a lagging veteran hoplite. The Thebans played the Jack and Queen of Hearts, allowing them to advance one unit and re-roll the bravery of another.

Finally, the battle phase occurred, with all Units advancing one space, then some missile shooting resulting in another Disordered Corinthian [white six].
Finally both sides attempted to rally one unit that was in disorder, and rolling 1's they failed.

For Turn 2, the Battle phase brought no one into melee, but I succeeded in rallying one Corinthian from Disorder, and reigning in one Disordered Veteran Theban Unit.
Clearly, the Thebans have managed to get their phalanx in better order, with two main blocks and one well ahead and one lagging behind.

Turn 3 saw the two sides get into strike range, so the success of two Units removing their Disorder was welcomed. 

Turn 4 saw two opposing units both about to enter the same space - as movement is simultaneous, they had to dice off...
...and the Thebans took the space first.
In this specific instance, it resulted in the Corinthian halting a space early and getting supported by three other units - the alternative was to advance alone, so this was optimal outcome for the Corinthians!
Additionally, the Corinthians placed a card that pushed back a Theban in Disorder. 

Overall, the Corinthians have managed their left better than the Thebans their right.

Combat was then fought out, with the Thebans breaking one Corinthian and advancing, despite being overlapped on one side. Another Theban to the left pushed back it's opponent, Shaken. 
Combat is a simple d6 roll-off with a few modifiers, and comparing the totals for four results: tie, win by 1, 2-3, or 4. A tie is a push with a chance at being disorganized, a 4 breaks the loser who is removed, and the intermediate results are push backs with morale issues.

The Thebans finish a strong turn by playing a card that disordered a Corinthian. 
Having lost a Unit, the Corinthians rolled a 3 to stay in the field easily.

Turn 5, the Thebans continued to kick Corinthian butt, resulting in another unit breaking and another unit shaken.
The Corinthians need to bolster their courage with some wine from the Peleponnese. Liquid courage is better than none at all...
Turn 5 concludes with both sides removing a Disorder on one Unit, and the Corinthians rolling a '4' to remain in the field.

Turn 6, the Corinthians lose another unit, but finally broke a Theban. Both rally off a Disorder and then the Thebans roll a '6' to easily stay on the field - all praise to the bravery from Bacchus!

Finally, on Turn 7, the Thebans break a fifth Corinthian while their other Novice Unit was also broken. Fantastically, both sides fail their army break point!  The Thebans had to roll a '1' [success!] and the Corinthians needed a high roll to stick around but rolled a '2'.  In any event, on Points, the result was a minor Victory for the Thebans - failing army morale cost them a Major victory they richly deserved!

What a buncha fun!

The cards presented additional possibilities that can matter but don't dominate the game. I was pretty busy with the rules so forgot to play three of them.

The disordered advance of the phalanxes during this period was pretty exciting, and not orderly or boring at all. This is the somewhat wilder period of hoplite warfare, when disciplined, professional phalanxes were less common than those that charged forward wildly, somewhat disorganized. This was definitely accomplished by the rules, witness the pic for turn 1 with the widely spread hoplite Units, and Turn 4 which has a lot of yellow disordered markers.

The aesthetic of the square grid spaces resulted in the Units appearing more spread out on the table than they were in movement speed. I didn't like the wide spread, and could see using rectangular spaces just for the sake of visual appeal.

Overall, I really liked this free set for its flavorful ambiance and highly structured approach that was evocative of the limits of hoplite phalanxes. While there were some issues with mechanics, there were none that stopped the flow of the game or that impacted the game enough to change an outcome. 

The bottom line is that altho the Corinthians managed to be more orderly at impact The Thebans edged them out in the combat dice rolls.

Will be playing again, soon, but simply MUST make a QRS or condensed set of the rules so I don't have to page around so much. The good news is I'm looking forward to another Tearless Hoplite Battle!

Wednesday, August 17, 2022

Terrain List for One-Hour Wargames scenarios


Here's the list I have compiled.  If there's any corrections, please LMK!

From this post is the short summary: 

https://ecw40mmproject.blogspot.com/2019/12/one-hour-wargames-terrain-list.html  

And here's the list in full [color coded]

One-Hour Wargames: All Needed Terrain

1.       2-Level 6x12” Hill x 2

2.       2-Level 6x12” Hill, 6’ of road

3.       2-Level 6x12” Hill, 6x6” wood, 3’ of river2 bridges

4.       2-Level 6x12” Hill, 6x12” wood, 3’ of road

5.       2-Level 6x12” Hill, 6x6” wood, 3’ ea. of river and road, 1 bridge

6.       2-Level 6x12” Hill, 3’ of road

7.       2-Level 6x12” Hill, 2-Level 18x12” Hill, 6x6” wood

8.       2-Level 18x12” Hill, 6x6” wood, 3’ of road

9.       2-Level 6x12” Hill, 6x6” wood, 6x6” town, 3’ ea. of river and road, 1 bridge, 1 Ford

10.   2-Level 12x12” Hill [impassible”], 12x12” wood, 6x6” town, 3’ of road

11.   12x12” wood, 6x6” Swamp,6’ of road

12.   2-Level 6x12” Hill,  6x6” town, 3’ ea. of river and road, 1 bridge, 1 Ford

13.   2-Level 6x12” Hill, 12x12” wood, 3’ of road

14.   2-Level 6x12” Hill, 12x12” wood, 6x6” town, 3’ of road

15.   12x12” wood, 6x6” town [“fortification”] x2

16.   2-Level 6x12” Hill, 6x12” wood, 6x6” town, 3’ of road

17.   2-Level 6x12” Hill

18.   6x6” town, 3’ ea. of river and road, 1 bridge, 2 Fords

19.   6x12” wood, 3’ ea. of river and road, 1 bridge, 1 Ford

20.   2-Level 6x12” Hill, 6x6” wood x2, 3’ of river2 Fords

21.   2-Level 12x12” Hill, 1.5’ of road, 1.5’ of swamp [3” wide], 6x6” town

22.   2-Level 6x12” Hill, 36x12” wood, 6x6” town [“fortification”]

23.   2-Level 6x12” Hill, 6x6” wood x3, 8x8” town, 3’ ea. of river and road, 1 bridge, 2 Fords

24.   12x12” wood, 12x12” Swamp, 3’ of road

25.   2-Level 6x12” Hill, 12x12” wood, 3’ of road

26.   2-Level 6x12” Hill, 6x6” wood, 6x12” wood x2, 3’ ea. of river and road, 1 bridge

27.   6’ of road

28.   2-Level 18x12” Hill, 6x6” town, 3’ of road

29.   2-Level 18x12” Hill

30.   2-Level 18x12” Hill, 6x12” wood, 8x8” town, 3’ ea. of river and road, 1 bridge, 1 Ford


Roads & Rivers: 3” width – could model narrower with cleared berms and banks

·         4 HILLS: 2-Level 6x12” Hill x 2, 2-Level 18x12” Hill, 2-Level 12x12” Hill [“rough”],

·         6 WOODS: 6x6” wood x3, 6x12” woodx2, 12x12” wood,

·         2 x 6x6” towns, 8x8´town, 6’ of road, 2x Bridges, 2xFords

·         3’ of river6x6” Swamp, 6x12” Swamp, 12x12” Swamp

Obviously, some terrain pieces could be built up from two-three others, like making a 12x12” wood from 2 6x6” woods and one 12x6” wood, for example. There are a couple of scenarios with a 24”x 6” Hill but the 18” long one will do just as well, or you can put together the two 6x12” Hills, you’ll just have a saddle in the center. There’s also a giant woods in one scenario, 1’x3’, but probably best done by marking the line of the table with string/yarn, and distributing the 4 Woods into the space.

Saturday, August 13, 2022

Hoplimania! Busting thru Painting Funk with Xyston...

This set of rules, and plentiful classical studies began the Hoplite Obsession. Especially the "Hoplomachia" rules by The Perfect Captain [website in the wayback machine, but the IO group is still chugging along]. They are a great example of what rules look like when they are tailored to a specific era, in this case the Peloponnesian War, or 460 BC to 360 BC -ish. 

I was led to them by fellow gamer Steve Turn, who may or may not still have his hoplite armies [worth checking]. We played a few times and tried to sell the concept to one of the local clubs, but that didn't take off.  Would've loved to see them in 25mm. Steve created the entire sanides and all the gaming widgets - I have yet to.

Below is most of the figures in various stages of near-completion, all Xyston. Just enough for some modest battles, perhaps a scuffle between two neighboring cities, or a small expedition.
Why has this project languished...??  I've no idea.  Partly, I forgot how far along it was - it is well over half finished at this stage. Partly, I was annoyed at how the Xyston figs got painted by a painting service. Some had excellent detail work, but the priming [I'm guessing] was too thick and obscured some of the lovely detail on the faces and such. At one point I sold all extra mint blisters and just stuck it in a closet. I've tried to revive it a few times, but not succeeded until now.

Maybe I shouldn't have used an opaque tool box to store it in?  My 15mm Romans have similarly disappeared in an odd box in the closet shelf of my office. They will be next...

Inevitably, I did a re-draft of the Hoplomachia rules which needed a bunch of editing, just for clarity and brevity's sake. Cut them down from 30+ pp to around 20. I am giving the rules a few days off and will face them again soon.

The research pile is very healthy, with some great new acquisitions or library loans [my new policy is that unless I will study and mark it up, if it is at the library I don't buy the book...I've noticed they don't like my notes and comments, erudite and insightful as they must be...]. 
- My copy of Thucydides is from high school [so 35 years old?] and just baring holding together. 
- Lost Battles and Legion rules by Prof. Phillip Sabin [very interesting read and the rules look good also - got a great review by my favorite BGG-er Marco Arnaudo]
- Kagan's "The Peloponnesian War" which is just great - I did buy it as it will be a great reference to mark up.
- "Men of Bronze", "Soldiers and Ghosts" both nice finds - MoB is very crunch history, S&G is a bit easier reading.
- "The Cambridge History of Greek and Roman Warfare" must surely be the present best work on the subject. Reading the Greek sections makes me feel like I am up to date on the latest revelations and latest thinking about ancient warfare. Shame these books are in the hundreds of dollars!  Grateful the library can get them!
- Hanson "The Wars of the Ancient Greeks" is a nice thematic overview.
- Ospreys, of course!  The Greek Hoplite - Elite is very helpful.
Also, I joined the "Lost Battles" IO group, and have found it a great place to discuss niggling questions about ancient warfare in general, and even some wargaming. Great bunch of smart chaps... why'd they let me join??

So, what's on the table? 

Six bases of Theban Hoplites:

Eight bases of Lakedaimonian hoplites [not Spartiates, necessarily, Spartan neighbors] - painted, need basing.

Another 10 bases of mercenary or panhellenic hoplites - need basing.

Another seven bases of mixed hoplites...need spears and transfers. They could be generic, or end up as Thebans or Lakedaimonians - maybe they will  finish a base or two here and there. 

14 more bases of Panhellenic or mercenary hoplites. Need re-basing...
They came out pretty well, however. Overall, lotsa variety from the Vedi Vidi Vici decals, altho there are no doubt much fancier ones out there by now.
There are several decals I like here, including the Green Man, the horse and the pegasus, and the running legs above. Below, the owl and the eye are nice.
Below, the Athenian face to far right is very nice, as is the stylized snake.

That's 45 bases of Hoplites total, plus another three with generals factored in, not to mention markers and independent general stands. Call it 48 stands altogether.

At two deep - my minimum - it's 24 stands of 8 Hoplite figs on a 40mm frontage. Two of them can be used for Ancient and Medieval Warfare games [12 Units], and three are a suitable frontage for One-Hour Wargames [8 Units]. In Hoplomachia, it is 24 lochoi which is 12 a side for 3-5 Units each, just enough.

In the steel tool box - which holds all the magnets, are families [baggage...no pun intended], Hellenic peltastes to the front, and I'm guessing Gepid archers for Athens behind?  Just four horsemen, not many.

Pretty sure the red-cloaked fellows are Spartan psiloi. In front, more peltastes.

Two units of Thracian peltastes backed up by Hellenic psiloi. Need to put some more transfers on - I have the faces and a few others I like.

On a side note - there's too many dudes with brown hair!  Need more with black hair. I don't think there were many fair-haired types in Ancient Greece.

Four stands of Thessalian light cavalry. The form rhomboids when lined up!

Two stands of heavy cav, two stands of Spartan or Lakedaimonian cavalry.

All in all, ten bases of cavalry, which is about 3-5 units, enough for any of my games - cavalry isn't a big part of most Greek armies.

The lights are more important: with 8 stands of psiloi [and another 8 of camp followers], I am a bit light on psiloi, will have to work on that. But there's plenty of peltasts, 12 bases and 8 of Thracians, who are a tribal sort of peltast. Overall, I have a reasonable amount of lights, especially since I'm more focused on the hoplites and the phalanx clash. While I enjoy working with lights, they are similar to almost any other period's lights.

With the 24 double-based hoplites 10 cavalry bases, and 36 bases of lights, I will be able to play the period in just about any of the rule sets I want to try out - but most of all Hoplomachia. 

The last 24 figs are cleaned, primed and ready for an experiment: White primer v. Black primer with White Drybrush. As they are generals and personalities of various kinds, they will also get the best treatment for clothing [well, not the Spartans]. It'll be interesting to see if there's any difference either in the process or final product.

Having obtained a few more books since I last worked on these seriously, I will probably do a little more painting of small details on the hoplites and fix up a few hair colors, work on some contrasts with various belts and other details. A bunch of the helmets have mold lines, which annoys the heck out of me, especially since the line gets emphasized by dry-brushing and dipping, two of my painting techniques! These will have to be filed down and re-painted.

One important thing - I painted a lot of the shield rims and left the shields bronze. I think it was that the rims were bronze and the shield was painted or not even bronze but leather!  Too late for a bunch of these guys - I'm not re-doing decals!  But I will need to read up on this and check again.

Finally, I have to mix up another batch of miracle dip - a bit thinner for these 15mm fellows, and with a black contrast to show the strong Mediterranean sun. Then I will have to dip the lot.

Soon as the order of bases arrives from Litko, I will need to spray those so they can thoroughly dry out, not to mention that they need ideal weather conditions.

Well, at least one more project is moving forward and will be game ready for this fall - very exciting!  Makes me think about my Republican Romans and Gauls...