Tuesday, May 4, 2021

Return to Feuding: the Second Battle!

Sir Ranulf gathers as many men as possible and pushes hard for the bridge over an unfordable river that is the key to the defense of the cantref he desires. He sends his attendants out to bring along his scattered army that is chasing Welshmen and looting their belongings. They must arrive as quickly as possible as there's no doubt about it now - the Welsh know he's coming!  The question is...who will get to the bridge first?

One-Hour Wargames #5 is a very interesting bridgehead scenario. The Blue attacker has managed to push across a spearhead, or perhaps forlorn hope, that must hold ground while reinforcements hurry to expand the bridgehead.  Meanwhile, the Red defender must gather scattered forces to crush the bridgehead. 

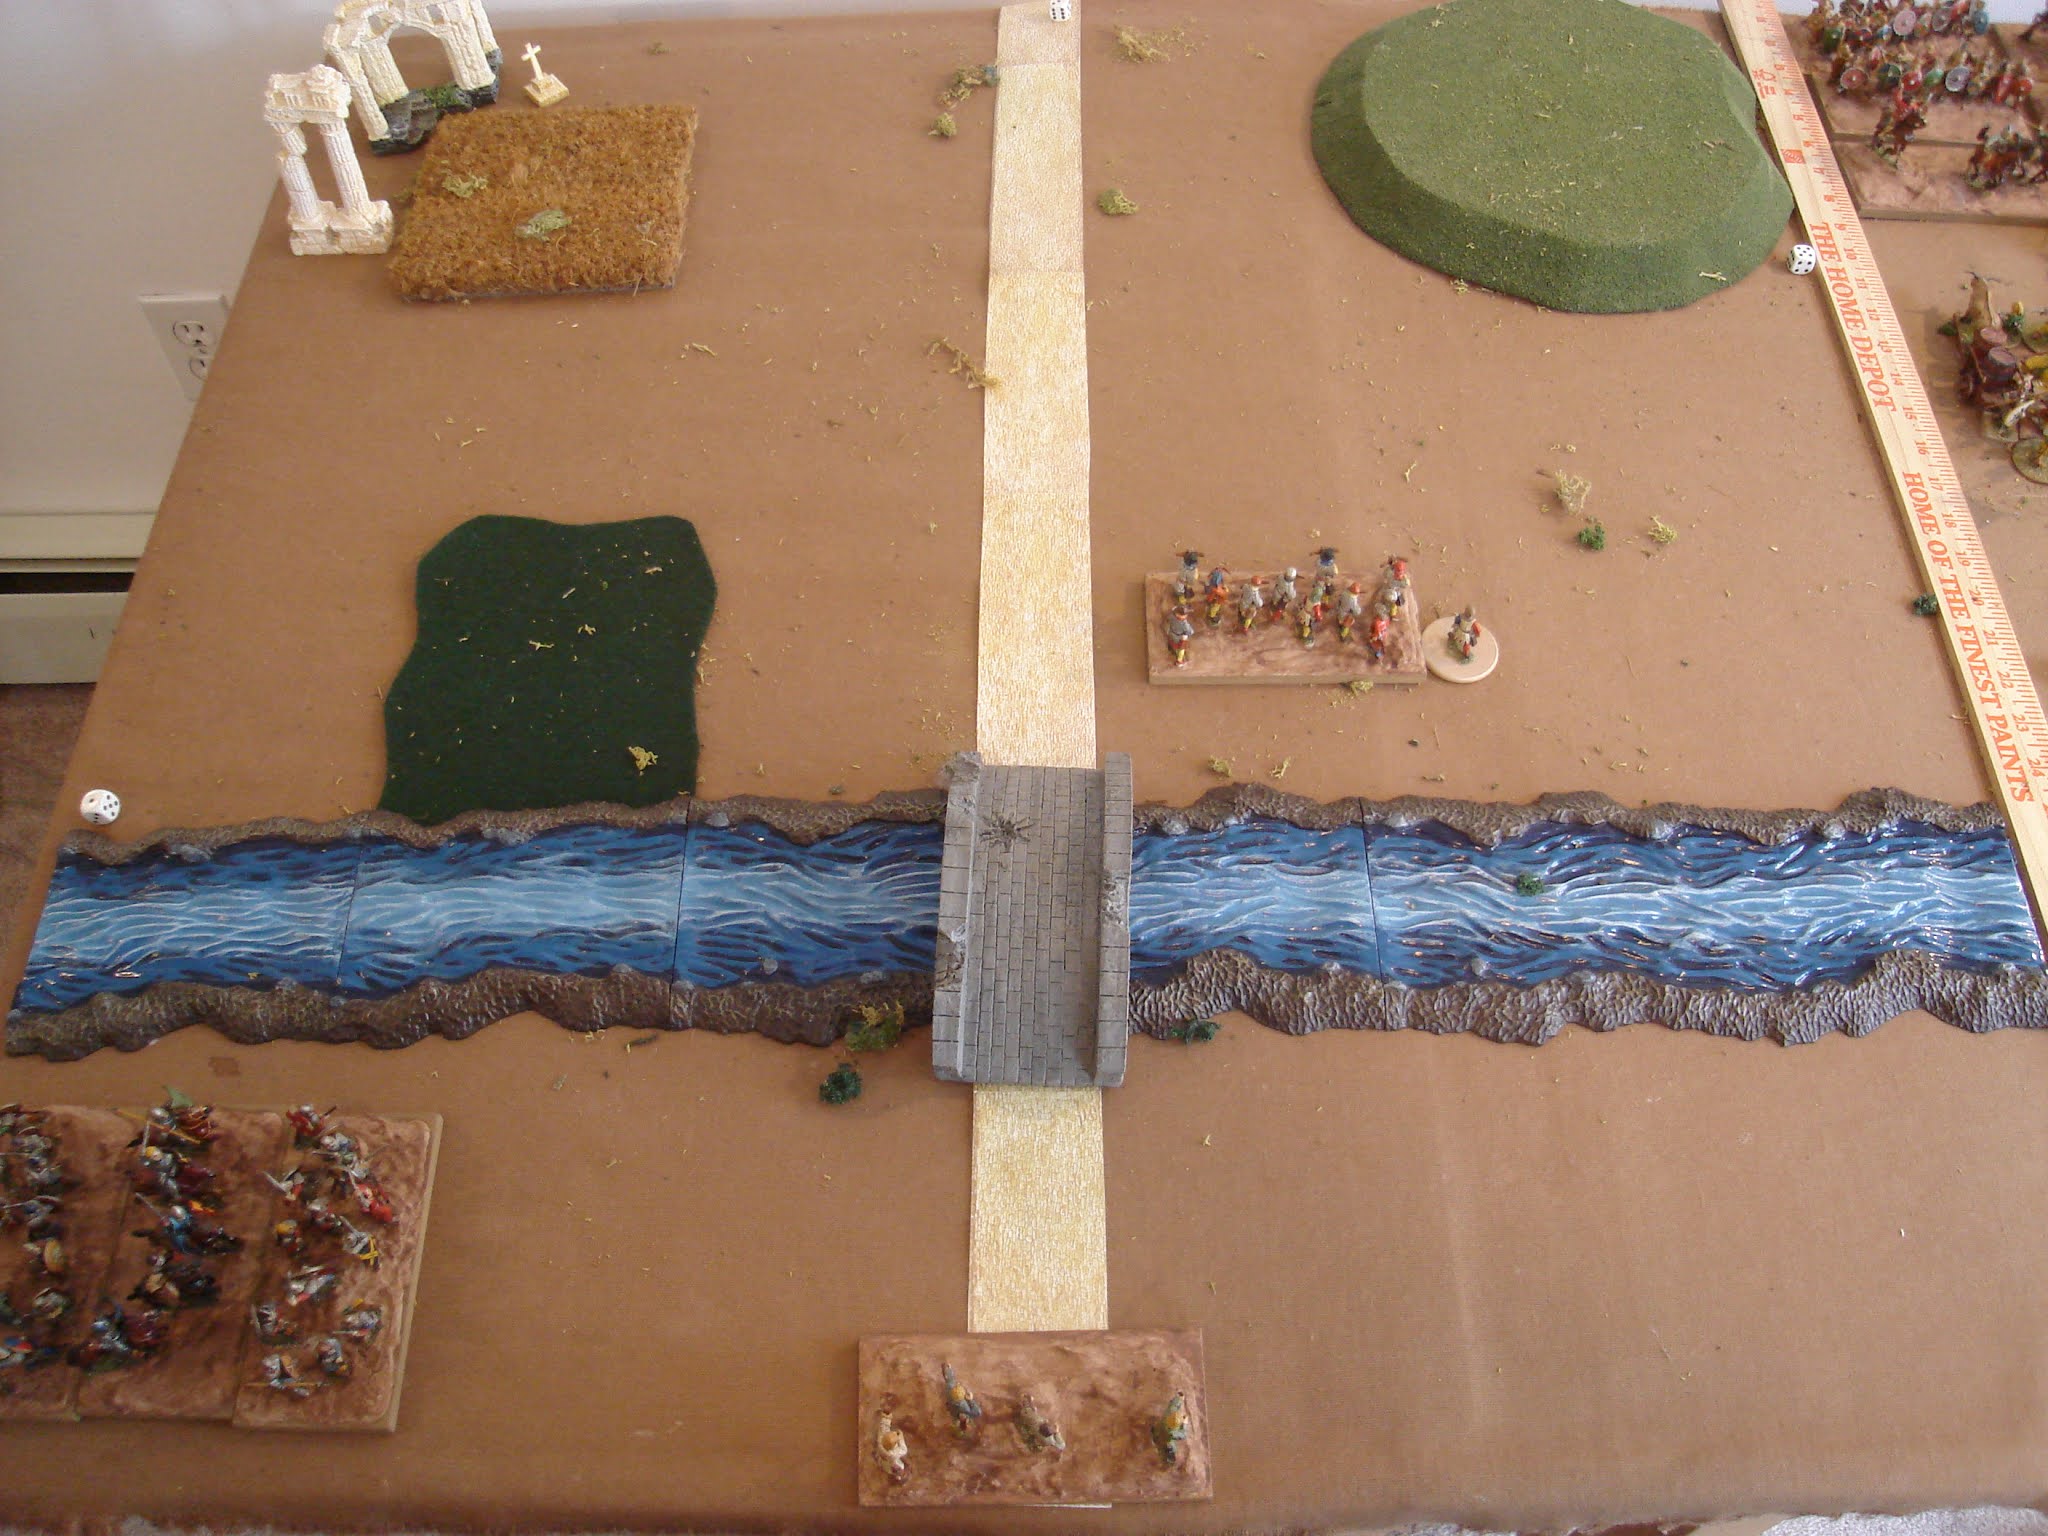
Red gets 3 waves of 2 units each, but the trick is that while he gets to pick the units he dices for where they arrive: on a 1-2 it's at 9 o'clock to left of the wood; on a 3-4 it's straight down the road from 12 o'clock; and on a 5-6 it is just at the base of the hill to the right at 2 o'clock. Where the forces enter and what kind they are is a big deal, as getting a skirmisher at 1-2 is a potential game winner, while at 5-6 it is nearly useless.

NOTE: the rules do not say - but one could dice the location and then pick the two units assuming a more organized defense. I decided to go with the more difficult pick the units then dice, as in this narrative the Welsh are caught off-guard...your narrative may be different!  There is also a choice for the attacking Blue to choose the order of advance across the bridge ahead of time or decide on the spot - I chose that he had to decide before hand. Goes to show that it is easy to work a OHW scenario into the history or story you are trying to create...

Maestro Capellini shivered and pulled his cloak closer as he looked at his men. They were a fine contingent of professionals, mostly from the South of Europe. They had been a company for several years now, and knew the business end of a crossbow very well. Altho they kept intending to return back to the warm and wealthy south, the money was just too good! These Northmen valued them and trusted them more than their own vassals at times. His main complaint was the weather, which was too damp for his blood. 

The Maestro's men were ready for whatever the Stranieri would throw at them today. He could hear the bellowing of Sir Ranulf as he organized the next group to cross over, which was reassuring. However he couldn't see any Welsh, which always concerned him...the devils could appear from a wood or gully by the hundreds!

Below, the crossbowmen hold the bridgehead.  They have a Master Bowman leading them, who allows them to shoot an additional 6" but to less effect.  Sir Ranulf hopes that they will be able to dominate the opening stages of the battle for decisive effect later.  To the bottom left are the oncoming reinforcements in order of appearance. First up are a unit of Skirmishers. Hopefully, they will be able to take control of the woods and hold them.  If not, victory is doubtful.

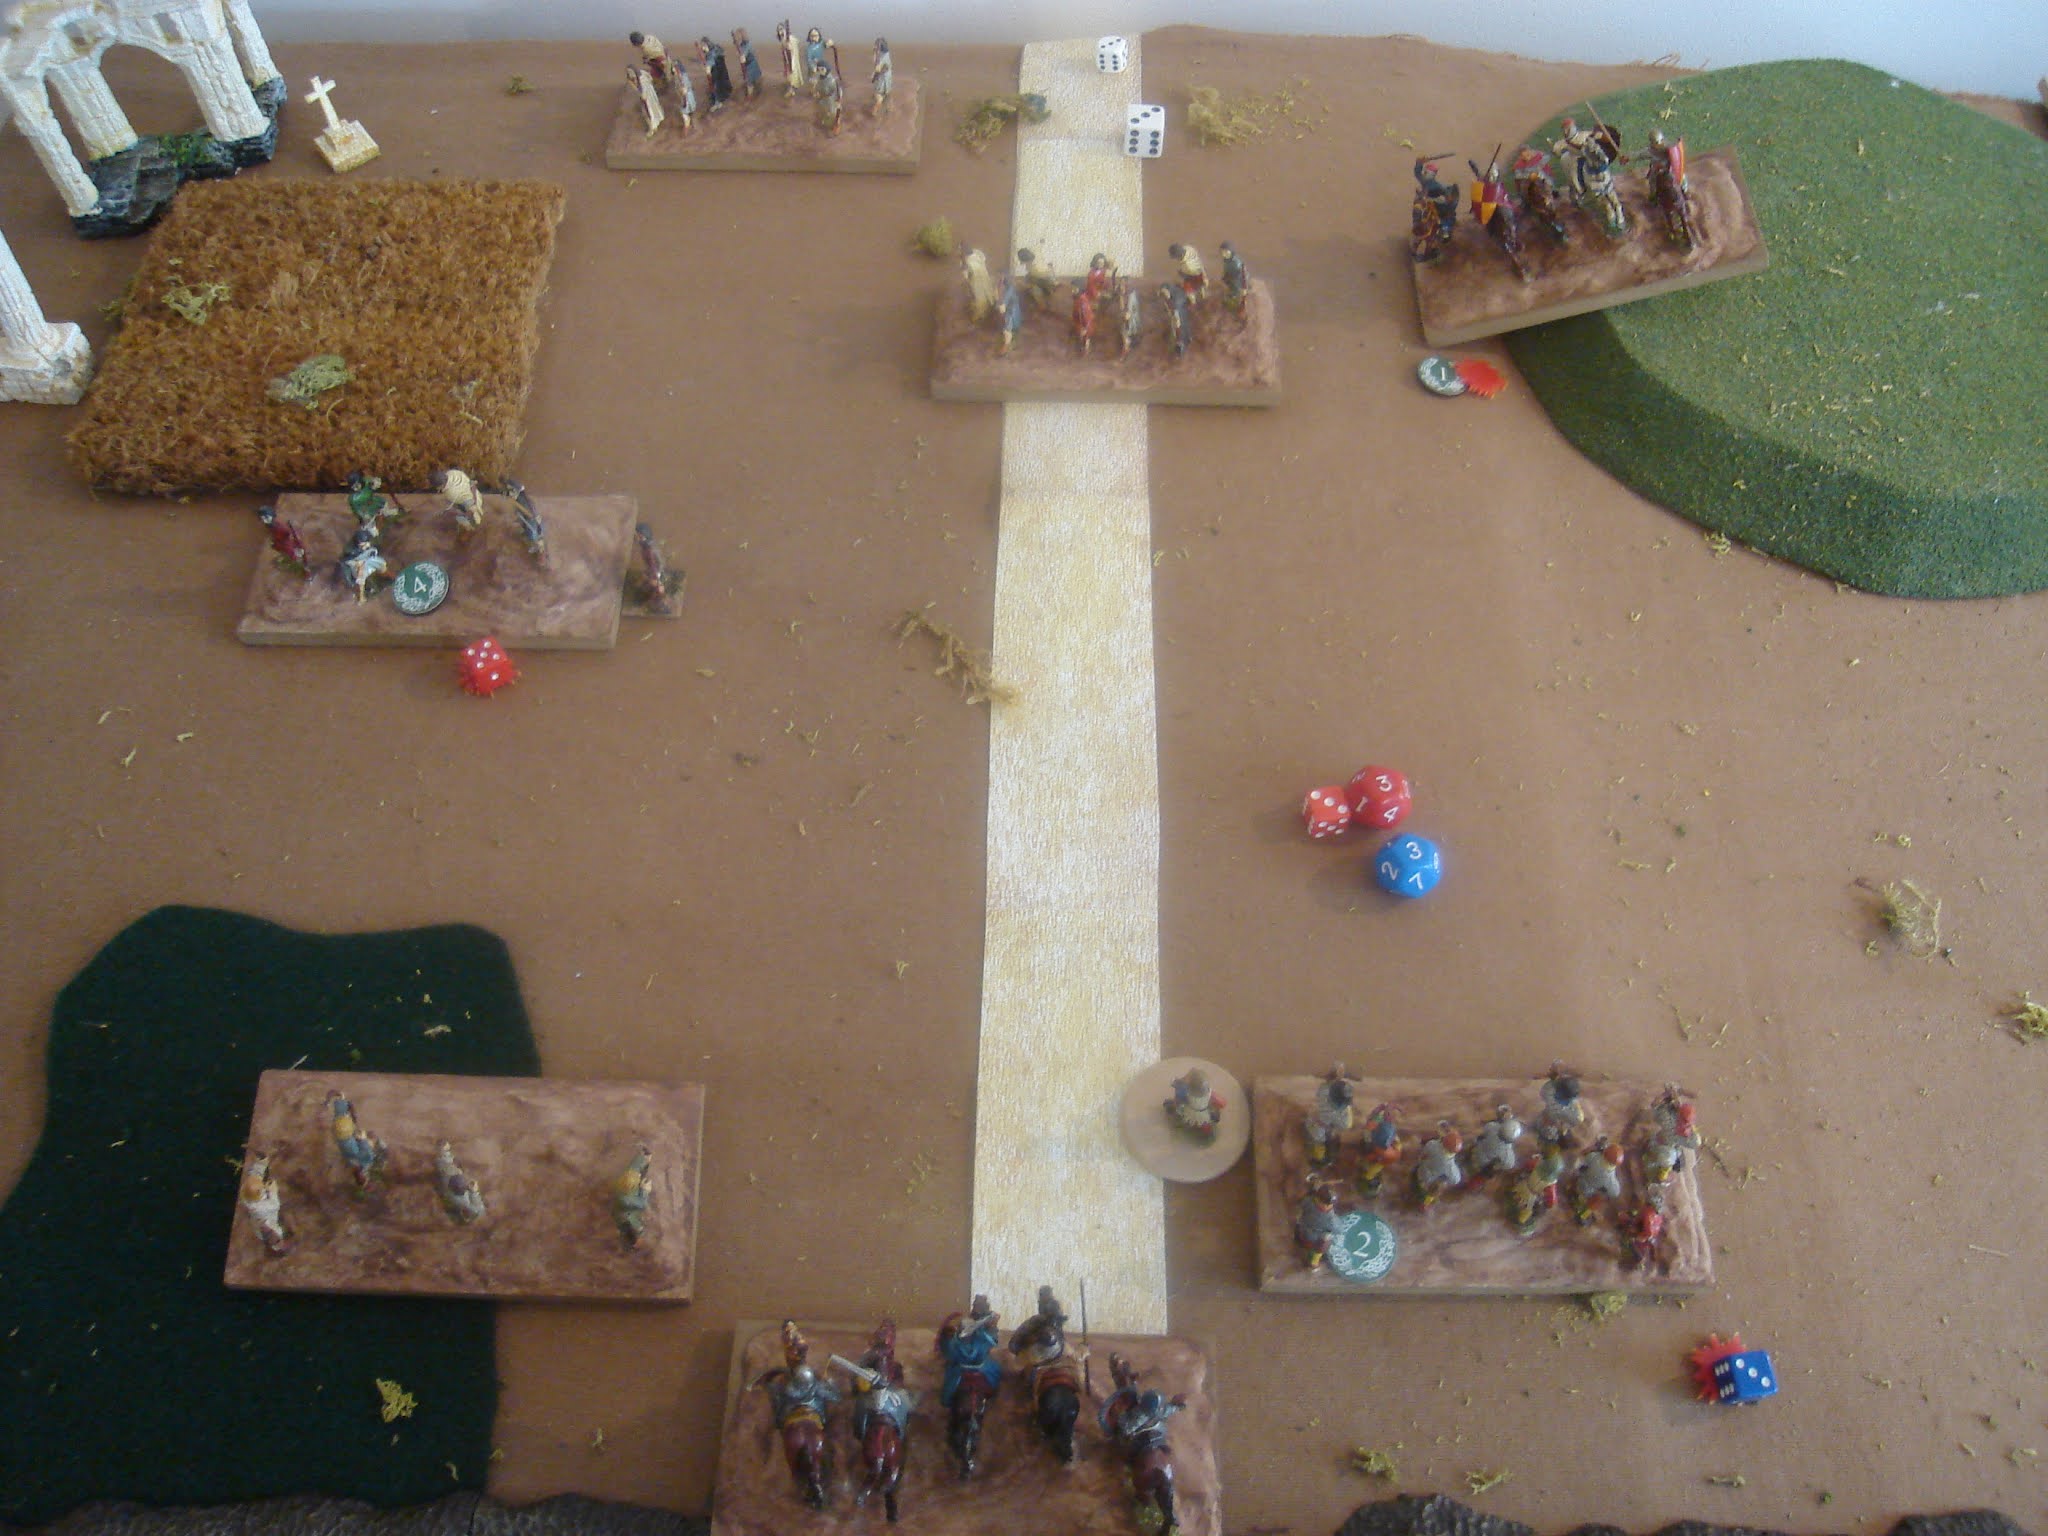
Below, the first two Welsh units arrive - Bowmen and Skirmishers, they rolled a '3' for arrival. The hope is that the skirmishers can seize the woods and hold them for a win since Blue must clear an area 12" from the bridge or lose the scenario. The Bowmen roll high for movement and thanks to that and the road bonus they are in their own range of the Crossbowmen. The Skirmishers are a bit slow.
Below, Old Glory Welsh archers. The single fig is a Green Hood Personality figure. He may be assigned to a unit of Brigans [Skirmishers] and allows them to reroll any natural '1' on movement or shooting. This does make the unit a bit more reliable in its performance.  The Archers are a standard bowmen unit, except my default for archers is the "d6" level of combat performance, not "d6+2".

Facing them are the mercenary Crossbowmen, all Foundry figs. They shoot at the d6+2 level, and have the Master Bowmen figure with them, giving them 6" of extra range at less effectiveness.

Using their range, the Crossbows are able to reach the Welsh Skirmishers which are presently the biggest threat to victory on the table. They roll average and get 2 Hits. In my version of these rules, units die at the 7th Hit.

Turn 2, the Welsh skirmishers only roll a '2' on Morale so can't move. They also take two more Hits from the deadly Crossbowmen. Those in turn take only 1 Hit from the Archers and are reinforced by their own Skirmishing archers. It seems that the Normans will win the critical "race to the woods" at this point.

Turn 3, the Welsh roll a '5' for their Brigans who shake off their battlefield stupor and quickly advance against the woods. Reinforcements are a unit of Knights and a second unit of Bowmen. The plan is to dominate the shooting fight then charge in with the Knights to mop up and contest the bridge. Unfortunately, the Knights take a hit from the Crossbowmen, English Knights are crossing the bridge, and the English skirmisher is almost in the woods.
Below, a tough turn 4 for the Welsh. Their Knights roll a '3' and cannot move faster than their base move - ergo cannot charge the Crossbowmen, so move aside. Welsh archery again only inflicts one Hit, which is shrugged off my the professional Crossbowmen. The English knights roll high and are able to charge the other Welsh Bowman Unit, while the Welsh skirmishers takes another Hit and is going to die if it doesn't rally soon!
The mercenaries cheer as the Welsh knights turn aside in disorder from the deadly flight of bolts sent into them. Several Welsh nobles lay on the field while wounded horses scream and run wild. The return shooting is not effective, many arrows falling wide of the mark, and the few wounded are escorted off the field. The feudal archers, mostly huntsmen, are holding the woods to the left, while the knights gallop by charging the Welsh archers.  Behind, dismounted knights begin crossing the bridge. The Maestro is relieved to see them - they are far better able to hold the bridgehead than his men, as there are just too many targets on the field!


The feudal archers have not only secured the wood, they have almost destroyed the Welsh skirmisher, the only Welsh unit that may enter the woods.

The situation at the end of Welsh Turn 5. The damaged Knights have flanked the Crossbows while two units of Freemen [standard infantry] arrive rolling a '6' for location. The Welsh Skirmishers rally off a hit so they are likely out of danger for now. The Welsh Bowmen seems to have brought rubber arrows...still, there are many Welsh and few English on the field!
English Turn 5. The Skirmishers miss, another hit is put upon the Welsh Archers from the Crossbowmen, and the dismounted Serjeants cross over. The situation is stable but not secure from any perspective.
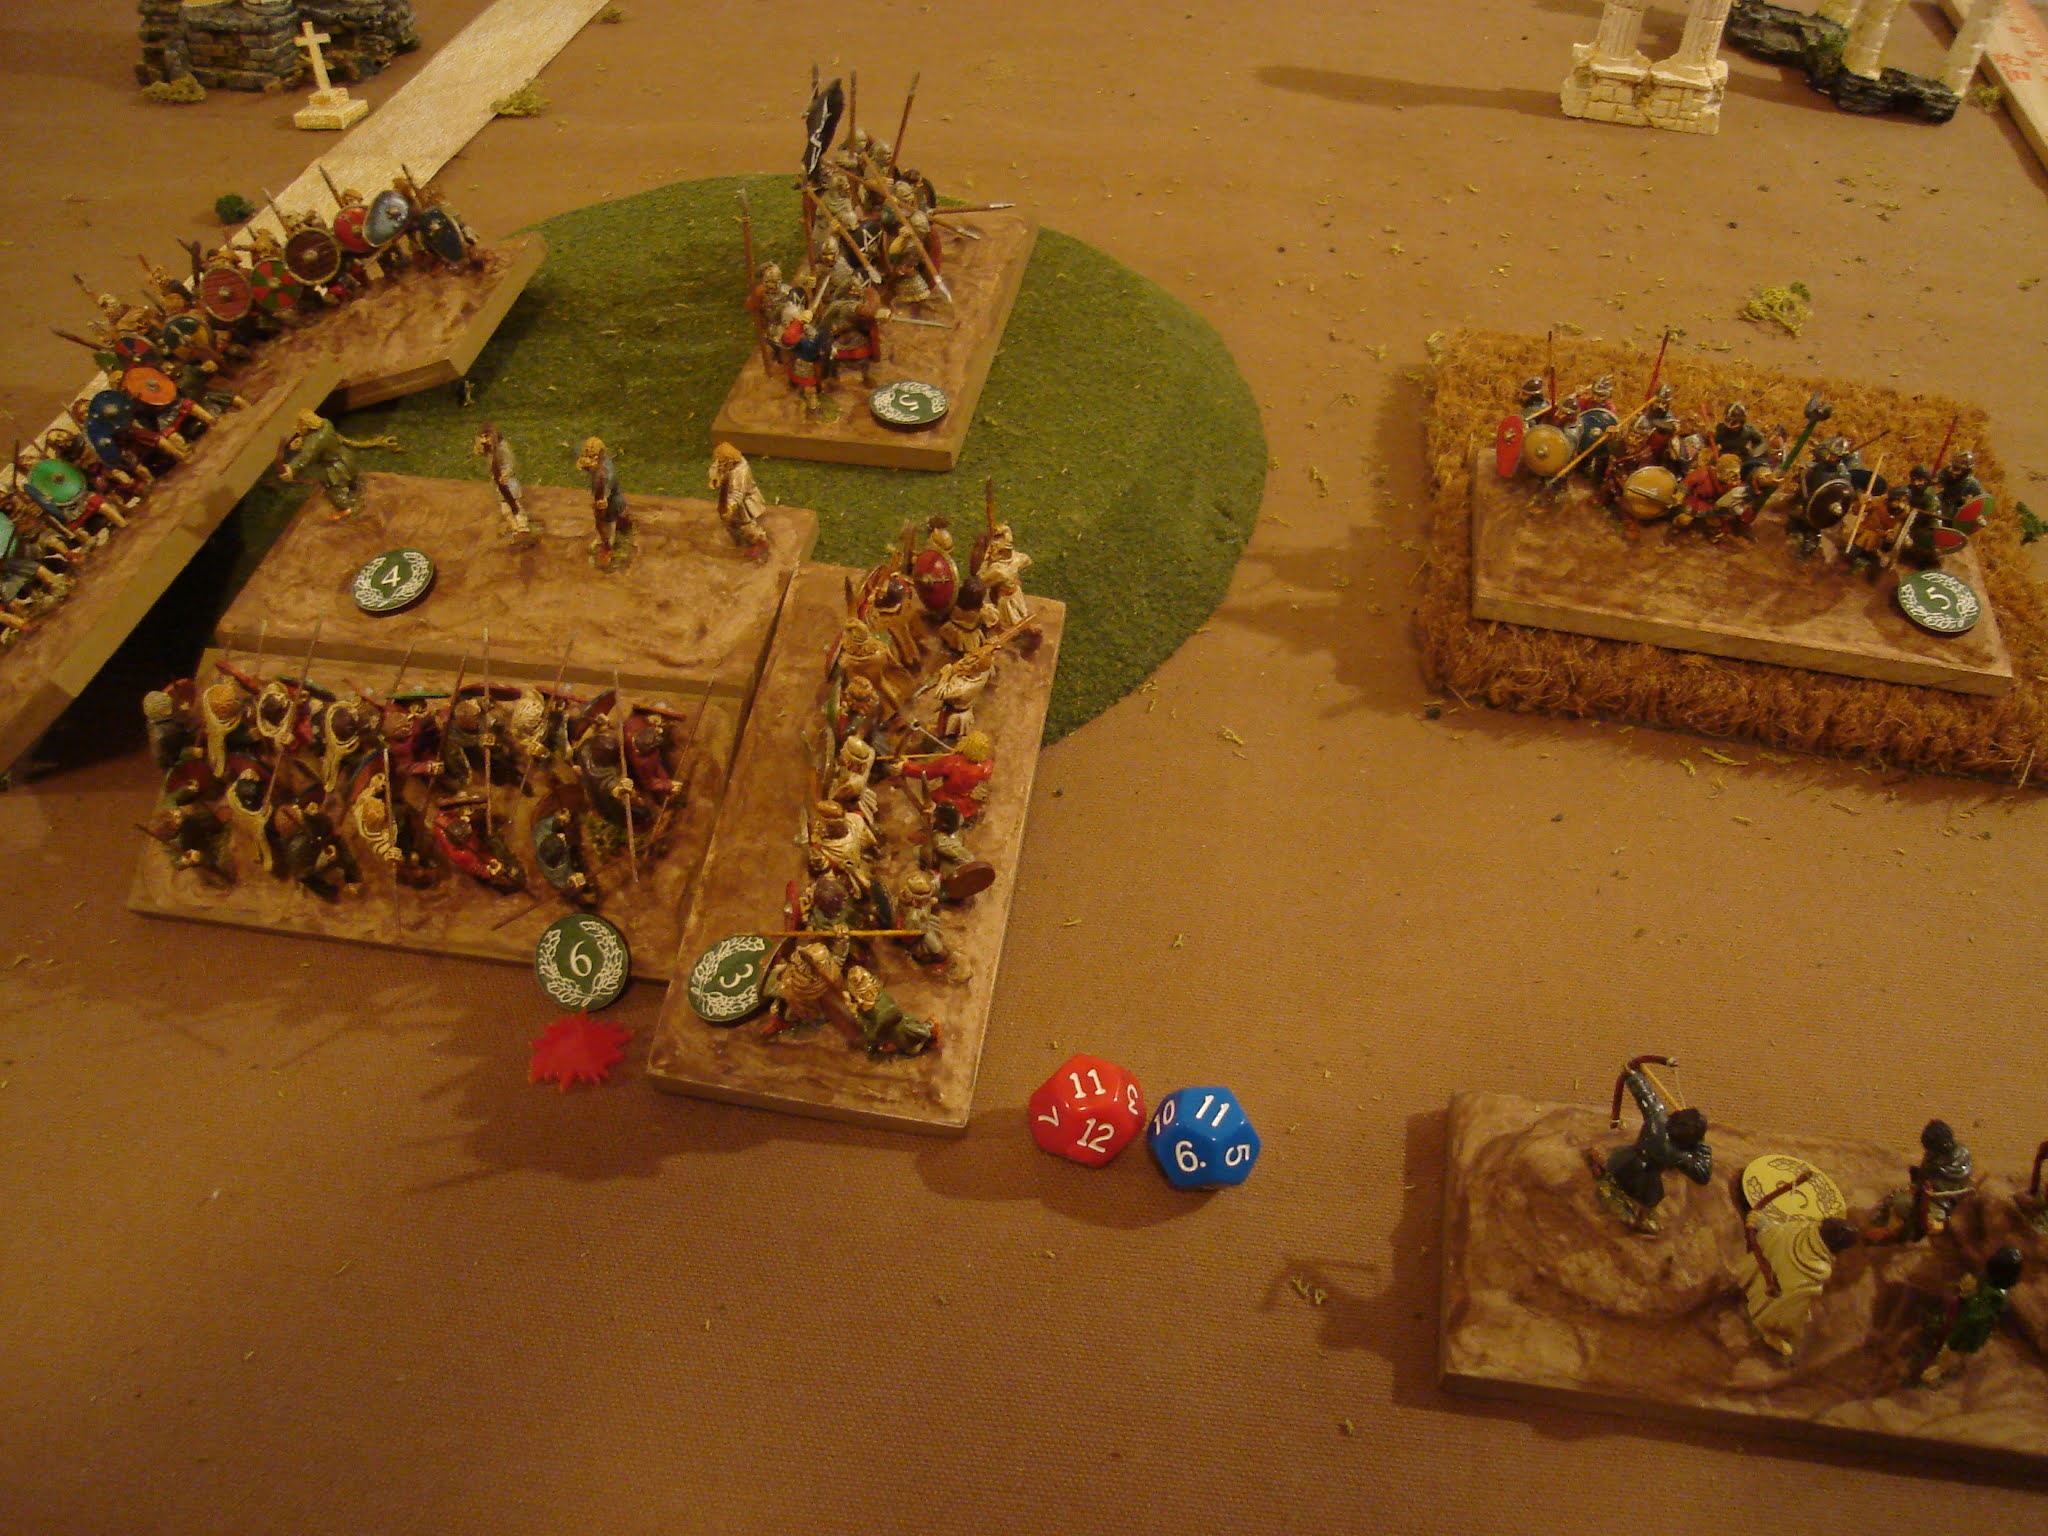
Suddenly, the field is full of Welshmen!  Two large groups led by screaming chiefs pop out from behind the hill, while their Knights work around the Maestro's flank, much to his concern. He turns a bunch of his mercenaries to face the inevitable charge, and hopes that these Welsh are not so fierce when mounted. The rest of his men hit several archers, one of whom begins screaming from a nasty stomach wound, distracting many of his fellows - their return shots are not effective. Glancing back, the Maestro sees more dismounted Knights crossing the bridge... he just needs to hold out a little longer and they will be relieved!

Welsh Turn 6. The knights charge in and the Freemen begin maneuvering to hit the Crossbows from the front. Their Bowmen roll a '2' for Morale and barely manage to inflict a Hit on the Knights in melee against their fellows, who miss entirely in the melee phase. Overall, the situation looks good to contain the bridgehead.

English Turn 6. The Crossbows face the Knights after passing Morale. This creates space for the Serjeants to advance past them into the Welsh Freemen, while the second Serjeant unit prepares to attack the Knights when the Crossbowmen quit the field. They have 4 Hits against the 3 of the Knights, so we will see...
Welsh Turn 7. Disastrous Morale Checks!  The Skirmishers and Freemen both roll a '1' and Retreat from their opponents. This also blocks the other Freemen from taking up a more useful position on the battlefield. Still, the Knights pass and inflict two more Hits on the Crossbowmen, who are nearly done at '6' Hits.
Norman Turn 7. The Marcher Lord is marching ahead!  Sir Ranulf's Knights destroy the opposing Bowmen, finally. His Serjeants follow up with a ferocious attack on the retreated Freemen that has them at 5 Hits. His final unit, one of Freemen, cross the bridge and start advancing down the road. He also successfully maneuvers a unit to back up the Crossbowmen against the Welsh Knights. The situation is looking very good!
And as if things couldn't get much better...Sir Ranulf wins Initiative for Turn 8!

Turn 8 - the Normans seize the Initiative and the field of battle! Their Knights attack the Bowmen on the road, pinning them in place. The Serjeants roll another triple-hit, putting the Welsh Freemen at 8 and routing them off the field. The Skirmishers destroy the Welsh Skirmishers, and the Crossbowmen hold the Knights off.

Maestro Capellini hears cheering from everywhere, as Welsh begin to flee - his men take heart and work to hold off the Welsh knights as best they can with their swords and an occasional crossbow bolt. The Welsh knights seem dismayed, some are clearly hesitant, and they point to behind the Maestro. He turns and sees the Serjeants advancing carefully, and in an orderly fashion, close together. The Maestro begins pushing his men at the back to start moving off, thru or around the Serjeants backing them up. They need little encouragement, and start shouting to their fellows to hurry behind them, and to "scapa while the scapa is buona!"

All does not go the Norman's way, however.  The Welsh Turn 8 sees the Crossbowmen and Knights put to flight, and the Welsh Freemen putting the hurt on the triumphant Serjeant unit. The Welsh Bowmen - clearly desperate and ferocious - inflict max Hits possible to destroy the Norman Knights!

Marcher Lord Turn 9. The Serjeants easily pass Morale and inflict Hits on the Welsh Freemen, even as their own Freemen push down the road into the Archers. The Marcher Lord's skirmishers advance out of the woods to help clear the road, just in case. The Serjeants near the bridge advance and push into the Welsh knights, inflicting serious damage.
Welsh Turn 9 sees aggressive and strong performance by all Welsh Units, who also pass their own Morale checks with a margin of error. The Bowmen put in another amazing attack, inflicting max Hits on the Norman Freemen, much to their surprise!
Norman Turn 10. Despite these efforts, the Welsh are struggling. The Archers flee after being shot in the rear by the English Skirmisher Unit. This frees up the English freemen to attack the Welsh Freemen, who are approaching the end. The Norman Serjeants roll a measily '1' for Morale and retreat against the Welsh Knights!
Maestro Cappellini's last men crossed the bridge, and headed back to camp. A few hurry as they hear the Welsh knights give a fierce warcry and charge into the Serjeants fiercely enough to push them back several yards - will the Bridge be lost?? The Maestro begins to shout at his men to turn and prepare to shoot at the knights, but none turn - they have had enough for today.

Unsurprisingly, the Welsh Freemen are destroyed. The Welsh Knights blow their chances to steal a draw by rolling a '1' for morale themselves, and retreating from contact! 


The Norman Serjeants take heart when they see the Welsh Knights falter, and advance upon them again, pushing them nearly to the limit of endurance. Also, their fellows are just barely in range to charge to their flank [I allow close units to charge into their side arc, just a couple of inches].

Unsurprisingly, they see off the Welsh Knights.
End of the battle. The Welsh are swept from the field...barely!


Well, this was an exciting matchup, no mistake!  This is a hard scenario for Blue to win, as getting a 12" bridgehead is nearly impossible without destroying the enemy army. Still, this time they had the perfect plan and it was aided by some good fortune with seizing Initiative at just the right time.  A few dice rolls going the other way, and this may easily have been a draw.

I played this scenario about 6 times, trying out various units and combinations. I feel like the Serjeants are essential for their durability, and the Skirmishers are mandatory if the opposing side has any because of the woods. Overall, another great series of games, playtests, and an enjoyable continuation to the narrative, as Sir Ranulf continues to advance into the cantref!

Maestro Cappellini looked around at his weary men. They had a narrow scrape between that bridge and the Welsh knights!  A few sang quiet songs, satisfied with themselves and their work today. Sir Ranulf had visited their camp and congratulated them, and more importantly, handed a fairly heavy purse to the Maestro saying "with respects from the Welsh!"  The men had cheered lustily and shouted a variety of appreciated banter and battle cries back at Sir Ranulf, who nodded knowingly, gave a slight wave of appreciation to the Mastro, and walked off. 
Sir Ranulf was certain that this cantref would be his - he just needed to push on, push on!

Thursday, April 8, 2021

Late Dark Ages Battle: One - Hour Wargames #17 "Encounter", p.2

 ...after a wild first 6 Turns, we are wondering if the Saxons can hold the center hill and bring up reinforcements fast enough to relieve the heavy infantry holding on there.  Let's see!

Turn 6 Bretons. Their heavy infantry are within a Base Depth [BD] of the Saxons, so they may charge them. Using the bases as a measurement tool can really help speed up the game...
...so they take a bit of a risk and hope they will wipe them out quickly.  The foot skirmishers miss but the horse skirmishers manage another Hit. In Melee, the heavies inflict one hit, bringing the Saxon heavy infantry to 6 Hits - one more and they are dead! To cover their flank and rear, the skirmishers shift right and the cavalry attack the Warband, inflicting 2 Hits - double the average!  Bretons also get a reinforcement of Freemen - a great turn for them!

Saxon Turn 6. The heavies roll a '1' for morale and retreat a BD. This means they can't fight back this turn. Their Warband roll a '3' and decline the opportunity for further glory by advancing. The Freemen move up, and the skirmishers inflict a hit on the light cavalry.

What!?  The Saxons seize the IN and choose to go first for Turn 7!

Saxon Turn 7. The Freemen charge the Breton heavy infantry and roll 2/2 hits!  The Warband charge the cavalry and also get 2 Hits. The skirmishers inflict one hit and are destroyed!

Breton Turn 7. The heavy infantry roll a '2' for Morale and can't move. Their skirmishers move up and inflict two Hits on the Freemen, however, and the cavalry inflict 1 Hit back on the Warband. The reinforcing Freemen move up and threaten the skirmishers, but are also heading to the hill, which is the objective.  They may squeak out of this situation yet...

Saxon Turn 8. They pass all their Morale checks - tasting victory? Warband roll 3/3 Hits, and severely cramp the style of the cavalry.
Saxon turn ends with their heavy infantry rallying off one hit, getting down to '5', and inflicting hits on the Breton heavy infantry, cavalry, and freemen. they also got a Freeman reinforcement. A nice turn.

Breton Turn 8. The Cavalry roll a '2' but are -1 due to the yellow Hits, and need to retreat - unfortunately, they can't retreat the full distance b/c of the skirmishers, so take another Hit.  Ugh.
The heavy infantry also roll a retreat, and are able to go back the full distance, but are still in contact.
The Freemen shake it off and move forwards. The Skirmishers inflict another hit on the Saxon Freemen. A weak turn...perhaps, but this is still anyone's game.

And now the Bretons - who have tied a knot at the end of their rope and are hanging on - win IN!  It's a no-brainer decision for them, they will take the first player turn for Turn 9.
Their skirmishers inflict a Hit on the Warband then retreat. The heavy infantry turn to face the Saxon Freemen and put a Hit on them.
The Bretons also get a Freeman reinforcement, and attack the hill with the other Freeman.  They roll well and inflict two hits despite them being uphill. However, on Saxon Turn 9,  they roll extremely fortunately and inflict 2 Hits back! Their heavy infantry help gang up on the Breton heavies, but the warband completely miss, and fail to finish off the cavalry - argh!

And then, for the umpteenth time, the IN switches and the Saxons take it for Turn 10 - more turnovers than a pastry shop here!  What are the odds??
Oddly, I appear to not have taken any pics of Turn 10...must've been a bit dull.  

Turn 11, Bretons win IN back. I hardly know what to say at this point.

Well...Turn 11 sees the Saxon Warband having eliminated the Cavalry but take some more Hits. The heavy infantry and Freemen eliminated the Breton heavy infantry, and then the Freemen moved on to attack the Breton Freemen attacking the skirmishers on the hill, who are being held by the Skirmishers. Meanwhile, both sides have Freemen fighting on the hill.  Overall, I think the edge is to the Saxons since they hold the hill in strength and the Bretons haven't managed to finish off another Saxon unit altho there are two at 5 Hits.

Turn 12. Saxons seize IN back.
Turn 12. Saxon skirmishers drive off the Freemen, albeit with help from their Freemen. The Warband and heavies have failed to Rally off Hits. The Breton skirmishers got dinged along the way. Altho a couple of Saxon units are at the end of their rope, I don't know that the Breton skirmishers are the right unit to defeat three units and save the day!

Saxon Turn 14, Breton Turn 13. The Bretons are trying for the draw, by sticking their dirty toes onto the hill! The skirmishers eliminated the Saxon skirmishers, but not the Freemen that are nearby.
This results in the Bretons becoming the cream filling of a Saxon Oreo, and being eliminated.

Well, that was one of the wildest games yet.  The chance for IN to change that often is not very high. But it has to happen occasionally.

This makes it worth noting - altho certain mechanics may have an AVERAGE result that is the same as another, that doesn't mean that they have the same possibilities. So in the RAW, there are three attack mechanics, two of which have a minimum of 1 or 3 Hits [d6 and d6+2] so neither can "miss". This results in a steady attrition, even if it is small. I do like this since it shows fatigue even if not a decisive result.

My system - and several others - have the same mathematical averages but do allow the possibility of missing an attack completely. This - theoretically - could result in some "back luck" and a lot of misses. I'm OK with this because if you roll lots of natural 1's in the RAW, you still lose while your opponent rolls average.

Your feelings on this may vary.

This was a great knock-down drag-out fight, and I originally thought the Saxons would lose after some poor choices and results in the first 5 turns. They did turn it around completely and drove the Bretons from the field. This was about the eighth time I played the scenario, and I think I have it mostly understood. I do like the increasing chances of reinforcements arriving with every missed roll. I have had it go down to a 1+ only once, and a 2+ a few times.

Just goes to show that there are plenty of games to play with every OHW scenario, even one that seems as simple as this!

As for the rules, I am very happy with how they have developed, and I really enjoy the Morale check mechanic - provides the right amount of friction with minimum rules fuss, and "feels" right.  So a tip of the hat to John Acar and his labors for gamers worldwide!

Friday, April 2, 2021

Late Dark Ages Battle: One - Hour Wargames #17 "Encounter", p.1

 "I wish I had drunk less sherry and listened more to John Acar!"
From here [click]

Well, it seems like a regularly find something useful in what John Acar [click] says. True, he appears from his Fb page to live in a somewhat sideways gravitational field, but hey Napoleon Himself can't be wrong!  Seriously, altho I've used or considered many of JA's rules preferences, I must admit that he regularly reminds me of why some things work.

I've saved his "what I like in rules" post from somewhere. I printed it out and eventually I will do more with it.  I think his reasoning and preferences are that good! Recently, he put up a Horse and Musket version of OHW that incorporates a "check morale when the unit activates" mechanic [which I do use in my WWII rules already], but it reminded me to try it out in my "Spear to the Strife" Late Dark Ages / Feudal Rules and it has worked out really well.

All the positives being said, the rules he posted have the same gaps as the original OHW rules with key mechanics missing. But, I did steal his 1d6 roll for the morale results, altho I felt they needed to be toned down a bit - they were TOO impactful and more or less raised a slew of additional rules questions.  Still, they did work when I developed the final product.

My version of the morale check mechanic has any unit that takes a hit [and I use a 6-hit system - on the 7th, the unit is removed] has to check morale the next time it is activated, which will always be next turn [you can't NOT Activate a unit, even if it does nothing]. It has about a 50-50 chance of passing with nearly no ill effects. But on a 1-3, you end up with some retreats and loss of movement and combat power, as the unit becomes a bit confounded at their disorder and/or casualties.  Works well and is easy to tweak [you can make it more or less impactful with little effort]. I playtested a whole bunch of times and this will be the unveiling.  

To demonstrate, I played the the #17 'Encounter" scenario for the first time.  This has each side starting with 1 of its 6 units on the table 6" in, with a hill objective for both sides in the dead center.
...my take on the scenario map below:
NOTE: The road, field and ruins have no effect on the game...they just look pretty!

The catch is that this is an encounter battle, and each side rolls a d6 at the start of their turn and on a 4+ they pick another unit to enter the table.

The BLUF on this scenario is that it is important when you get your reinforcements! If you don't get any for 2 or so turns, you may be in deep trouble. To lessen the impact of luck, I drop the target number by 1 for each Turn that reinforcements fail to enter: so one failure and the next roll is for a 3+, another failure and it's a 2+...haven't missed that one, but if another failure, it would be an automatic on a 1+!

However, do NOT be discouraged if your reinforcements are slow to arrive. It is quite possible that you will find yourself retreating towards your board edge to gain some time while your opponent advances to pressure you more, and you are now closer to your reinforcements than he is!  Also, as it is a draw if the hill is not ENTIRELY in one side's hands, even if you are encircled by 6 enemy Units and have one unit with one Hit left - it's a draw. OK, that would certainly be a draw in the opponent's favor, but hey, better than a loss! So the scenario is not easy to WIN altho it is often in favor of one side depending on how the reinforcement rolls go.

That being said, the critical decision is which of your units to pick as the reinforcement.  After playing this about 6 times, my humble opinion is that there are two ways to do it - pick all your light skirmishing and cavalry stuff first, to help develop an aggressive stance on the battlefield. OR, pick your solid line units force, build up strength and then advance together with your best combat power. YMMV!

The only terrain issue is that Units uphill of the enemy take half hits in Melee, if not from Shooting. That is hard to take advantage of as it is unlikely you will get there with secure flanks, also.

That all being said, let's see what happens in this 7th +playtest!

Below, the army representing the remnants of civilization.

These Byzantine Peltastoi function as OHW Serjeants - they hit for d6 Hits and are Armored so take half Hits. I switched to a 3d6 hitting on a specific target number instead of the OHW system. The math is the same but there are additional possibilities in my mechanics, like missing completely.
All figs Old Glory 25s unless otherwise noted [CLICK]

These Irish medieval cavalry function as OHW Cavalry, hitting for d6 Hits. BUT, they also may Move then Shoot javelins same as Skirmishers, so d6-2 Hits in OHW.

Skirmishers from OHW, Pict LC and Welsh Archers. The dismounted may move thru woods and pass through other Skirmishers, the mounted cannot but of course they move faster. They both shoot and melee d6-2 in OHW. Interestingly, these are the only troops that can completely miss in the combat mechanics. Makes them a bit more unpredictable, which is as it should be. 

These Dark Ages Welsh function as Freemen, generic OHW Levy in the Medieval rules. They hit for d6 and have no armor.
...plus, they look cool in a continuous shield wall!  

Below, the Saxon Savages.

These Gripping Beast Late Romans [CLICK] are acting as foot Serjeants, or fight d6 and are Armored. 

These Saxon Fyrd are same as the Welsh Freemen. And also look good together!

These Gothic Infantry are acting as OHW Warband so hit on d6+2 and move fast as Skirmishers. They function as slower Knights, basically. They don't like to be shot at, however.

These Gothic archers are skirmishers, and the only firepower the Saxons have.

Battle Deployment. The Barbarians are leading with their most civilized - and durable - Unit. Goal is to seize and hold the hilltop best they can and hang on for reinforcements.  The British are leading with their Mtd. Brigans [Light Cav] who have a modest shooting ability and are very maneuverable. Goal is to harass the heavy infantry and soften them up for the reinforcements. There's only a low chance of them being forced into a melee, but that also means that the infantry can rally every turn to try and get the hits off. The net result is that does stop the infantry from maneuvering, which is a LC task.

Turn 1. Both sides advanced, neither sides got reinforcements [need a 4+] so both will need a 3+ next turn. The light cavalry rolled very low, and the infantry rolled high and moved nearly as far as they!

Turn 2 Initiative. Blue does not win by two, so it is retained by Red Saxons. 
Looking at the table, Red decides to concede the IN and force Blue to move first. This allows them a counter-move against the fast-moving Mtd. Brigans. A great choice as they may win IN later and turn the tables on the light cavalry.
Britains do get a reinforcement and choose their Brigans - skirmishing infantry. This will increase their ability to harass the infantry from two directions. Not to be put off their attack plan, the light cav move to just within shooting range but miss, needing a 5+ for a hit. The Infantry turn a bit to face the cav.
As their counter - the Saxons roll a reinforcement and bring on their Brigans, who roll high enough to get into range. They also stay close enough to prevent the light cavalry from slipping through the gap between them and their Infantry. They shoot and get one Hit!  The light cav get a red Hit marker to show they must check morale next Activation Phase.
End of Turn 2. Both sides need to roll a 4+ for a reinforcement unit. Blue has IN.

Turn 3. Red wins IN, 6-2! They seize IN and successfully roll a reinforcement so bring on a Warband. They shoot and get 2 Hits with their skirmishers, pushing the light cavalry to 3 Hits! The infantry could attempt a charge on the light cavalry, but the chance is only about a 1/3 or 1/6 to make it, so they decide to sit tight and secure the hill, which is after all the victory condition.

Blue Turn 3. The light cav roll a '1' and Retreat a Base Depth. This means they can't shoot as they retreated out of Range. On a 2 or higher they would have at least stood their ground!

Turn 3 end. Both sides have three units on the table. Britans hope to use their shooting and maneuvering to tear up the Warband, while the lights keep the other two units busy.

Turn 3 Redux. It's really turn 4, but I forgot to advance the Turn dice...the problem with taking pics, checking new rules, and playing against myself! 
Turn 3 Redux Saxons. All three units advance. Unfortunately, the Brigans missed the light cav.
Turn 3 Redux Bretons. The cavalry advance and score Hits on the Warband. The Brigans are keeping the heavy infantry on the hill busy. The Breton heavy infantry arrives and begins pushing forward. The plan is to advance to the right of the hill, crush the warband, and flank the hill. 


Stand against their arrows! 

The Cavalry threaten the Warband amidst the ruins of Roman civilization.

Turn 4. The Bretons seize IN back!  Pretty surprising, usually only happens a couple times a game.

Turn 4 Bretons. They make the most of the turnover and inflict Hits on both the heavy infantry and the warband, while advancing their own heavy infantry.

Turn 4 Saxons. They roll poorly on the Warband's Morale Check, and they retreat a base depth. The heavy infantry stand, the Brigans advance and put a hit on the light cavalry, and they get a reinforcement - they pick the second Warband - fastest unit they have left.

Turn 5 Bretons. They inflict serious punishment!  Three more hits on the heavy infantry from shooting, and two more on the Warband from shooting, then their heavy infantry manage a long charge and send the warband packing - wow, great turn!

Turn 5 Saxons. They get a reinforcement, a regular old Freemen infantry. The remaining Warband curbs its enthusiasm and just advances a bit, not wanting to get caught away from support. The heavy infantry pass morale with a 4, then rally off one Hit with another 4. Their Brigans advance and get a Hit on the light cavalry.

"Warriors...come out to play-ayyyyyy!" [click]

Well, it's been an interesting start, a lot of turnovers of Initiative and some setbacks for the Saxons - can they recover and hold on to the hill??

Next post - Turn 6 and on to Victory!