

Key Question: How "Mass" is mass combat?
I stumbled upon "On Bloody Ground" by WiP Games [CLICK] on YouTube, and watched a couple of partial vids. it struck me as "legitimate heir to Warhammer Ancient Battles" [and possibly WHF5th] so I investigated. The son in the Father-Son author team, Dan Toone, was very responsive via Fb. We discussed and I got a "yes" to an objective review here at "Spear to the Strife" blog and a free copy of the rulebook mailed. Ergo, this is a cooperative review, but we are not personal friends so it will be a genuine critique!
The question I want to answer for all of you on the web is:
"Should I buy these rules, and if so why?"
Let's get to it!
BLUF
1) "On Bloody Ground" [OBG] is a traditional set of wargame rules with common mechanics and methods to the tabletop wargame culture today - i.e. no novelty mechanics.
2) It is amazingly well written for a first effort design team! It could use one more draft / edition with clarifications, but they are handling that via free FAQ at their website.
3) Unit and command "feel" is a Unit Skirmish Game, with units moving and acting line 25-150 men or so, and commanders bellowing orders about as complicated as "Charge!", "Stand firm, lads!" or "Run Away!" Thus they are very suitable to simulate 95% of warfare in the period: small fights, mostly unrecorded, of less than 1,000 men. They don't feel like "mass combat" to me, as that is more like the Battle of Brunanburh in my mind, so "how mass is mass combat?"
4) The game is aimed at friendly pickup games, but could accommodate small historical battles, or bath-tubbed large historical battles. Competitive people will likely be able to take advantage of the occasional loop hole etc as the rules are not written "tightly" for tournament purpose.
5) It's reminiscent of Warhammer Ancient Battles / "Shieldwall" supplement. If you loved doing Dark Ages with those rules, and / or you enjoyed Warhammer Fantasy 5th edition, you will enjoy these rules. Also, your figures and units should already be about the right size. Basing is single figs, but I played it with blocks of 12-16 infantry no problem.
6) Core mechanics are simplified / streamlined WAB, but remind me of a few other traditional sets and take up 12 pages.
This is where you'll be checking rules for moving, shooting and combat.
7) Additional mechanics for Commanders, Orders, Bystanders, Army Creation, Special Rules, Scenarios and Terrain are another 15 pages.
This is where you'll be checking for commander, unit and scenario rules.
Should be noted that these rules will make great High Fantasy rules for Dark Age inspired worlds e.g. Tolkein, as "Magic" can literally be done JUST using the Command Points system and purchasing extra leaders as "sorcerers" and such! The flavor would be up to the players, but looks soooo easy....
Tweaking... yes, you will want to tweak these rules, and they are easy to tweak to suit your ideas of dark age combat, or your time limit. Want to have a faster game? Raise morale a point. Want combat to last longer? Lower morale a point. Simple!
SUMMARY:
If you are uninterested in detailed simulation [spare me, oh merciful Lord!], want a fun game that is evocative of the Dark Ages with a low time / price [£15.00] demand, AND potential for High Fantasy, then you should buy these rules immediately! They only printed 500 sets...just sayin'
IN-DEPTH DETAILS
Design goals, from Co-author Dan Toone:
-- "fun...perfect for a day or weekend of gaming with friends...not coming with a play to win at all costs mentality".
-- "a game that felt right for both players, whilst having a competitive and tactical element to it still."
-- "we plan to release 2 books a year...They will be focusing on specific periods of history rather than a whole 'age'. We want to avoid "2 books at an inflated price with things most people don't want" or need to play the period.
Design Goals Achieved?
Clearly, the DNA is from WAB, but WAB ultimately became a tournament game which demanded a lot of clarifications to the over-engineered mechanics. I don't see OBG heading that way.
Main change is Combat is more bloody, to force the player to "properly decide when...to commit to fighting" and provoke decision points with their leaders.
I enjoyed many aspects of WAB, but this is simpler and streamlined, and it feels more realistic and less stylized and is fun, so I think they succeeded with their intent.
Core Mechanics
- Charge into Combat and resolve immediately. There is no limit to the number of times the Unit(s) may fight [technically]. However, one side usually either passes a test to Stand Firm [ending Combat for that Phase] or gains the upper hand and destroys their opponent [ending the Combat completely]. A draw also ends Combat for that Phase.
If Combat results in the winner and loser alternating, and the loser fails to Stand Fast, then the Units can slowly grind down over a number of fights in the same Phase. Failing to Stand Fast means you lose figures equal to the amount you failed to pass.
- Single die attack numbers, e.g. hit on 4+, the number of dice equals the number of figs fighting.
- Shields reduce your Hit chance.
- Saves for Armor, only, shields do not increase save [see above].
- Shooting and Combat attacks use same mechanics: dice equal number of eligible figs, roll them to get your attack number or higher, roll to save, roll to wound, remove or mark Casualties.
- Leadership tests with 2d6, typically needing 8+ or so.
- Figs are removed [or marked] showing loss of people and combat power
- Full Move is straight ahead with turn at end;
- A Maneuver move is half in any direction and facing.
- Measurements in inches, may premeasure
- Units are 5+ figures; none can cost more than 15% of the army's total value, e.g. a 1,000 point army has a cost limit of 150 points per unit. Most fighting infantry are in the 6-10 point range. Mounted generally cost double, and weak fighters or skirmishers are as little as 4 points.
- Game Turn is IGO-UGO with each side having a Player Turn of Charge - Move - Shoot - Combat. There is a [very] limited chance to change the sequence of Player Turns at the beginning of any Game Turn. So if you had second Player Turn from Turn 1, you will stay second unless you succeed in seizing the Initiative on a future turn and getting first Player Turn. Yes, this will give you two Player Turns in a row.
Additional Rules
- Armies are in the 1,000 - 2,000 point range, with 2,000 being recommended. Figure costs average about 8 points each, except leaders cost 50-150 typically. So 100-150 figures is a typical game size.
- Leaders exert limited ability to affect troops and turn sequence; they use Command Points to *attempt* a leadership activity of variable difficulty. This spends the Command Point and they typically have only 1-3 Command Points total.
- Units have a variety of distinctive weapons and characteristics, from the generic "Hand Weapon" to spears, 2-handed axes, javelins, etc, all of which fight a bit differently and will no doubt shape your tactics to take advantage of them.
- There are 3 scenario types, 4 deployment methods, and 9 special objectives, all of which shape a battle in a simple and effective way. You will be on a quest to obtain victory points and Victory margins are at up to 100, 250, and over 250 points.
Comms & Support
- Easy to reach the authors
- Website is simple, works easily, no prob setting up account.
Run through of Mechanics
Hit 3+, Wound 4+, Leadership 8+, Thrusting Spear & Shield.
Thrusting Spears fight up to 3 Ranks in Combat; they fight one rank when they Charge.
Shields are a -1 for your opponent to Hit you with Missiles or in Melee [not part of Armor Save]

Above Right: Normans.
12 Serjeants in Light Armor 5+ Save, Hit 4+, Wound 4+, Leadership 8+
2-Handed Axes [-2 v. Armor Save, fight 2 Ranks deep, but may not use a shield in Combat].
Two Units of 16 Liberi [Freemen?],
Hit 4+, Wound 4+, Leadership 8+, Hand Weapon, Shield
Points values for each side was around 460. Double the number of units and add a leader and it's around 1,000 points, a modest sized game for the rules, at 6 units and 75 figs a side.
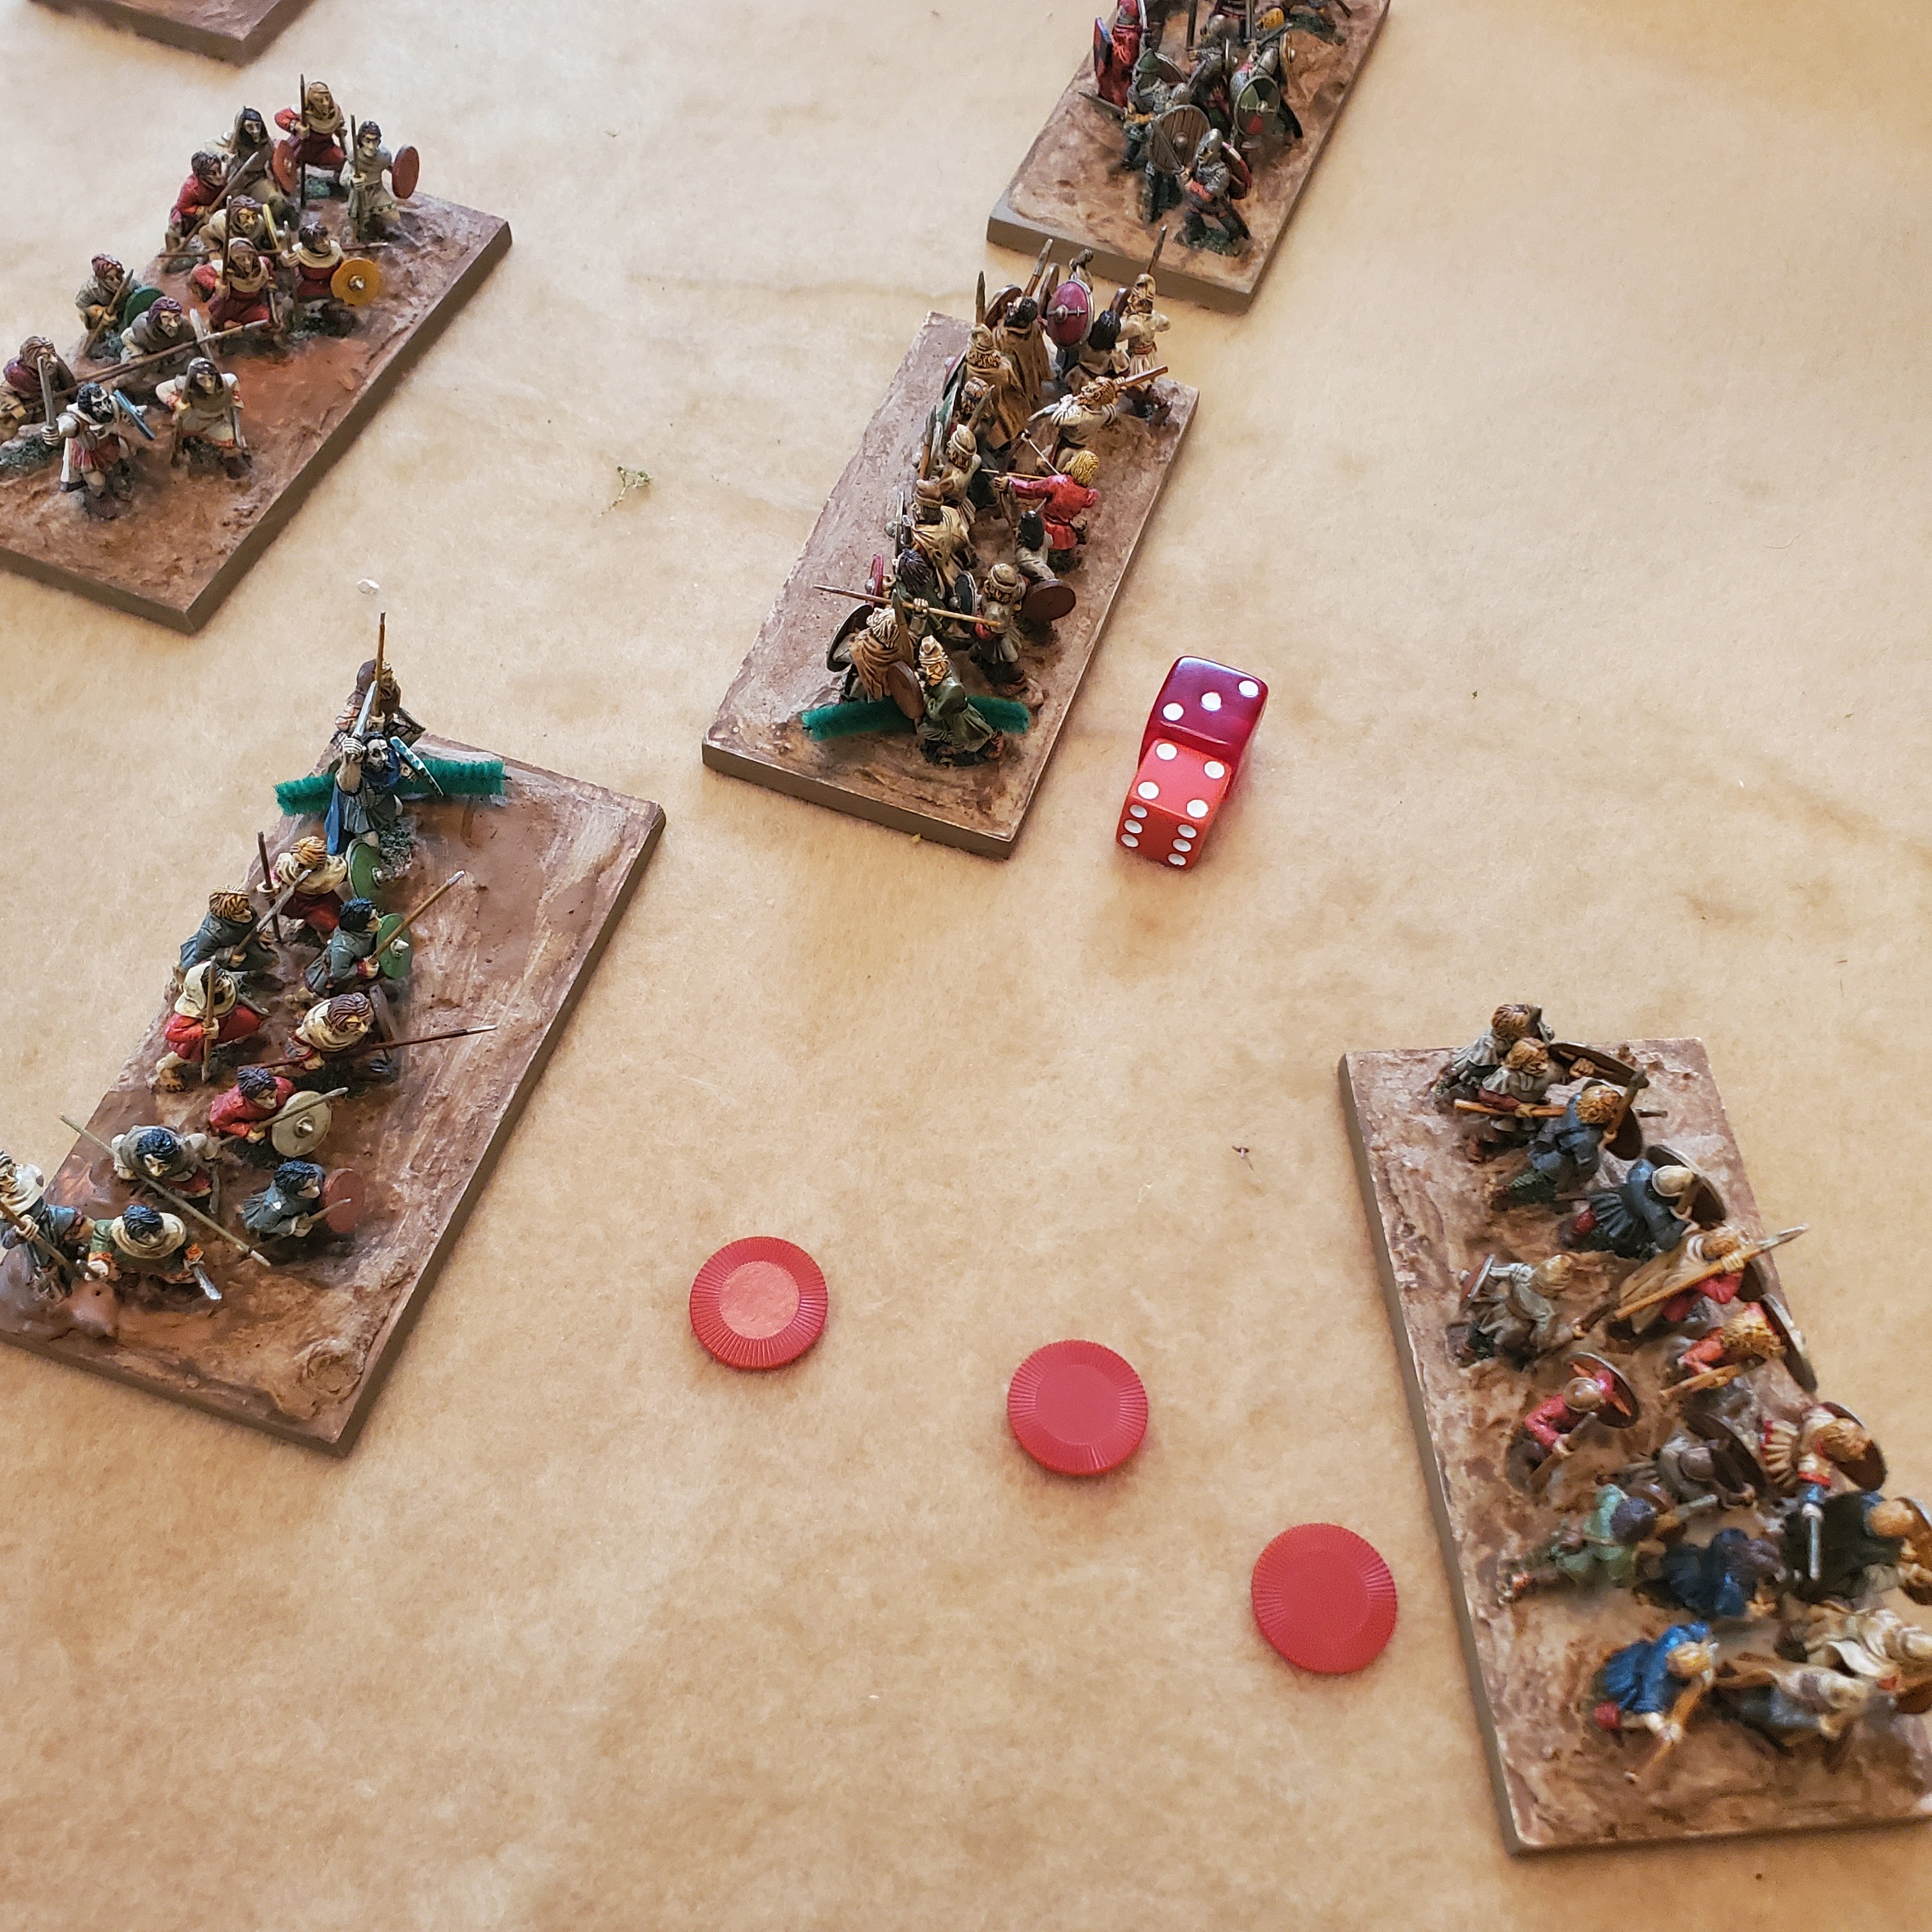
Both sides set up even, around two feet apart. The Welsh chose to be a bit more spread out for maneuver room, while the Normans opted to be closer together for mutual support [but what do I know, really?? That's the thinking, anyway!].
Below, Game Turn 1, both sides move up, Normans first then Welsh. The Welsh are dropping back on the left to delay impact with the Norman Serjeants - they both hit hard and survive well with their armor.


The Welsh push them back 2" [not filmed] and again win 3-1, gaining a second Momentum Point. The Fyrd roll to Stand Fast, needing a '10' and get a '5'. 3+6+3+5 = 17 Casualties!
 As the Fyrd have 16 figs, they are wiped out and removed. The Fyrd next to them take a Panic Test and miss by '1', so lose 1 figure.
 Finally, the victorious Welsh get a "Surge Move", which is a free Maneuver Move, so they face the Normal Flank. This ends the Charge Phase of the Welsh Player Turn 2.

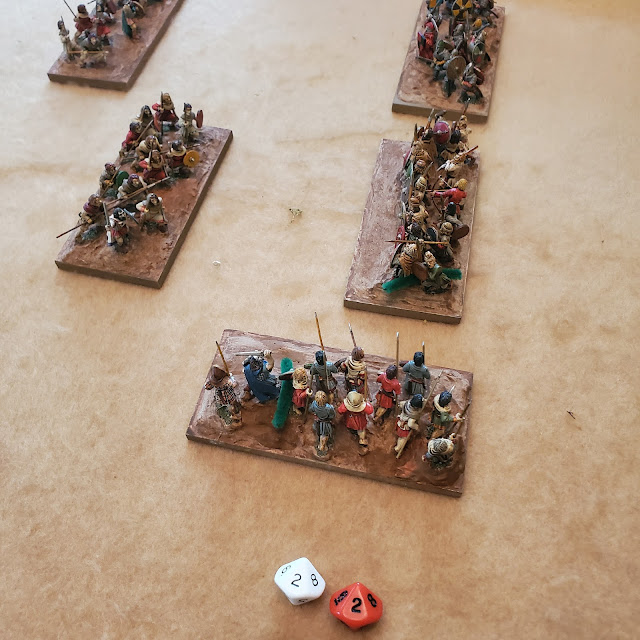
Welsh Move Phase, they advance en echelon to keep the Norman's best unit out of the fight as long as possible, ending as below. Tactically, not the ideal move, but I am learning the game and how to execute tabletop tactics with it...

 Normans roll their Stand Fast needing a 9+ they roll a '6' and lose 3 more figs, for 6 altogether, and are Pushed Back.

Above, end of Game Turn 2.
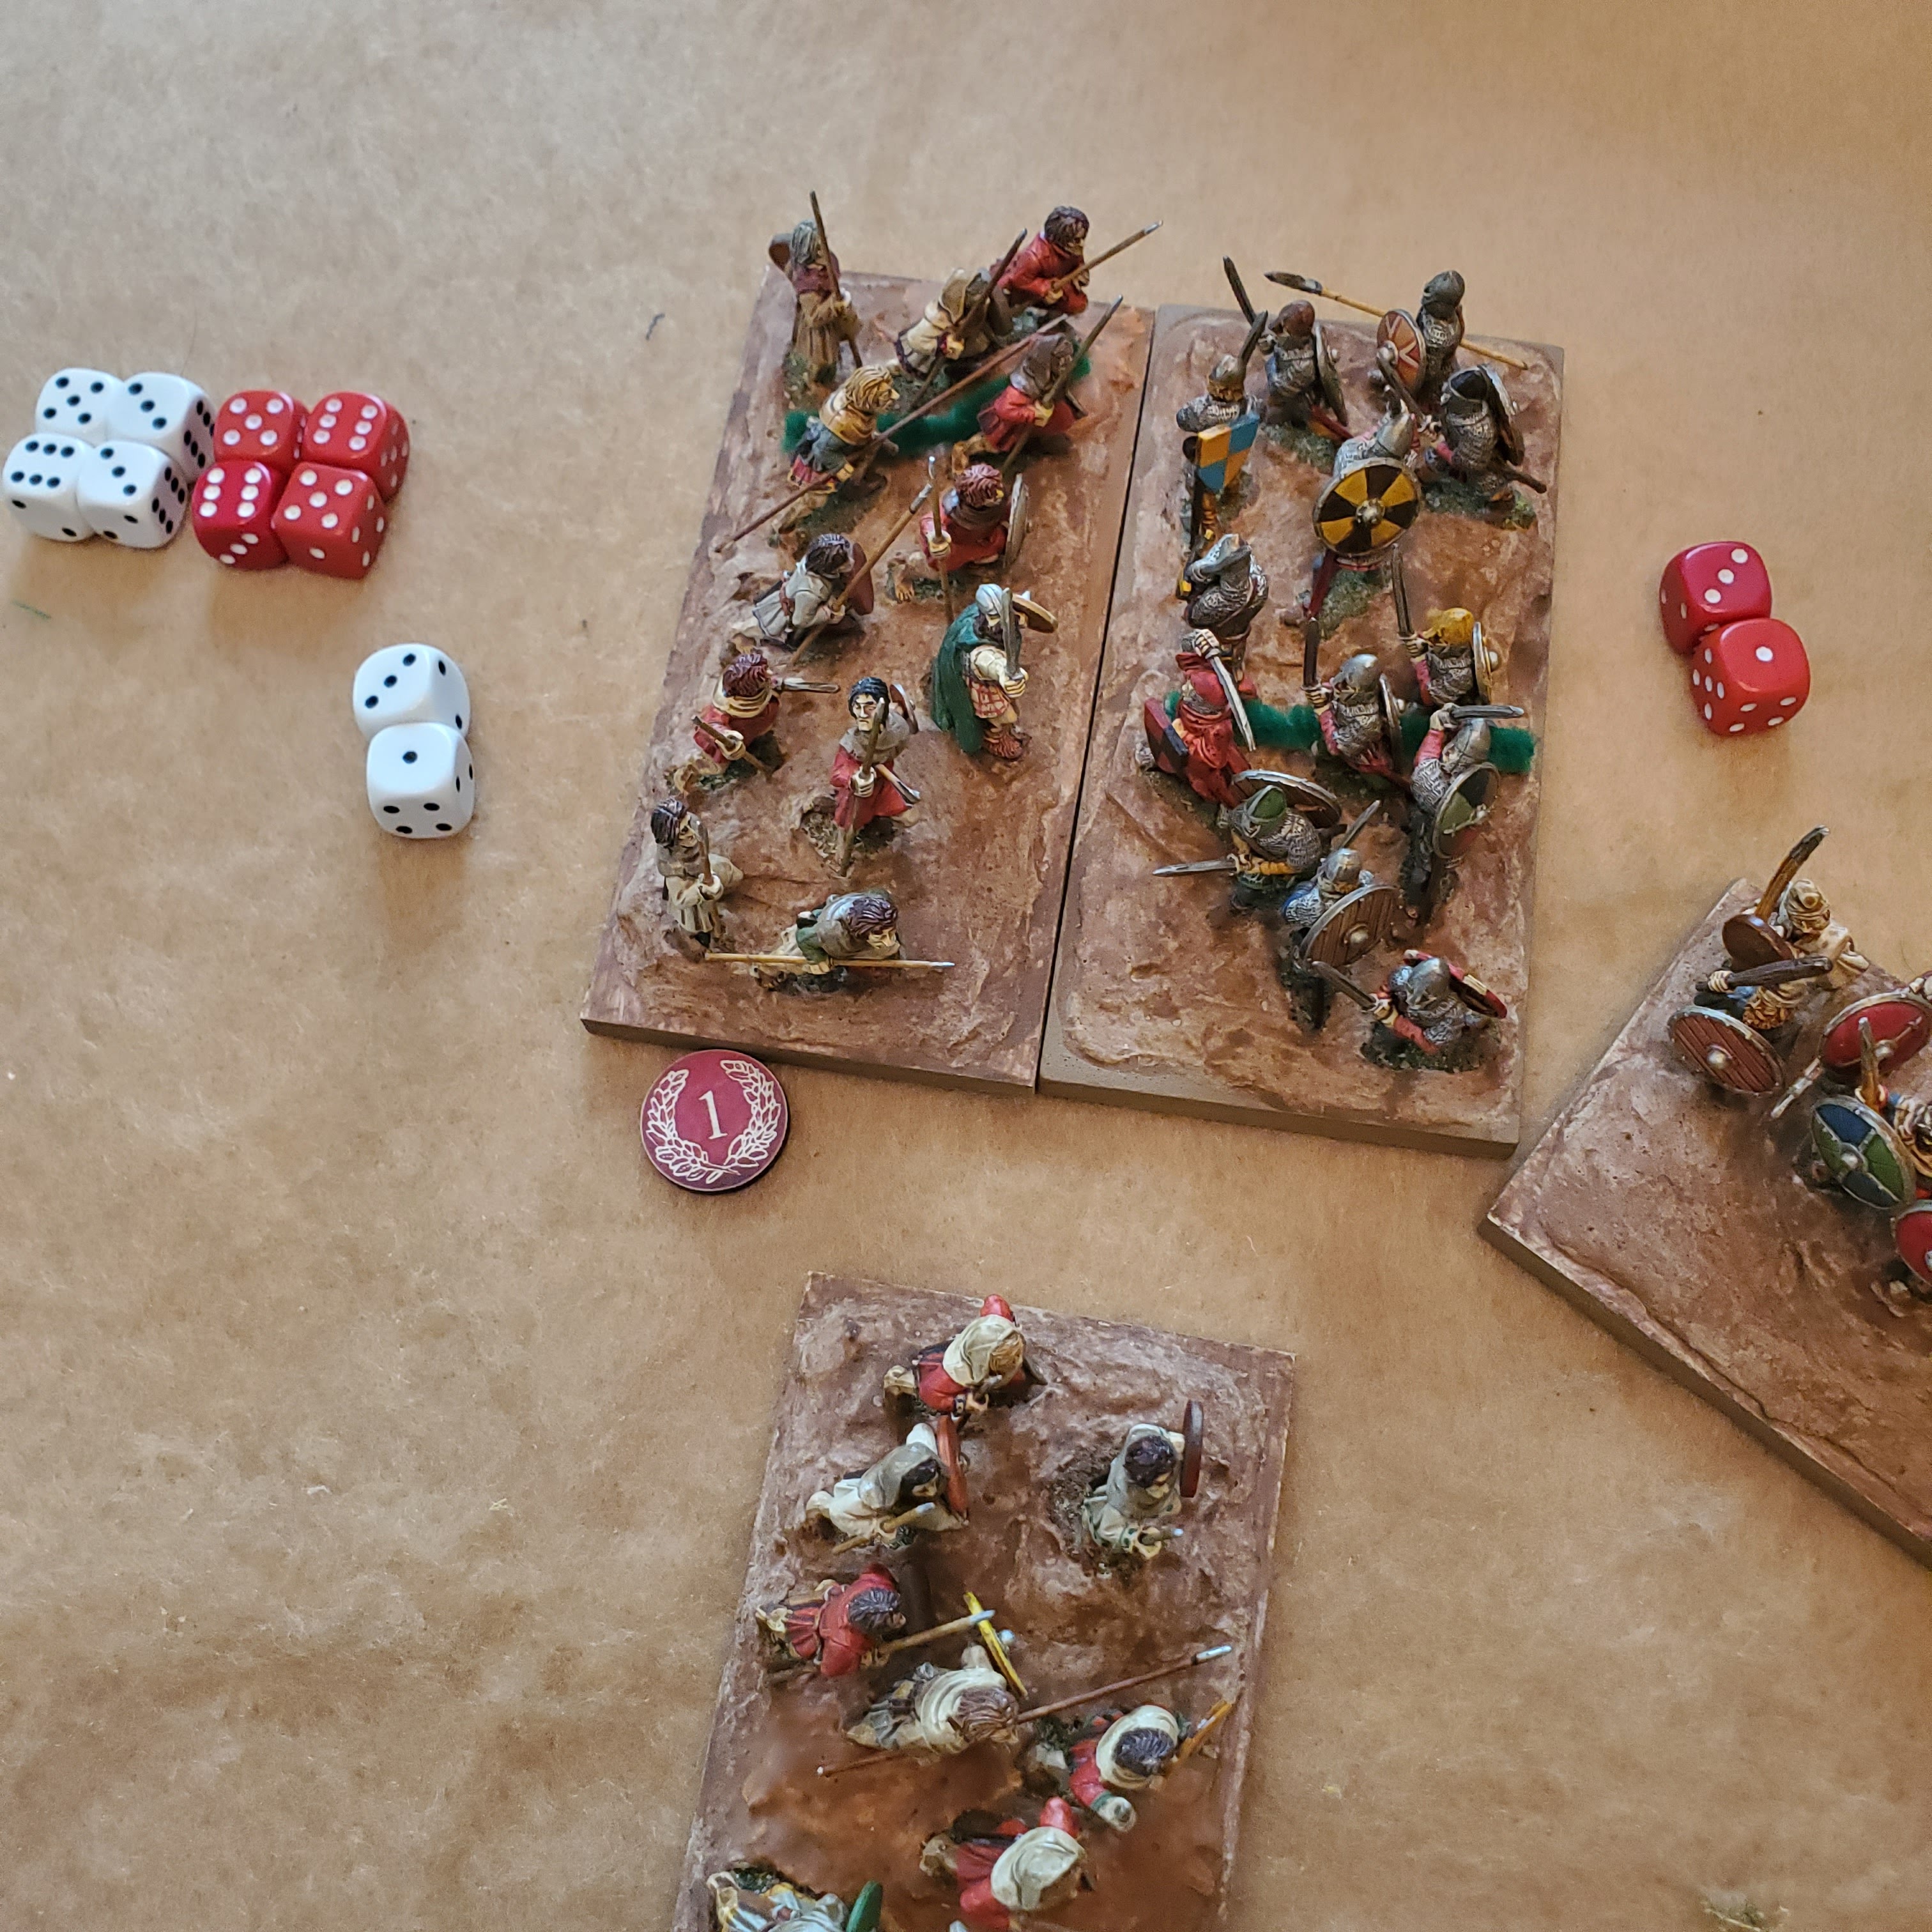
Below, Norman Player Turn 3 begins. The Normans want their best Unit to bring on the hurt, and are over 6" away. They have a 4" + d6 Charge move, so need a 3+, and roll a '3' exactly!

The Normans roll badly, and end up just barely losing 3-4 to the Welsh who gain a Momentum Point. The Welsh were aided by fighting two ranks deep [all 12 figs] and their shields reduced the Norman's chance to hit...and they rolled badly.

In the next Combat resolution [still original Charge Phase], they tie at 4-4 on Hits, but no wounds, so tie at 0-0. End of this combat.


 They roll a '7' and lose 2 more figs.
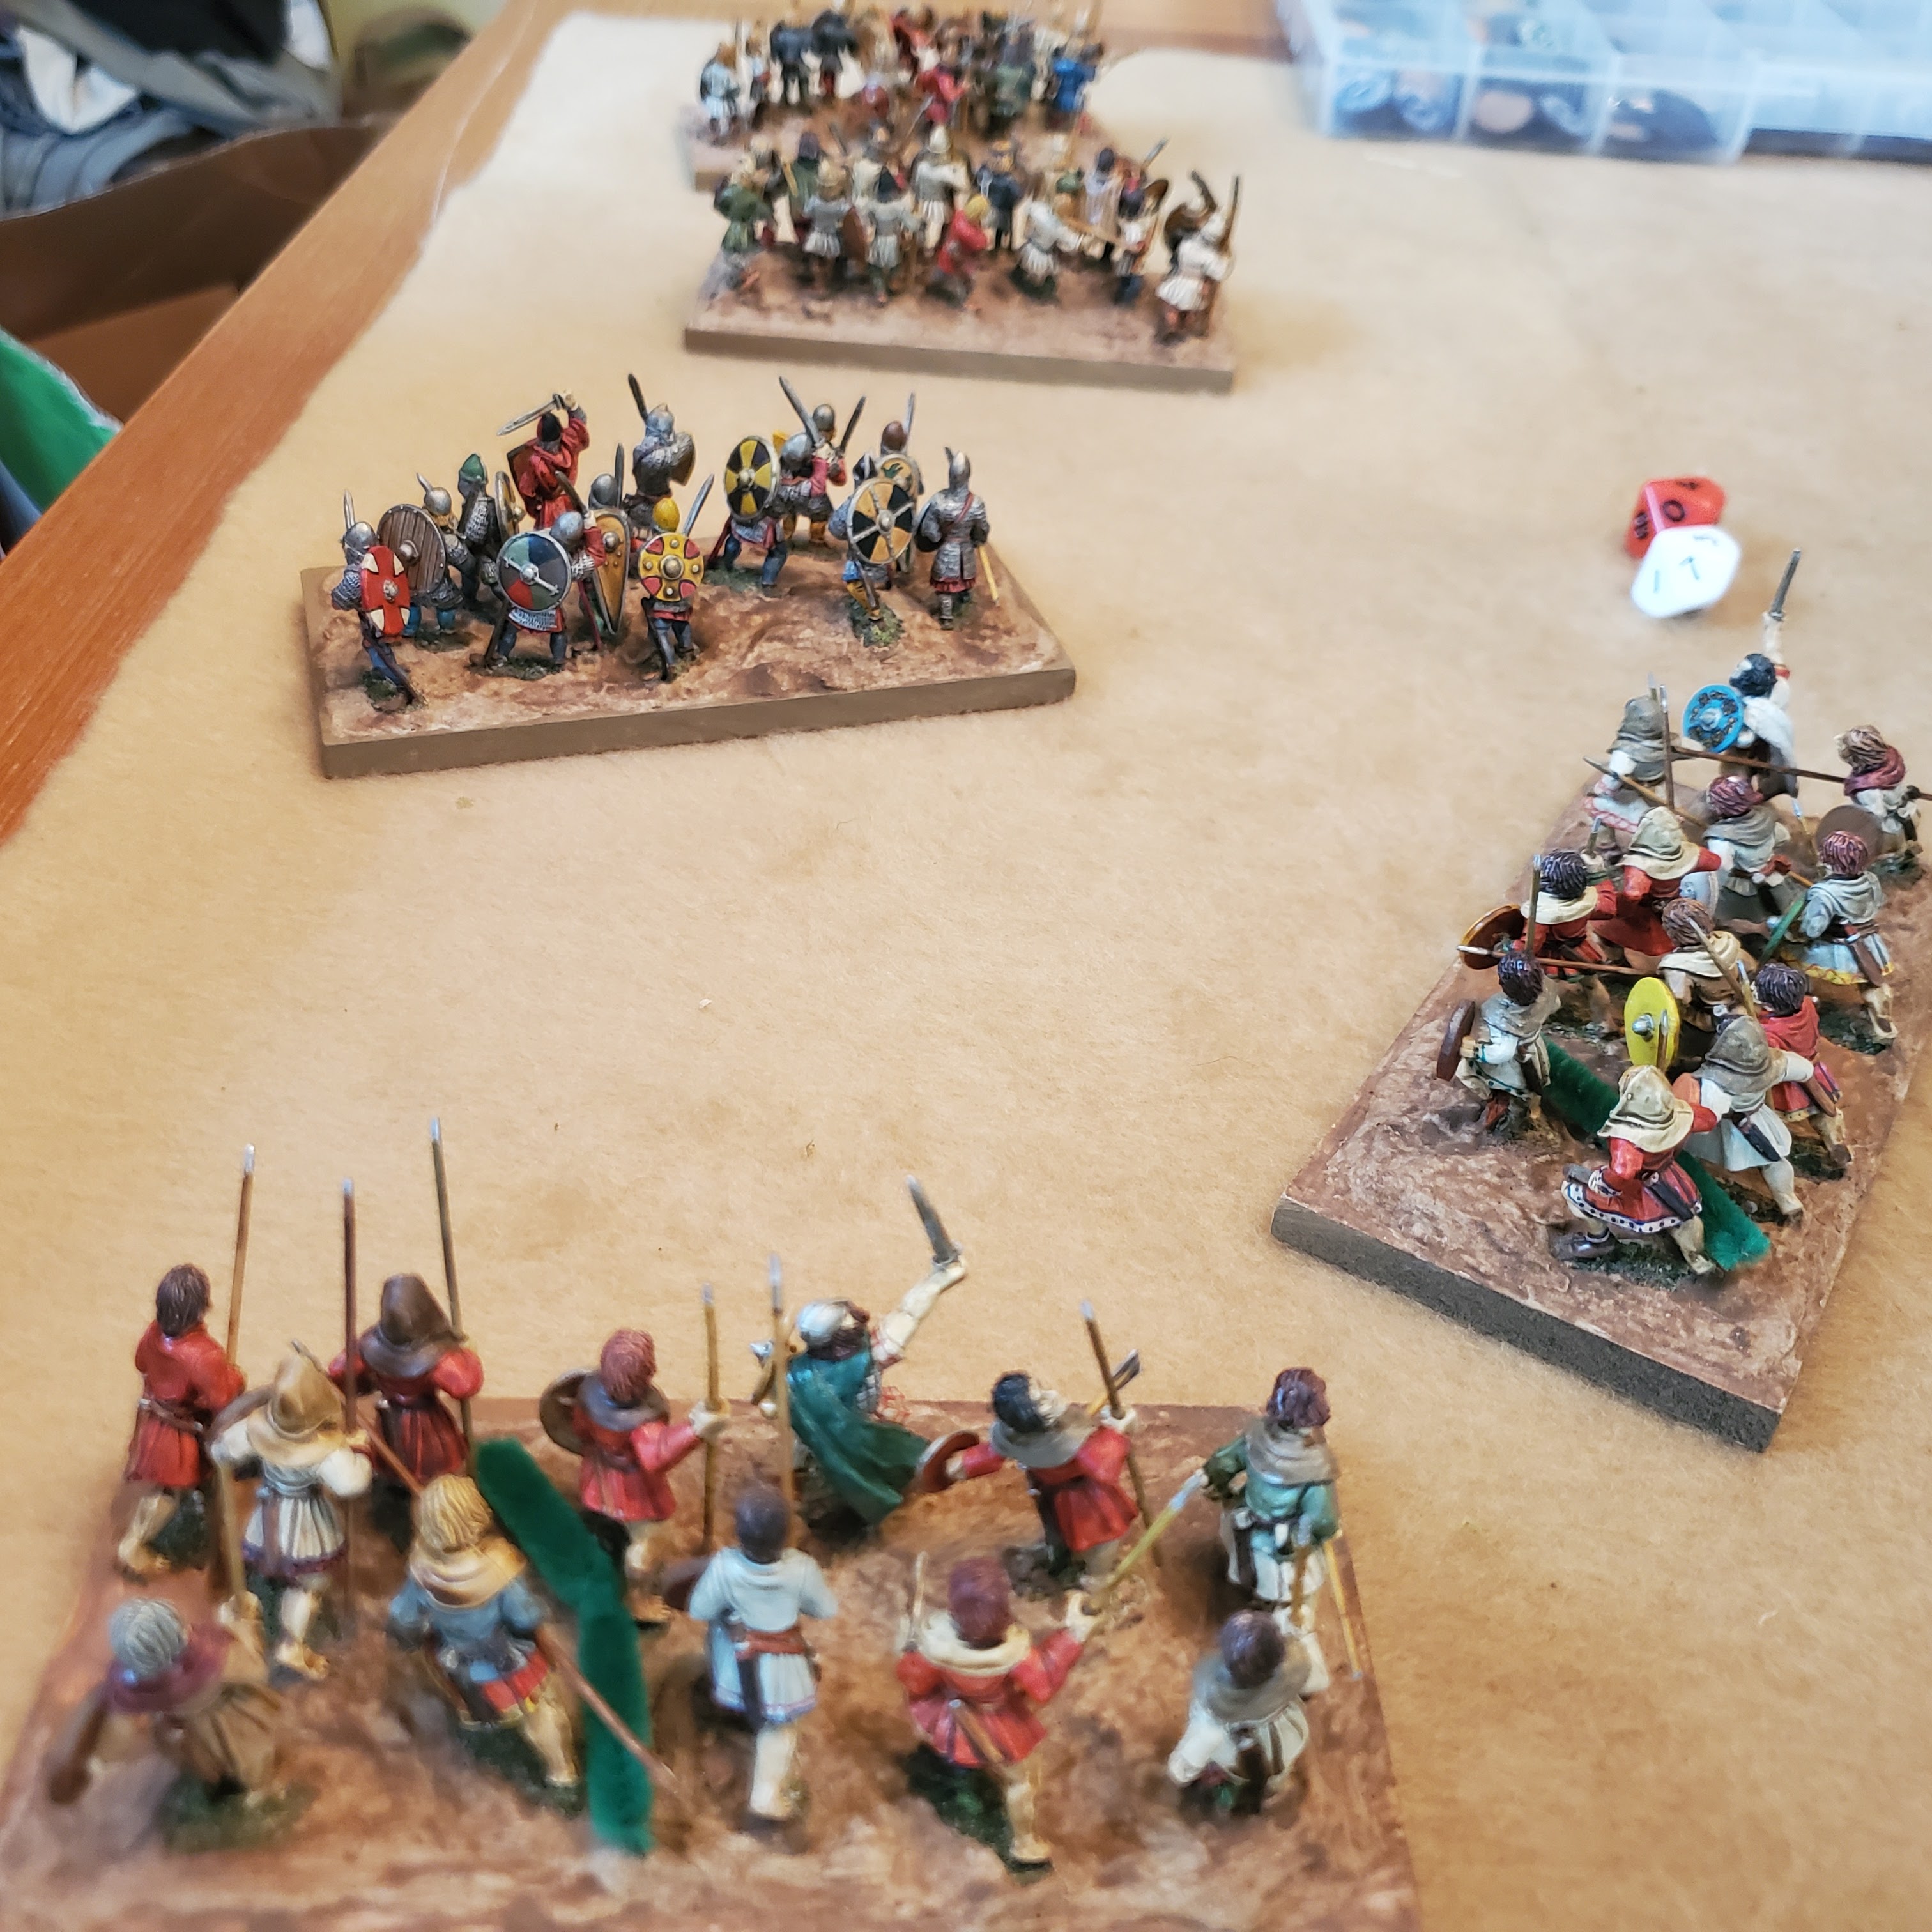
Normans then Maneuver their Fyrd unit back and to the side, luring the Welsh away from the stalemated combat.

Welsh Player Turn 3, they Charge a fresh unit into the remaining Fyrd. They win 4-2, gain a Momentum Point, and the Fyrd need a 9+ for their Stand Fast test.

Next Combat resolution, the Welsh win 3-2, gain a second Momentum Point, and the Fyrd need a 10 to Stand Fast. They roll a '5' and lose 5 more figures!


In the Move Phase, the Welsh on the far right advance to surround the Normans.

Altho a foregone conclusion, I fight quick third Combat and the Fyrd are wiped out. The Welsh advance attempting to cut off the retreat of the Norman Sergeants, last on the field.

In the Combat Phase, the melee that started in this turn's Charge Phase continues [this is still Welsh Player Turn 3]. With terrible dice by both sides, the Welsh manage a Casualty and gain a Momentum Point. The Normans need a '9' to Stand Fast but only roll a '7', so two more Casualties.
 In the next Combat resolution, the Welsh again win 2-1, and gain a second Momentum . The Normans roll a '12' which is "Insane Courage" and always passes! I incorrectly pushed them back - if you Stand Fast, you do not get Pushed Back. The Welsh also lose both Momentum Points.

Norman Player Turn 4. The last three Serjeants fight the Welsh, and lose 3-1. Welsh gain Momentum Point, Normans need a 9+ to pass but get a 7 and are Wiped Out!
 Normans flee the field after stiff fight!

Welsh enjoy seeing the backs of their adversaries!


So, this is what a *portion* of a battle fought with "On Bloody Ground" feels like: a few fairly maneuverable Units thrashing away at each other, with some tactical choices along the way but Combat being the most important deciding factor.
In a full 1000 point game, there would be twice as many units and most likely a leader on each side, who could make a few attempts to spend Command Points to affect the game - as one has to dice for most of these attempts, they have a modest impact in the planning process, but of course they could turn a situation around. Feels right for a scrap with about 500 fighters on a side.
So, I give this two thumbs up, and recommend you get a copy!
Part 2 will feature an interview with Dan Toone and a larger battle with commanders, the full game setup, and Special Objectives so stay tuned!
much better than my review ie I only did 2 pages worth. You have clearly done a much better job reviewing it! :)
ReplyDeleteI didn't see it, so can't judge for myself, but I'll believe you, haha! :D
DeleteNicely explained Alex. I'm not sure how shooting works using the same mechanism as melee though. Could that be covered in a future example?
ReplyDeleteI'll add a few more comments on that. But it is - literally - the same process, it's just that you can do it at a distance.
Deleteadded a bit more explanation on that point.
DeleteWell-written and nicely illustrated review. Although the rules seem designed for individual figure removal, I appreciate that you are using element-based units
ReplyDeletefor this test-drive. Good to see a rules' review carrying a game playthrough. If I enjoyed WAB, I might be tempted by this latest incarnation.
Thanks Jonathan - it's what I like to see when I read a review!
DeleteBig fan of the rules, one of my favourite games at the moment
ReplyDeleteGot anything posted about it?
DeleteGreat review. Best way to understand rules is to play through a small encounter.
ReplyDeleteThis comment has been removed by the author.
DeleteDefinitely - preferably multiple small encounters! I got a few things wrong the first couple times I ran through it.
DeleteGreat Report and very interesting rules. Sad that Part 2 seemed to have never materialized...at least , I couldn't find it...all the best
ReplyDeleteYou are correct - I had no trouble with the interview, but I had trouble getting a larger playtest going. I forget what happened, but it was one of those "real life gets in the way of important things like gaming" situations.
ReplyDelete