
Unexpectedly, this shot is full of Minotaur Butt. Should I apologize??

Playing Song of Blades and Heroes a few times, left me with greater proficiency, and an appreciation of what the rules do, and don't do, in their basic form. As in, without significant Traits [special rules] being used. I _really_ wanted to know how the game played at its most bare essence. So let's see what it's like!
To speed the game up and give quicker results:
- I lowered the Combat values of every single figs. This has the effect of making it easier to Double or Triple each other in Melee, which is how you outright kill figs. Now, an "average" warrior is C2, which means he adds +2 to his die roll. This is the same as DBA Light Infantry and Cavalry. The two head warriors [who do NOT have the Leader Trait] are C3, as are the Minotaurs.
- Fallen [Stunned, by my perception] models that are shot at by missiles grant the +2 to the attacker, but the attack is not Lethal, as missiles just aren't as dangerous in this period as Movies would have us believe...
Above, the start position of the Big Minotaurs. They gain a +1 in Combat, but give a +1 to incoming Missile fire. They will come straight up the road. Below, the Marauders advance parallel to them, 6 lead by their Chosen, who is C3 to their C2 and has the Savage Trait [inflicts a Gruesome Kill if he doubles an opponent, instead of tripling him].


Imps win roll-off for Initiative, so act first. Playing pretty conservatively, they roll one die for actions of each fig, advancing 3/5 Archers [Q=4+] successfully, and all the Spearmen [Q=3+]. The archers plan is to advance into bow range, then fall back on the courtyard as needed.


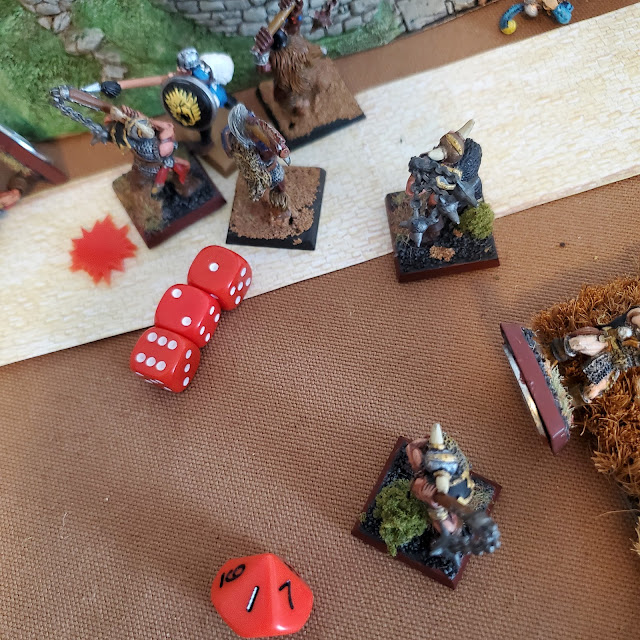
 The Minotaurs are Q4, so need a 4+ to pass and get an action, while the above Bull has rolled 3 failures. Red is both their activation and turn dice color.

Marauder Turn 2. With many failures, the Marauders manage to move one, ONE Marauder forward one move.


Marauder Turn 3. The humans fail all but one Activation, allowing the Stunned Marauder to recover and move. Nothing else passes.

Imp Turn 4. 3/4 Archers shoot to no effect. The last Archer rolls three dice, fails 2 [ending the turn] but does get his shot in, 7-4. Had he rolled 2 successes, it would have been 7-3 and he would have killed the Marauder. This outcome happens a lot, since you have to not only roll well, but the opponent needs to roll poorly, for any chance of something happening either way.

Marauder Turn 4...they set a record for doing nothing, failing every single activation except one, who moves into contact with an Archer.
 Meanwhile, Bull rolls 2 failures, ending their turn.

Imp Turn 5, Imps set a new record and fail to activate a single Archer, then fail to reposition a spearman, failing all three rolls [needing 3+] and ending their turn. So...nothing happened.
 Bulls manage a bit of forward movement, before rolling 2 Failuers [needing 4+] and ending their turn.

Imp Turn 6. Archer shoots and Stuns a Bull! Ozhelm then Activates with 2 Successes [needing 3+] and beats the Bull 6-2 [modified 11-4] doubling and killing the Bull. Had it been 12-4, it would have been a Gruesome Kill, causing Morale Checks against all friendly models within Long distance [7"].
 Holding on to their turn, the Imps activate a Spearman for 2 Successes, who then defeats a Marauder, Stunning him.

 The Imps then fail some activations, and their turn ends.

Marauders, also play conservatively, dicing once for each fig and getting 4/7 Marauders to move, and then switching to the Minotaurs...

Who move one up the road, and on the last roll fail with 3 dice - end of Player Turn.

Imp Turn 2. Four Archers fail to activate on 1 die [needing 4+]. Last archer rolls 3 dice [since it doesn't matter] and gets one success, shooting a Marauder to no effect [each adds their C2 value to the die, and the Archer loses 6-8, which means no effect from his shooting].


The Minotaurs then fail three dice, and turn ends.

Imp Turn 3. Three Archers shoot [2 NE, one Stuns a Marauder, 4-3] and the last rolls 3 dice attempting an Aimed shot at the Stunned Marauder, and succeeds on the 2 dice needed, but then blows the roll 1-4, resulting in nothing happening.


The Archer then Activates for 3 Successes, makes a Mighty Blow against the Stunned Marauder, beats him [barely] and kills him since blows struck against Stunned figs are Lethal, killing them if they lose [instead of being doubled].

Marauder Turn 6. They activate one Bull for three Actions, and he Moves twice then fights a Spearman, but they tie so nothing happens. Next activation they get two failures, but move a Bull into contact with a spearman with the one Success.

Imp Turn 7. They go all-out, activate Ozhelm for two successes, he moves and attacks a Bull. Doubling him 7-3, he kills him instantly.
 Turning to the archers, one Activates, shoots and kills a Marauder 7-3 - the turn is really working out for the Imps!
 Another spearman activates for 3 Successes, moves, and strikes a Mighty Blow against the last Bull. He wins on an odd roll, so just pushes the Bull back. All attempts over, play passes to the Marauders.

Marauder Turn 8. Things are looking bad for the Marauders, so they MUST get some Actions in and kill a few Imps! Unfortunately, the Leader fails 2 and is only able to move to contact one archer. Turn over.

Imp Turn 9. Imps fail to activate any Archers, then blow all-out attempt with Ozhelm getting three failures. Turn over, nothing happened.


Marauder Turn 9. They activate the Chosen for 2 Successes, opening the way for a possible kill, with some help from another Marauder who's helping to outnumber the Archer. Unfortunately they tie and nothing happens.

Imp Turn 10. Imps surround the last Bull, then blow the Activation roll for Ozhelm, getting only 1 Success.


Marauder Turn 10. Altho they only activate their Chosen with one Success and their turn will end, they spend their success to attack the Archer, and manage to beat him 4-2 modified! This means a Gruesome Kill since the Chosen has the Savage Trait. All Imp models within Long distance now check morale.
 The Spearmen rolls 3 Successes and fights on doggedly! Three of the Archers retreat 1-2 Moves, and the last fails for 3 and runs off the board.


Marauder Turn 11 they fail 2 but move the chosen in on the Spearman.
Imp Turn 12, Ozhelm Passes 3, out-rolls the surrounded Bull, doubles and kills it!
 "BRRRAAAAUUUUUGH!" goes the death-bellow of the Bull Minotaur!
 Archers also roll well, returning to the field of battle bravely.

 Next activation - 3 Failures. Turn ends.


Unfortunately, Imps roll weak and defeat the Bull on an odd roll, which forces it to recoil - this helps the Bull since it was almost surrounded.


The Imp Turn 11 starts well, with three successes for the Spearman who then Stuns a Marauder beating him on an even number 8-7. But then they fail for 3.


Marauder Turn 12, Chosen kills Spearman with Gruesome Kill on his side's one Activation Pass, but the Archers roll morale well, just a couple of small retreats.
Imp Turn 13. Archer activates, kills a Marauder outright, and they are now over 50%, so must check. Most of the Marauders run away. Since they are fighting on the Imp side of the board, they do not end up running OFF the board, but some make it pretty far away! It helps to fight on the opponent's side of the board...


With only 4 Marauders v. 3 Archers, 3 Spearmen and Ozhelm, the Marauders concede the game.
This was a fun game, and I found I liked the way it played with lots of "weak" Combat figures. I think 1-2 is enough for any "common" warrior, especially if none have the "Leader" Trait, which really helps to move faster and gang up on figures.
Most of the player decisions involve judging the right time to risk big rolls or not, and hope for results that give the side an edge. This involves patiently getting figures into Contact with a figure you plan to gang up on so you have every advantage possible, then rolling a couple pips higher and hoping for a kill. One does spend a lot of time pondering game mechanics and figuring likely combat results, which is the nature of the DBA system. It makes the game "feel" gamey, which can reduce the "realism feel" for some. But it is fun, too.
Again, this is a presentation of what it is like to play the game with the minimum number of rules, representing badly - lead forces on both sides [no Leaders]. I will make the argument that the game was realistic enough and altho the advance to contact was often sloppy, and the fighting itself was choppy, there's nothing wrong with that.
I hope that you get an idea of how play goes, and this will help you decide if the SBH engine is one you can enjoy.
Next up is to try SBH with the Leader Trait and rules, and see how that goes.
No comments:
Post a Comment
Thanks for your comment! t will be posted after it's moderated.