
This part has some variations and analysis of force composition and options for the defender. The Attacker really only has one option - send the fastest strike force to the right around the bog, while other forces pin the defenders. If the two defending Units can be destroyed, those entering on Turn 3 will be heavily outnumbered and defeated by Turn 6 and the game will be over.
Same bleak field on the same table...

Setup thought: The Defender's Units must be within 12" of the board edge or else there wouldn't have to be a special rule stating that there are no charges on the first turn. This also means that scenarios without this special rule DO allow charges onto the board, so woe to us who do not prepare for that and use the board edge as protective terrain! Here, I measured it to make sure they were.

Tactic #1: Hold the gap as long as possible. If the Defense can destroy one attacker and damage another, this may be worthwhile. But it is hard to accomplish unless Defender's units have excellent firepower, say a d6+2 shot. This is possible in the original OHW rules, using two Archers [assuming you roll them for your force]. Then on Turn 3 the reinforcements arrive and can try to contain the outflanking force of 2-3 Units. This is difficult if the attackers have Artillery they can put in front of the bog and use to support the outflanking force. Force composition is critical!


Turn 1. Welsh Archers start off by rolling 3/3 Hits! The Knights are badly damaged. The spearmen manage to get pretty far, rolling 6.5" of movement. I use variable movement in my rules.

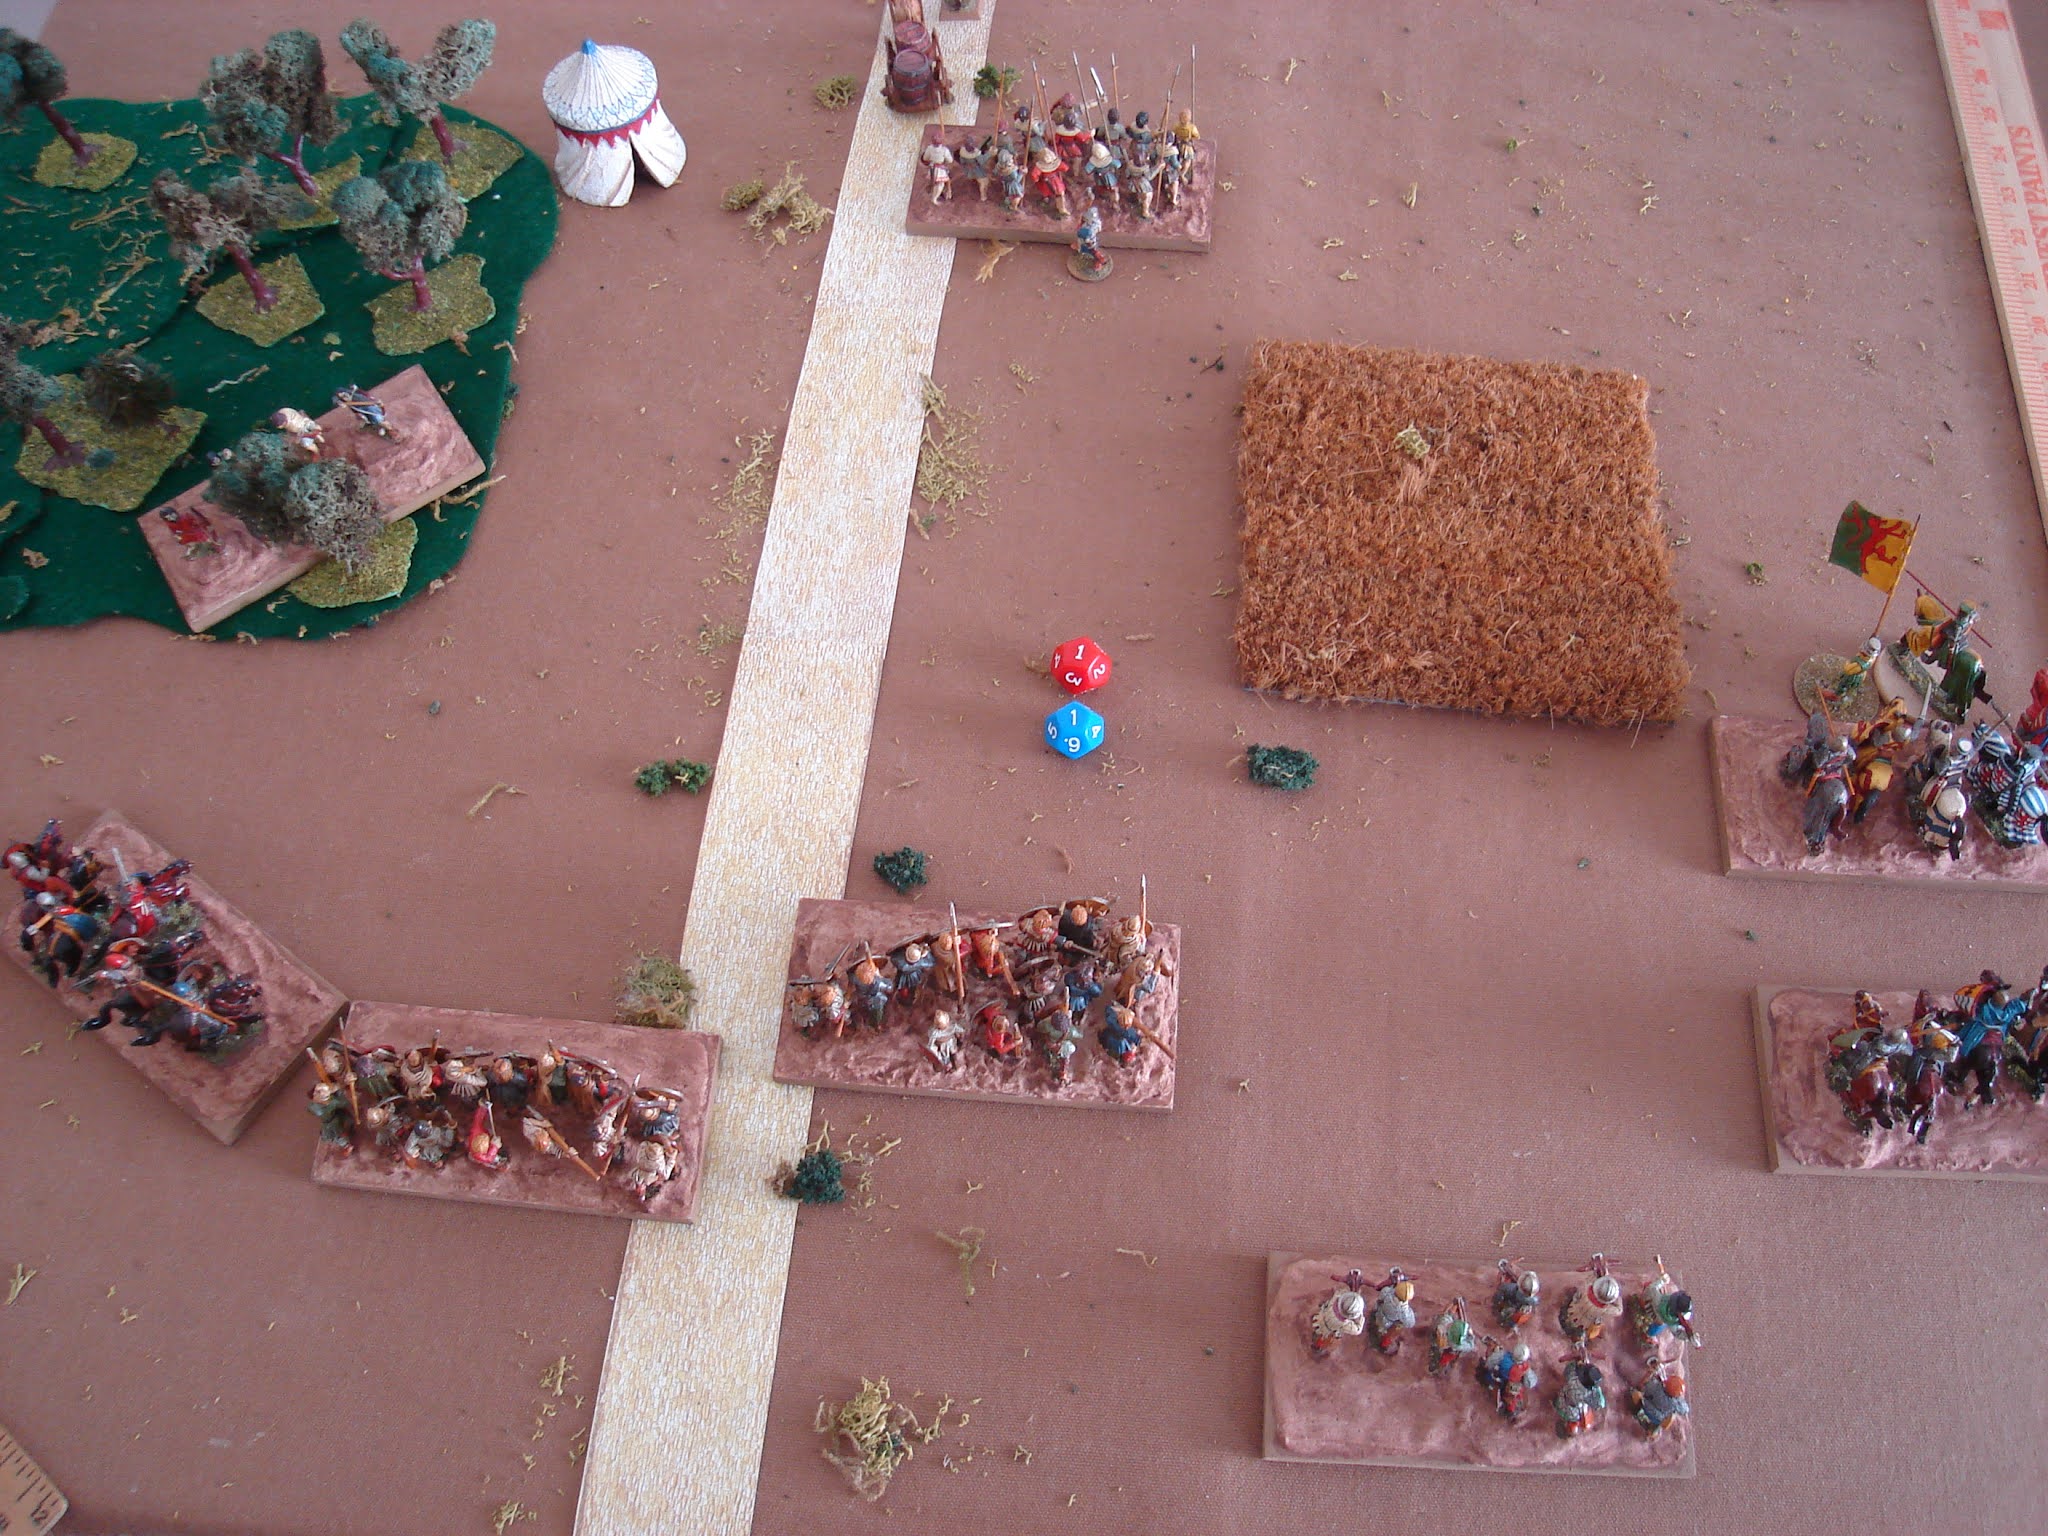
Turn 2. Welsh Archers are holding. Outflanking force is getting thru the gap successfully. The Infantry are too slow to stop them, and to slow to get the first charge, also.

Turn 3. English keep Initiative [IN] and their knights charge, while their Welsh reinforcements arrive. The Cavalry must declare and roll for their movement, and roll a bit low. The problem with not declaring movement when using variable movement is that you can roll, THEN decide. So the Cavalry can come in closer to the other knights instead...

Turn 3. The Light Cavalry roll a bit high, but not enough to charge the Knights in the flank. However, both units roll REALLY well throwing javelins, getting 2 hits apiece [should be 1 each].
 Turn 3. The Big Picture is that while the Welsh have a bit of a battleline, it is being broken up. Still, the English are scattered around and not supporting each other well. The Welsh Archers are over-performing and may defeat a Unit of Knights!

Blue Turn 4. With knights charging in and support from their crossbows. This is shaping up to be a strong turn for them...
 ...they break the Welsh Freemen in the center...
 ...and the Welsh Bowmen on the road...

Red Turn 4. Welsh Light Cavalry throw javelins at the Knights and back off. Doesn't look good as they don't have a lot of space to maneuver and there are plenty of English around.

Blue Turn 5. English let the Freemen chase the Light Cavalry and rally a hit off the Knights. The other units slowly advance around the bog, while the other Knights slowly beat the Welsh Cavalry.

Force composition variance - Defender has Skirmisher and Infantry unit starting. This is very promising. The Skirmisher has enough movement to enter the woods where no other troop type can go.

Turn 2. Here the Skirmishers are able to shoot in the rear of units fighting their Infantry. This can be nasty if they roll well. However, the outflanking force is unopposed.

Turn 3. The Welsh destroy one English knight, and are opposing the other two with their Cavalry and Light Cavalry - will be tough! But now they are fighting weaker units along the road.


...thus freeing up a bunch of space to maneuver. Doesn't look good for the Welsh!


Yep, this is another loss for the defender - with only two Units on the table, one hurting..game over!


This ended up being a narrow victory for the Welsh. The champs were the Skirmishers, who skillfully used the woods to quickly move around while staying pretty safe themselves.
Overall, I think the best defense in this scenario is a skirmisher and a tough infantry unit, or a cavalry unit. Two mounted units allows the defenders to completely retreat successfully, and hopefully join their reinforcements for a force of 4 against an attacking force of 4-5. Fast attackers and a Skirmisher on their side and this will again be a tough win for the defense. Overall, a tough scenario for the defenders, IMHO. For a more equal fight, bring the Turn 9 reinforcements in earlier.
Hope you all have enjoyed this return to the feudal era! Even if my analysis is wrong, I hope that it gets you thinking, and I welcome your comments.
My next project is to steal John Acar's morale rules and add them to this game - hmmmm....
What are you using for the road? The expensive roads look odd to me and the pieces are too short anyway. You seem to have solved the road problem.
ReplyDeleteHey Jim,
ReplyDeleteThe road is from an Usborne cut-out models medieval castle or town book.
I had to carefully cut and trim and tape on the bottom the 8-11" long segments, and also have to leave it hanging in a wargame closet instead of folding it up. But it looks good in 25mm [technically, it is 20mm or 1/72 scale]. You could also leave the pieces unattached and squashed flat somehow, then blue tack them for the table. That seems harder to me, actually. Paper terrain is often a great looking substitute on the table, and looks good for gamin purposes IMHO, especially with other paper terrain.
Hope that is helpful!