Wednesday, November 21, 2018

Vendel Dwarves - gratuitous pics

Come and Take them!
Vendel Dwarves / Dwerrows in all their glory. Altho they are not as naturalistic and dynamic as the Perry sculpts for GW, they mix up well in formation and will look good on a uni-base like my other Dark Ages figs. Obviously, these will be heavy infantry!

I was feeling a bit of regret at tearing them off their individual bases, but seeing them now I do think they will look a lot better on one base, just like my other 25mm figs. There are more than enough for a dense base, even leaving off the King, his standard and a couple of the fanciest fellows to be heroes.

The King and his Standard Bearer. The green with red highlights is not for Christmas - they are naturally sympathetic colors from the color wheel, a piece of insight I learned perusing various Citadel sites, like 'Eavy Metal. Much as I dislike the company and their games, they did have a lot of great artistry in both sculpts and paint jobs. Shame their business model has made them out to be jerks, erhm, sorry, "wankers".

Above shields are a mix of 15mm Greek shield transfers and Micron Pen hand work.

Cultural Note: "It may be observed that in this book [LoTR] as in The Hobbit the form dwarves is used, although the dictionaries tell us that the plural of dwarf is dwarfs. It should be dwarrows (or dwerrows), if singular and plural had each gone its own way down the years, as have man and men, or goose and geese."  J.R.R.Tolkein
I'm ready to call them Dwerrows, at some point when it won't throw everyone off.

Vendel Norse Dwarves
images from: http://marbles.frothersunite.com/Dwarf_Army_showcase.html

I think my work is pretty comparable to that above!

The above shields are almost entirely brush for the beige and green, brown or red Micron pens for the finer work. The inspiration for the patters is mainly from Saxon and Tolkein Dwarf illustrations, e.g. their columns and other architectural details.


King of the Hill is important...especially if you're short, and well, own a hill or two.


GW LOTR Dwarf rangers fight amidst the ruins of manling civilization.
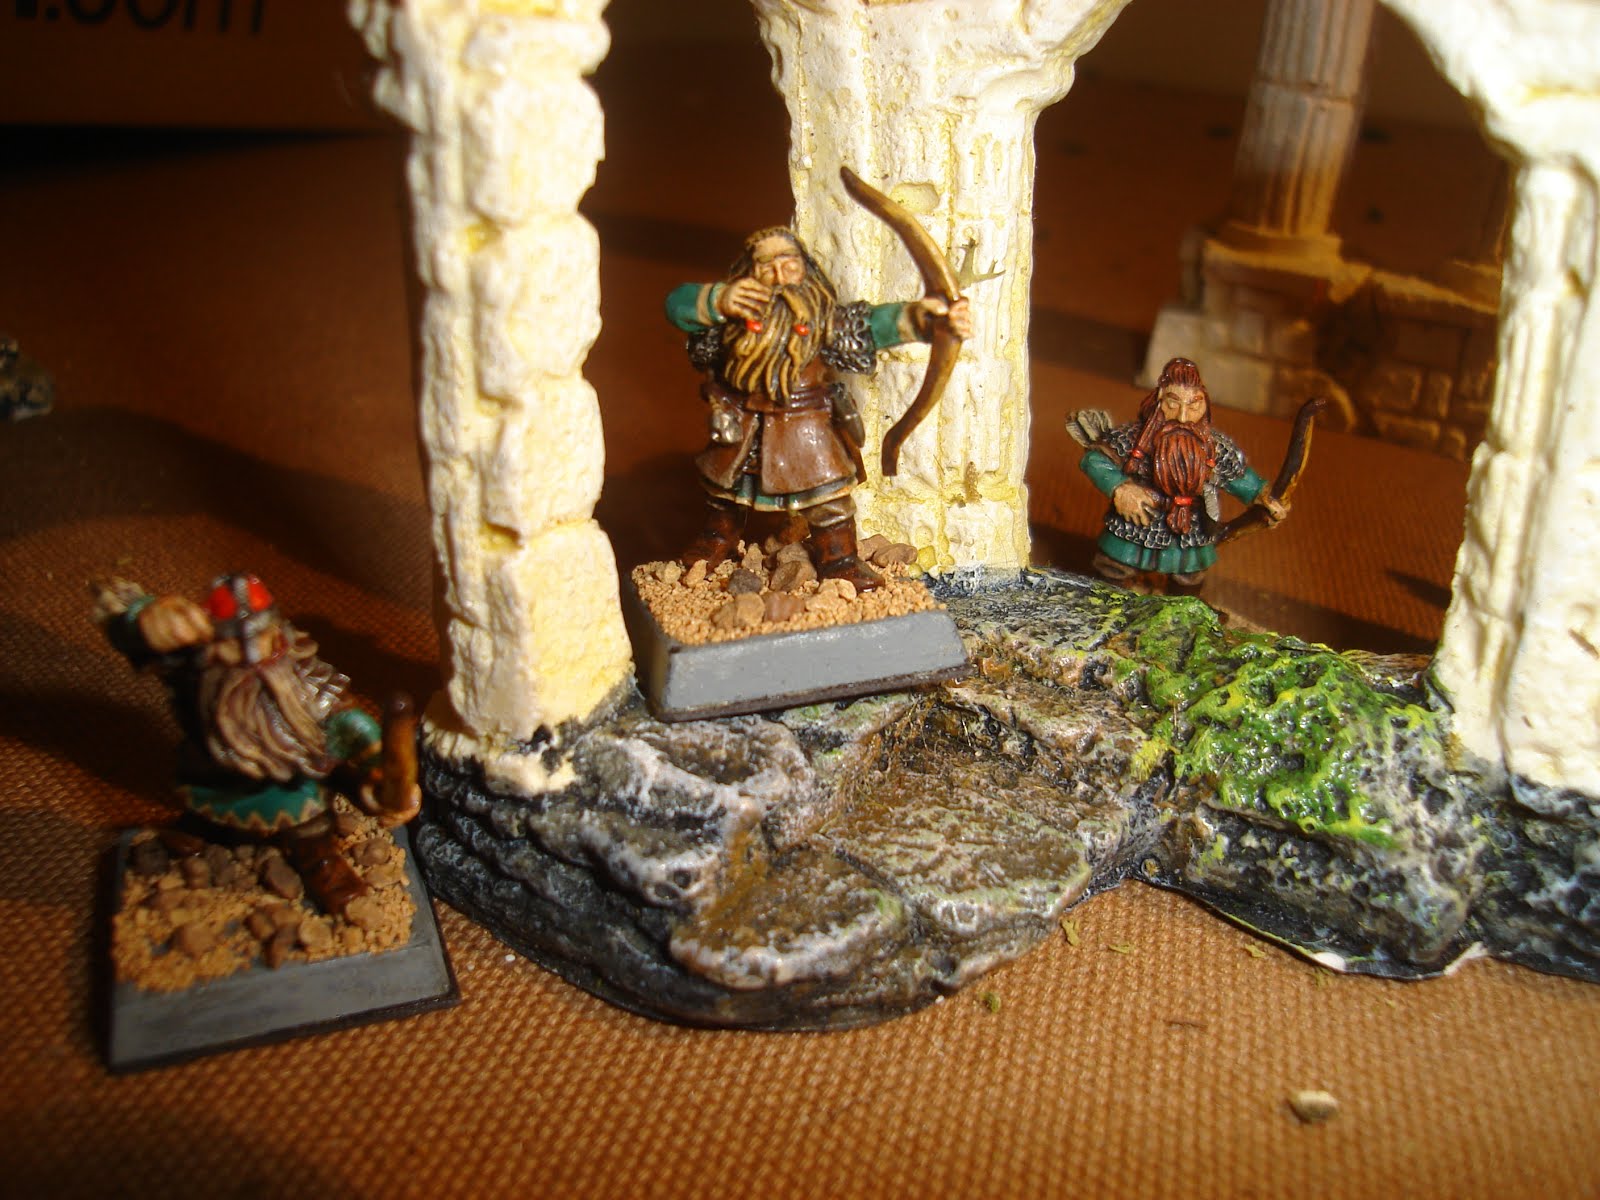

Closeup - the hair is especially well done, I believe these are Perry sculpts.

I do look forward to painting more of these, and also more of the Gripping Beast sculpts that Colin did. Sure, if pressed, I'd have to say that the LoTR/GW work the Perry Bros did is a level or two up on the sculpting ladder. However, there is something to be said for "style".
Vendel's Dwarven Fyrd
Ditto with these fellows, of which I've a bunch. ,

The Vendel Dwarf force has 14 warriors [bondi?] 5 Carls, the King and his Standard painted. Additionally, unpainted in the bag [below] are another 21 armored warrior bondi, and 16 Fyrd, plus 6 more of the GW archers and two GW Heroes [plus a couple of Gimlis in various poses]. While there isn't a perfect mesh of GW and Vendel, I have to use the LoTR heroes no matter what, due to their movie likenesses and excellent sculpting.


I will have to paint up these "Fird" in the colors of the "There and Back Again" dwarves!


The total force will come in at 5 Units: 1 Housecarl, 2 Thegn / Fyrd, 2 archer units [Brigans, but superior due to armor and swords]. They'll need one ally, which will most likely be some Manlings from a nearby trading town...somewhere. Most likely Welsh spearmen.

Next time - cracking them off the bases and mounting them!

Tuesday, November 6, 2018

Dark Ages and Lord of the Rings...

...Two great tastes that taste great together!
Just like some of our favorite Halloween candy.
A match made in.... Wait a minute, where's Chuck Norris? | HEY, YOU GOT YOUR CHOCOLATE IN MY PEANUT BUTTER WELL, YOU GOT PEANUT BUTTER ON MY CHOCOLATE | image tagged in memes,vladimir putin,donald trump,chuck norris,reese's | made w/ Imgflip meme maker
Well, had no idea it was a Putin-Trump level concern...https://imgflip.com/tag/reese%27s?sort=latest

It's no secret that LOTR is strongly based in the Dark Ages of history, especially that of Anglo-Saxon England. Rather than the elaborate themes of the High Middle Ages such as Camelot, pageantry of the joust, etc, it's from an earlier, simpler time, when mere survival was more an issue and a strong monarchy neither assumed nor looked upon as "good".
Related image
Third Age or Dark Age? Hard to tell, really.

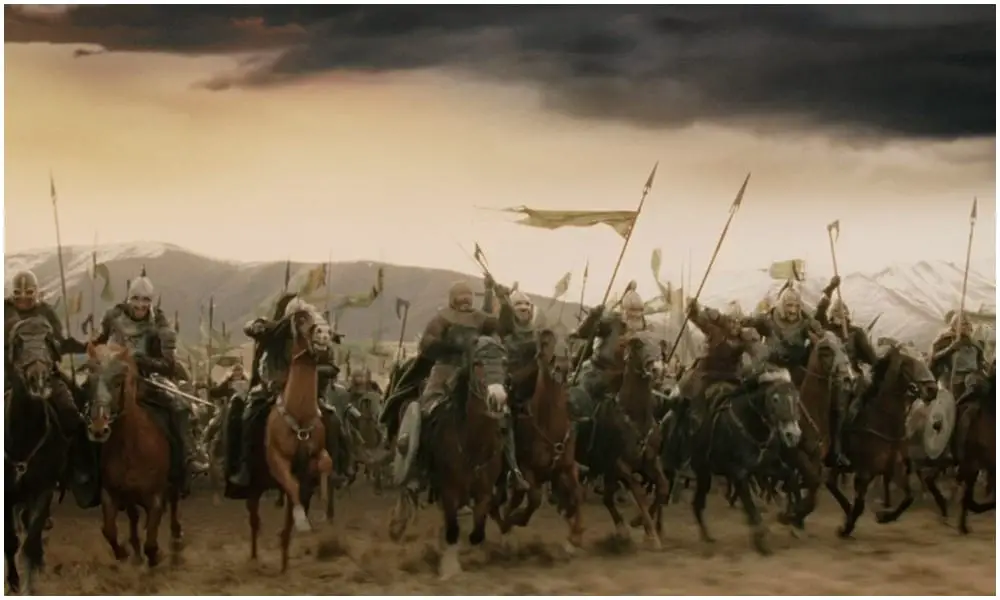
Plenty of descriptions from the book make it clear that Gondor probably has more to do with Late Rome or Byzantium than Richard the Lionhearted, even though there are some visits and references to "Easterlings" who fight with Mumaks or Oliphaunts. The films emphasize this with lots of fighting on foot except for the Lombards, erm, Rohirrim, who certainly add dash to the battle for Minas Tirith, and actually in the second and third films in general:
Related image
The Franks probably saw this soon after the Lombards crossed the Alps...

With "Sound Officer's Call!" Steve on a 10mm Warhammer Fantasy painting streak, and the development of my own "Spear to the Strife: Fast-play Medieval Rules" pretty much done, it is time to think of the figures, armies, hobby projects and plans to move things along. With it is my - admittedly reluctant - thinking that it is time to divest myself of 28mm Heroic Fantasy Armies and focus on 25mm Armies, and along with that move to also focus more on LOTR as a fantasy genre than the icky-sticky Warhammer Fantasy world [which also has some of the most annoying rules ever].

This is a bit tough b/c the WH figs are big, boldly sculpted, and I've a shed-load of them. It is especially tough since many are painted. I'm considering an intermediate step whereby I switch to skirmishing with heroic 28mm fantasy, for which there are Legions of rule sets and options, and it'd keep the painting / sculpting / crafty side of things going. But do I really need two parallel projects? Also, LOTR offers a wider audience due to the movies, than WH Fantasy. Plus, WHF 8th / 9th or Age of Sigmar are pretty dead / unattractive rule sets. I can play Kings of War with my 25mm stuff, on the very bases on which I have them now [and which are featured in these posts HERE].

Adding even MORE complexity to the situation is that there's really THREE different size/style issues at play, since nearly all my dwarves [dwarrows or dwerrows if you want to get even more Tolkien-y] are from the venerable Vendel line. These sculpts by  Colin Patten are in a bulky, old-school style that itself invokes what Tolkien would've expected from a LOTR line of figures. They remind me a bit of the Grenadier figs I had growing up, but are have cleaner lines which also gives them a bit of a stylized appearance.
Vendel Norse Dwarves
images from: http://marbles.frothersunite.com/Dwarf_Army_showcase.html
Vendel's Dwarven Fyrd
Colin's work lives on in many lines of figures by Gripping Beast, and now he continues his dwarf line at Conqueror Models and he himself can be found HERE at his website. In addition to his LOTR inspired dwarfs, I do have a bunch of his Gripping Beast, including a unit of Dark Age infantry inspired by the pretty adequate Winter King books.

The main aesthetic issue is that there's three completely different styles at play here: realistic 28mm sculpts, largely by the Perry Bros, 28mm Heroic by various GW sculptors [including the Perry Bros again!] and the Old Glory 25s sculpted by Dave Allsop [I think] which are dynamic and sculpted to game / paint with, in that important features are exaggerated for ease of painting and viewing from three feet away.

and a bit closer up...

Old Glory are some of my favorite "battle scale" miniatures in that they look great on the gaming table and are easy to work with, plus very reasonably priced.

Below, the movie realism of LOTR, granted, not a great photo, but you can see that the Cave Troll came out quite well, and close to the movie appearance.


Do these scales mix well? Kinda sorta. Patten's work is fine with Old Glory in terms of bulk and style. The 28mm LOTR figs are proportional to real life, so the faces and hands look small [but are correctly sized for a human, not sure about the goblins...] and the LOTR mixes best with itself, IMHO. On the table, the units do look a bit different, but it isn't a big deal. The easiest way to pursue would be to paint up the Patten and Old Glory items first, but I've also gotten some other plastics by Conquest, Fireforge and Wargames Factory [Warlord] in the mix. So maybe it is hopeless and I'm just overthinking the whole thing??

In any event, the priority of work will be:

  1.  Magic rules. We need Warhammer Fantasy WAAAGH! and Schools of Magic for Steve's 10mm Armies as that should play up soon. I'd like to work on LOTR magic type rules, also, from the excellent [if complex] LoTR Fantasy Battles game.
  2. Basing my 25mm Dark Ages stuff, and to start re-basing LOTR and my 20+ Vendel Dwarves into a Unit [of which I have 40 more to paint, incidentally]. This will get me playing Fantasy "Spear to the Strife" fantasy on my own.
  3. Finishing up my Anglo-Saxons who are NEARLY DONE and offer the most unique and challenging force for SttS - all Infantry, much of it heavy Sergeants.
  4. Painting up more Vendel Dwarfs, Old Glory skirmishers, and Dark Age Gripping Beast. Not to mention some plastics I've been slavering to do for ages! I especially need heroes to be finished up and based for the game.
Soooo, let's see what I manage to get to next!

Friday, October 19, 2018

Circle your wagons! War Wagons in One-Hour Wargames

Sure, go ahead and charge your knights into this!
1312217506061

The use of wagons in battles has occured in many periods of history. Here, I want to put forward some ideas of how to incorporate these difficult to use but possibly effective weapons into One-Hour Wargames and its many spin-offs [like mine!]. This is meant to be a pretty quick post on how to express these in the game rules, and possible variations through history, not an exhaustive investigation of the design issues.

Generally, the number of wagons represented by a Unit will depend on the scale of your OHW, but given an effective crossbow range of 12", we can say that a 5" unit is probably composed of about 5-15 wagons.

Heavy War Wagon, e.g. Hussite
These may be mobile, and for all practical purposes, are armored. However, once engaged they can't maneuver much. I'd count them as armored for shooting and melee, but immobile for a OHW. Therefore they will be less useful in games where the set up area is less advanced onto the board. I'm OK with that. I'd also allow them to shoot but only at d6-2 since they are not a mass of shooters, but rather a scattered bunch of shooters in cover, e.g. skirmishers. I'd also say that Cavalry can't charge them, but they can't charge at all! To summarize
  • Armored
  • Immobile
  • Shoot d6-2
  • Can't charge, can't be charged by Cavalry
  • no flank or rear benefits or penalties

Wagon Lager
Rather than being war wagons, these are regular wagons being used as a stockade, e.g. by Goths at Adrianople. I'd give them "integral" infantry. I'd say that they'd be the similar as above, but without any shooting ability. As the wagons aren't walled and armored [they are transport wagons] one may want to make them vulnerable to flank and rear attacks as normal. As their function is more akin to a wall than a "tank", perhaps they would only count as armored against melee attacks, not shooting, as many Soldiers wouldn't be able to get a good benefit from them as cover. Furthermore, the armor of the infantry manning them would have to be taken into account, and ancient armies weren't very likely to be fully armored, except for Roman Legions, of course. So to summarize:
  • Armored [v. melee only?]
  • Immobile
  • Can't charge, can't be charged by Cavalry
Medieval Carraccio
These are a standard mounted on a single wagon with an elite guard, not so much a unit of several wagons. As such, I'd say they are nothing more than a heavy infantry Unit, counting as Armored. The "Armored" status takes into account both the better equipment of the defenders and their higher morale defending the Carraccio when attacked. One could make them move a bit slower, and if you use Rally rules [like I do] they could rally better.

For some of the scenarios, these armies would have some real disadvantages. I still think it'd be an interesting scenario challenge to make these work, and I have to say that I'm tempted to modify some of my medieval transport wagons and try them out - I could put on some removable fighting walls made out of balsa wood.

There are some nice models knocking around, including with the Perry Brothers. However, I'd be tempted to check out the 3D printing world, as this should do pretty well in plastic. Definitely a project for another time, but I got to thinking about chariots, elephants and camels, and this seemed like a natural progression.

LMK what you think!

Wednesday, August 29, 2018

Huffalumps, Oliphaunts or Snuffleupagae?

ELEPHANTS. The bane of rule designers, they are usually too powerful...
Download (1)
http://lotr.wikia.com/wiki/M%C3%BBmakil 

or too weak...


https://thedrugofthenation.com/2011/11/25/show-of-the-day-sesame-street-snuffleupagus-edition/

...and hard to get "just right".
Image result for war elephants
http://www.historynet.com/carthaginian-war-elephant.htm

I've returned from my 1:1 Army adventure, and despite being pretty wiped out, wanted to finish this post from a several months ago. Apologies to followers for my absence, but "Duty Calls"! Hoping to post a batrep soon, preferably with an unusual scenario that I've never tried before, and some more modeling, painting and basing.

As one must expect with wargame rules, it is hard to get the right balance of history, playability, and "feel", and the more unusual the unit / weapon / personality the more difficult it gets. This problem is worsened due to the lack / unreliability of sources, and the general failure of most rule designers - the vast majority - to work out their mechanics well.

Some of the worst but most common are Chariots, Camels and Elephants [setting aside flaming pigs as something best left as a unique scenario rule]. One of the benefits of a simpler set of rules like One-Hour Wargames is that there are fewer mechanics to hash up, but it also requires a bunch of playtesting to get the right balance, and said balance may even have to change a bit depending on history. Remember that we are trying to keep as close to the 4/6-Unit / 30-scenario paradigm as possible, as that's the heart of the game.

Overall, I lean into the "less is more" when it comes to special rules and exceptions, so here's my take on some of the more common "unusual" Unit types from the Ancient World:

Chariots
Aside from being more sensitive to certain types of terrain, chariots are nothing more than platform cavalry. They can be classed as Cavalry for OHW if armed with javelin, spear or lance. If relying on bows, they are best expressed as mounted Skirmishers [shoot, move as Cavalry =12", can't enter rough terrain, etc].
EDIT: note that wheeled vehicles are more vulnerable to terrain than "legged" animals like horses, so it "may" be interesting to have a piece of terrain that is prohibited to the chariots but not to foot or horse units - LMK if you try this out.

Camels
Popular wisdom says that horses don't like the smell of them, and perhaps the size is an issue, also. If one buys into this, then one can halve Hits inflicted upon them by any horse-mounted cavalry Unit [said mechanic coming from the Pike and Shot rules]. You can instead drop them one melee level, from +2 [Knights] to 0, and from 0 [Cavalry] to -2. Some say that Camels are slower than horses - they are also more durable and mobile in soft sand, so personally I'd have them move the same as cavalry, but if they must be slower you can give them a 9 or 10" move.
Edit: same thought as above...maybe have a piece of "soft sand" terrain that camels can get thru but other units move thru at half speed?

Elephants
I’m not a snuffleupagus expert, but my understanding of them is that historically:
- act as a barrier to cavalry
- vulnerable to missiles
- can’t be screened [way too tall]
- can be an effective fighting platform, but generally speaking more of a support animal.
If these are true, then
- can’t be charged by Cavalry,
- normal Hits from archery
- If with lots of escorting skirmishers, then the unit becomes, in essence, a light infantry Unit that can’t be charged by cavalry. 
NOTE: due to their large size [and therefore easy to hit with missile weapons] armored elephants wouldn't count as armored from shooting. I'd upgrade them from "light" status of D6-2 to D6 instead as I see the armor as more of a melee benefit.

I don’t see anything else they need to be effective, frankly. Cavalry are the natural menace to light troops, so if they can’t be charged by cavalry that should be enough. So I’d use them in OHW terms as Skirmishers, d6-2 shooting / melee. If they were armored, had fighting platform, and were well – supported by integral infantry, let them fight as d6. Note that this would make them pretty tough for Cavalry to face - the horse can't charge them, but they are "blocked" and have to take shooting Hits. This would be pretty useful without overdoing it, I think.

When destroyed in melee [read NT’s melee rule concept again] everything directly behind 6” takes 2d6 Hits, or 12” takes d6 Hits [depending on your take of elephant rampage] as they rampage out of the fight. One could also dice for a direction, with 1-4 being directly forward / back / left / right and 5-6 is just destroyed, no rampage at all. 


With 6 Units, you shouldn’t have more than 1 elephant, unless it is a very rare list like Indian or Burmese. Be wary of making them into the Tiger Tank of the Ancient world! Elephants may be even smarter than horses, and horses won’t charge into formed, steady infantry – they look like a wall. One can assume that elephants have had some battle training, but it may not be effective if their driver is killed.

OK, so there's a few thoughts on some of these unusual troop types. I believe that even with just the special rules available in the OHW rules, there's enough to handle most situations. Trying to work with the Rules as Written but crossing over the occasional rule or unit type is well within the spirit of the rules, I think.

Happy to hear what people have to say about these special units - just post a comment. I have to say, that I'd really like to try out some of these units now - they'd be very interesting!

Wednesday, July 4, 2018

[Big] Battle of Crug Mawr, AD1136 p.3 - the Fight!

Forward! For Wales! Who needs support?! Wait, what IS this "support" of which you speak??  Another key military concept...forgotten in the heat of the moment. 

Welsh knights charge up the road leaving their spearmen attacking a hill and archers waaaay behind - Glorious!

Well, the original courier seems to have gone astray - shipwrecked in the Severn Estuary?? - and report of this battle is very late. Still, better late than never! The mega-game ended up with six players, twice that expected, but there were plenty of Units, 16 per side. 

For the Welsh, the deployment was 7 / Welsh left, 8 Welsh right, with the Brigans in the center to seize and exploit the woods at center table.

For the Normans, there were 8 on their left and 8 on their right, with 3 of the latter occupying the center hill and 5 catching up from behind to reinforce.

Below, the table is 5' deep, so there's an extra foot on each side to line up the troops prior to entering. On the right, both sides are on table per Scenario 2, while Scenario 4 to left only has the three Normans on the hill, with all other Units entering. The tents are off-table, but show the division of the board in the center. Every player has one Personality, which is good fun and gives players some personal feel. I gave all choices, and a variety of mounted, foot, and archer personalities were used.


Below, the setup. Note that the right-most Welsh have opted for an interesting checker-board pattern for their deployment. In front is the infantry and archers, behind the cavalry. The gap is >Base Depth, so they CAN charge thru the gap, but must have space beyond to actually fit or cannot do so. To left, the Normans put three Freemen on the hill.


Welsh Right Flank / Norman Left Flank below.
Both sides have opted for some spacing. Interestingly, I've rarely done this. I can't say it's a bad idea, but goes to show that you MUST playtest with strangers as they always have a different take on things. In this case, the Normans imitated the Welsh setup.

Partway thru game one, the center has become a somewhat confused melee. To the left, the Welsh Brigans have moved to the rear of the Norman crossbowmen, while Welsh Serjeants and Archers engage the foremost Norman units [the former looking exposed after having destroyed a Norman unit]. Note the GM's hand - don't just stand their gawking like you've never seen the 'and of God before!!!

Below, better view of the fight on the right, mid-game. Norman knights charge the Welsh Brigans while their Serjeants engage the Welsh Serjeants with support from two Crossbow Units. The Welsh have one Archer Unit supporting them. To the right, two Norman Knights fight Welsh Cavalry at 3-2 odds [note two destroyed Norman Knights to rear, left].

Welsh Left Flank / Norman Right Flank
Welsh Freemen head up the middle, while Cavalry and Archers advance on the flanks. Must say it doesn't look promising to have the mounted Brigans engaging two Norman Archers, but they do have their Knights behind, and savage intent, so maybe this will work out...

A few turns later, the Brigans have departed the field, while the knights push forward against an Archer, which has another in support. Welsh Freemen are fully involved on the hill, but Norman Serjeants are reinforcing as is a Welsh Archer with an Archer Personality.

More of a view left - the Norman Freemen partially advanced off the hill rather than allow the Welsh to pepper them with arrows and pick their attacks.


In the end, we played one battle on the left, and two on the right - the wild cavalry melees just don't last very long! As it was a repeat with same players, Battle #2 of Scenario #2 went pretty quick, and turned into a Welsh victory as the player got the hang of using the Welsh as intended, a closely-supporting force of Archers and Cavalry. The Norman player again advanced aggressively with his knights, but this time got spread out too much and a combination of reinforced melees, archer and good dice brought victory to the Welsh. It was a dynamic and interesting fight, just as it should have been.

The Norman player understood the rules very quickly, and liked how clean and clear they played. The Welsh player didn't seem to like them much - don't know exactly why,.

The single battle on the left was largely handled by the host, with only a couple of rule misunderstandings coming up, which they negotiated to their satisfaction. They all seemed to have a good time and required very little additional help.

Overall, people seemed to enjoy the simple - if tight - mechanics and to be able to concentrate on the tactics of the Units and use of the Personalities. There were no rule arguments and most questions were asked / answered in the first 30-45 minutes, with just an occasional question after. I needed to occasionally clarify the tactical situation according to the mechanics, since all but one were new to the rules and the mechanics show both what is happening as well as what possibilities there are as well. Hopefully, I wasn't too intrusive, but it was a bit more of a demo game than anything else.

In the end, there was one win per side on the right, and I can't remember who won Scenario #4! As most of the players had a good time, we'll just say:

"Everybody won...but not everyone got a trophy".

Friday, February 16, 2018

[Big] Battle of Crug Mawr, AD1136 p.2 - Wild Cav melee!

"English Dog!" "Welsh Cur!" 

Feudal times were full of courtesies...and feuding.

As stated in previous big-battle posts, playtesting is very helpful. It lets you see the pitfalls of your force configurations and also to design some different fights for different types of people. Generally speaking, there's the Infantry Fight, and the Cavalry Fight [era doesn't matter, Armor acts just like real cav...big bang, then it's all over]. I decided I wanted to have one of each, and that the below combo offered some interesting terrain and a role for the Brigans to shine, which seemed like a Welsh thing to do. One-Hour Wargames #4 & #2.

Scenario #4 is a quick-escalating attack on a hill. Turn 1 has Attacker entering with entire force on the bottom, and Defender has two Units on Hlil with rest of force entering Turn 2. Scenario #2 has Defender setting up entire force first within 6" of North edge, and Attacker doing the same within 6" of South edge second. Red goes first in both games.

Interesting to note, is that the central wood is now a very important piece of terrain, and even one Brigan in it has lots of options [unless the opponent has Brigans, also]. For the playtest, I wanted to see what would happen if the #4 Attacker put just one Brigan straight into the Woods, but used it against the #2 Defender. Ergo, I played Scenario #2 twice BUT with the wood sitting on the left edge of the board, leaving off the other 2.5' of Scenario #4. I Found that the Woods can be a very useful pivot point and a Brigans threaten the hill in the Defender's rear, tying up a unit or two. Below is the third play, when I had made some decisions about how to conduct the Defense.

Defender deploys first. I put the Serjeants on the left to hold the hill, perhaps strike off it in support of the Knight next to them. The Crossbows [Bowmen] are supposed to soften up any defenders before the stacked Knight Units in center [the front has the leader and his banner, the second a priest...well, monk actually], and the last two Knights are supposed to get out and smash up anything they can, supported by the Crossbows next to them.


Below, Attacker deploys second. Note, the scenario edge is normally between the hill and the wood - the wood is Scenario #4 intruding. On left is a Brigan from Scenario #4's force - it will immediately move forwards and use the Wood as a strongpoint to harass the Red Flank. Next is a unit of Mounted Brigans [light cav] with a Cavalry behind, a Bowmen, a Serjeant, and a Bowmen. I want this Infantry force to advance and mass fire on likely Targets, with the mounted to their left advancing to exploit it. 

On the right rear, I've more Mounted Brigans and a Cavalry, I want them to hold the right flank best they can. The Cavalry in the middle rear has a Welsh warlord and standard [unfortunately from an earlier era]. The priest was busy saying matins and arrived late [I forgot to put the priest out, but he will appear!]. Leaders add a Melee dice to any Unit they are in, while the priests may be used once to attempt a triple-rally, then are removed.


Turn 1. Red Advances, farther on the right than the left. The Crossbows are moving up fast as they can. The knights to right are moving the fastest, to threaten the Welsh right.

Turn 1. Blue advances on the left and center, while holding back on the right. Both flank Brigans rolled poorly and failed to advance very far.

Turn 2. Initiative is still solidly held by the Normans, who continue their advance, planning to shoot up some Welsh then slam knights into damaged Units, gaining a big edge. Both Crossbows are now in range of likely targets. The plan seems fine so far, but things are about to go South very quickly due to inattentiveness on my part [distracted by the kids].


Turn 2 below. Welsh continue to settle in, and it looks a bit dodgy with the right flank being wrapped, and a left held down by Brigans. However...The Bowmen deliver a stunning treble-hit on the Norman knights before them. The Mounted Brigans decide to help and toss Javelins hitting a double the usual ratio! They then stay put hoping to distract the Norman Serjeents in front of them. This puts the Norman Knights at 5/7 Hits, so the only thing left to do is charge with the Cavalry down the gap in the middle, hoping to wipe them out! Unfortunately, they only get in one more Hit, leaving them at '6' and on the table.

That was quite a show! Moving to the center doesn't look as good, but the Welsh Serjeants roll a '6' to move and are able to charge into the mercenary Crossbows to their front - I fight they should easily win! The right also looked dodgy, but leading off with the Welsh Bowmen, they also inflict three Hits on an English Knight, so the Welsh Cavalry charge them next! The Mounted Brigans find a space in which to insert themselves near the other knight, then throw Javelins to no avail [forgot to take the rubber tips off??]. 

Overall, a great Welsh turn thanks to amazing support from the bowmen. Needing a 4+ to hit with 3 Dice, they inflict 1-2 Hits a turn, depending on if they roll up or down. To have both roll up [2 Hits] is a pleasure, but to have both roll 3 Hits each is just fantastic, providing some opportunities for the lighter armed but fierce Welsh nobles to get involved. Surely things can't get much better, can they???

Turn 3 Initiative. They can! The Welsh roll over 2 better so seize the Initiative from the Normans. They decide to take the first Action Phase, and go again immediately.


Turn 3 Welsh right. More excellent Shooting. The Bowmen put two Hits on the Norman Lord's retinue, and the Mtd. Brigans roll three dice 5+ to inflict startling casualties on the Knights nearby! The Cavalry make up for it a bit my missing entirely.


Turn 3 Welsh Left. But wait, there's more great things to go...The shooting is again great, with the Bowmen finishing off the Knights in melee with the Cavalry [freeing them up]. The Mtd. Brigans pop thru the gap inexcusably left between the Serjeants and the Woods, ending behind the Serjeants and pelting them with Javelins [they rolled 13" of movement, and easily fit through the gap, needing a Base Depth...I should really know better...and got one hit, doubled to 2 Hits as it is on the rear]. The Serjeants await the onslaught...

As the Welsh Cavalry is only a Base Depth away from the Serjeants, they can charge them off their Flank Arc, and of course they do...

But manage to entirely miss! Both shooting and melee attacks lose a dice to an Armored defender, so the Brigans throw 2 Dice of Javelins and the Cavalry melee 2 dice.

Finally, the Leader shows he's not much of  a leader. With an opportunity to get the jump on the Norman Knights before him, he rolls a '2', getting a measly 7" total movement so can't reach anyone. He settles for aligning with the Bowmen in mutual support - if the Cavalry are charged, the Bowmen can shoot into the flank of the attacker. If the Bowmen are charged, the Cavalry can charge the flank of the attacker - and there's only one Knight available.

Welsh Turn 3 ends with the Welsh having the Initiative across the field thanks to having Units in mutually supporting positions, rolling great in shooting and then seizing the Initiative from the advancing Normans. Clearly, the onslaught of arrows thru them off their advance, causing confustion, and the Welsh were ready to take advantage of the...advantage.

Ok, so what's _good_ about this? Well, I know better than to advance the Normans as sloppy as I did - I was more concerned with setting up my attack then preventing a counter-attack, and I left gaps on the end of each flank that I shouldn't have. The Welsh have twice as many Units that shoot, and I underestimated them based on mediocre performance in the previous two playtests [altho the Welsh didn't manage to squeak out both as wins].

I have had to make lots of design decisions about how I think this level of battle is fought, and my overall opinion is that it has a lot of flowing and swirling melees with opportunities that appear and can be grabbed if you're ready. The formations are not rigid nor the soldiers themselves disciplined. Only the foot Units feel "slow and solid" and that also means they've trouble exploiting gaps that appear in the line because they can't move clear through them in one move. This makes weak Brigans actually useful - but not until the melees start getting settled into. Until then, they are a fast-moving but weak hitting shooting unit.

This can all be a bit disconcerting if you're expecting a big-battle feel, but this is more of a Unit-based skirmish, which I think evokes the Feudal period much better than a big-battle game. Save that for the Romans, eh? They can afford to move and feed 50,000 men!

Turn 3, Normans have some hard fighting ahead to turn this around. They shoot their Crossbows at the Welsh Lord's Cavalry then hit them with their Lord's Knights. They advance the other knight right behind, ready to charge the Welsh Bowmen or the rear of the other Cavalry, or threaten the Mtd. Brigans with destruction - they 're somewhat backed into a corner at present. Elsewhere they slug it out putting some hurt on the Welsh.


Turn 4, Welsh keep Initiative and of course choose to go first. With Victory in their grasp on the left, they need to keep the pressure up on the right. The Bowmen shoot the Norman Lord's retinue, weakening it enough that the Welsh Lord finishes it off in Melee. Their Serjeants are slowing grinding down the Mercenary Crossbowmen in the center who are showing themselves a tougher challenge than originally predicted. On the Right, they charge the Brigans into the rear of the far right Knights but to no effect - they miss. On the left, they surround the Serjeants by the Hill inflicting more losses from javelins on their flank and rear while their Cavalry fight them from the front. 

Turn 4, the Normans try to turn things around. On the right, their Knights destroy the Cavalry and face the Brigans. In the Center, the other Crossbow Unit puts some Hurt on the Welsh Lord's Cavalry, and then their Knights slam into the Welsh Bowmen hoping for easy pickings [they inflict hits at a 2-1 ratio...they should have an easy time of it]. 

The center Crossbow inflict two Hits on the Serjeants - take that! But are still getting the worst of it. Their Serjeants miss completely, not the right time to do so...overall, it's still a bit grim but there are three Units of Knights on the right that have some hurt to spare if they can free up, rally a bit and reposition themselves. One problem is that there's still plenty of Welsh shooting on the board - this can cancel the effects of rally efforts.

Turn 5, the Welsh clean things up a bit. They withdraw their Leader's Cavalry to rally as they've 6 Hits. The Priest dashes over. The Serjeants are wiped out finally, so the Mtd. Brigans move to the rear of the Crossbows but miss. The Bowmen holding the center are doing OK thanks to their shooting friedns - they put 3 Hits on the Norman Knights. On the far right, the Mtd. Brigans manage a Hit, getting the Knights to 5.

Turn 5, Normans put more Hurt on the Bowmen, but not enough. They rally the far Knight with the help of a priest, removing 3 Hits - with 2 Hits, they are a viable Unit. The Knights put two Hits on the Mtd. Brigans, but it could go either way at this point. After last turn's excitement, the Crosbowmen whiff, so it averages out. Everything rests on the Knights...

Turn 6, Welsh dash Norman hopes. The Welsh Bowmen single-handedly inflict 3 Hits, rolling 5-5-6 and wiping out the Knights fighting the Brigans. They in turn are free to roll 6-6-5 shooting the knight that just rallied, taking them from 2 to 5 Hits!

Turn 6 continues, but it only gets worse as numerous free Welsh Units move to the right, ready to make trouble. For the Normans, the Crossbows are fighting tough, and inflict two Hits on the advancing Serjeants! However, their Knights are disappointing, only putting one Hit on the Bowmen, who survive. The far Knight rallies again, but only gets off one Hit.


Turn 7, the end draweth nie! The Welsh put the Norman Knights in the center to flight, and the Brigans do the same to the Knight attempting to rally nearby. The only bright spot is that the Norman Crossbows are earning their pay - they inflict two Hits on the Serjeants in melee [needing a 5+] and see them off! It won't matter in the end, as witnessed by the many knights fleeing behind them...!! Still, we can all respect a gallant stand, can't we? If the Welsh loot the Norman baggage, maybe they can afford to hire them?


Turn 8, The Welsh Mtd. Brigans strike the Crossbows from the rear, getting one Hit, doubled to 2, putting them to 7 and they flee. Still, they stayed longer than the knights!


Final tally, was 2 Welsh Units destroyed, and two others put to the brink [one rescued by a priest who took off 5 Hits]. The Normans were wiped out, despite their priest rallying 3 Hits off a knight. With the Welsh in control of the hill and the crossroads, they will be able to continue their invasion of Norman lands, seizing or razing castles as they go.


Whew, what a debacle! But it was great fun to play and a great example of why it is fun to play at this level - this "battle" involved 800 Welsh against 880 Normans. But they managed to pull it out because I attacked in a clumsy fashion and then luck SHINED on them, clearly "Deus lo volt". It was still a wild blur of battle, and could've gone the other way had the Normans regained the Initiative or the Welsh just stopped shooting so darn well! These are NOT massed Longbows! And the Javelin-toting Brigans accounted for 2-3 Units with their efforts. They are dangerous in the second phase of battle, altho merely a nuisance in the first phase.

So very happy with how this game has developed. It needs to have the rules written in full, the Force Matrix cleaned up a bit, and the character rules re-done to match the new mechanics. Still, I think I will be painting up more from the pile of lead, especially characters, and returning to Wales for a campaign as soon as I can. Meanwhile, confident that the rules are solid for tomorrow's Big Battle Game - Crug Mawr!